General Functionality Setup Flow
Step 1. Enable Scopes for the Relevant Roles
This functionality allows you to manage the processes of creating and processing employee reimbursement requests and vendor payments in ITFin, with the ability to track all requests in one place and monitor balances by counterparty.
There are 3 types of requests, which can be used either separately or in combination:
• Employee reimbursement (via payroll or as a direct transfer to the employee’s account)
• Vendor payment
• Employee wallet refill (accountable funds), followed by reporting on how the accountable funds were used (via reimbursement from the employee’s own funds).
Access to the functionality
finance_payment_requests_view_reimbursementfinance_payment_requests_view_refillfinance_payment_requests_view_vendorsfinance_payment_requests_extendedfinance_payment_requests_view_reimbursement, finance_payment_requests_view_refill, or finance_payment_requests_view_vendors.finance_payment_requests_view_any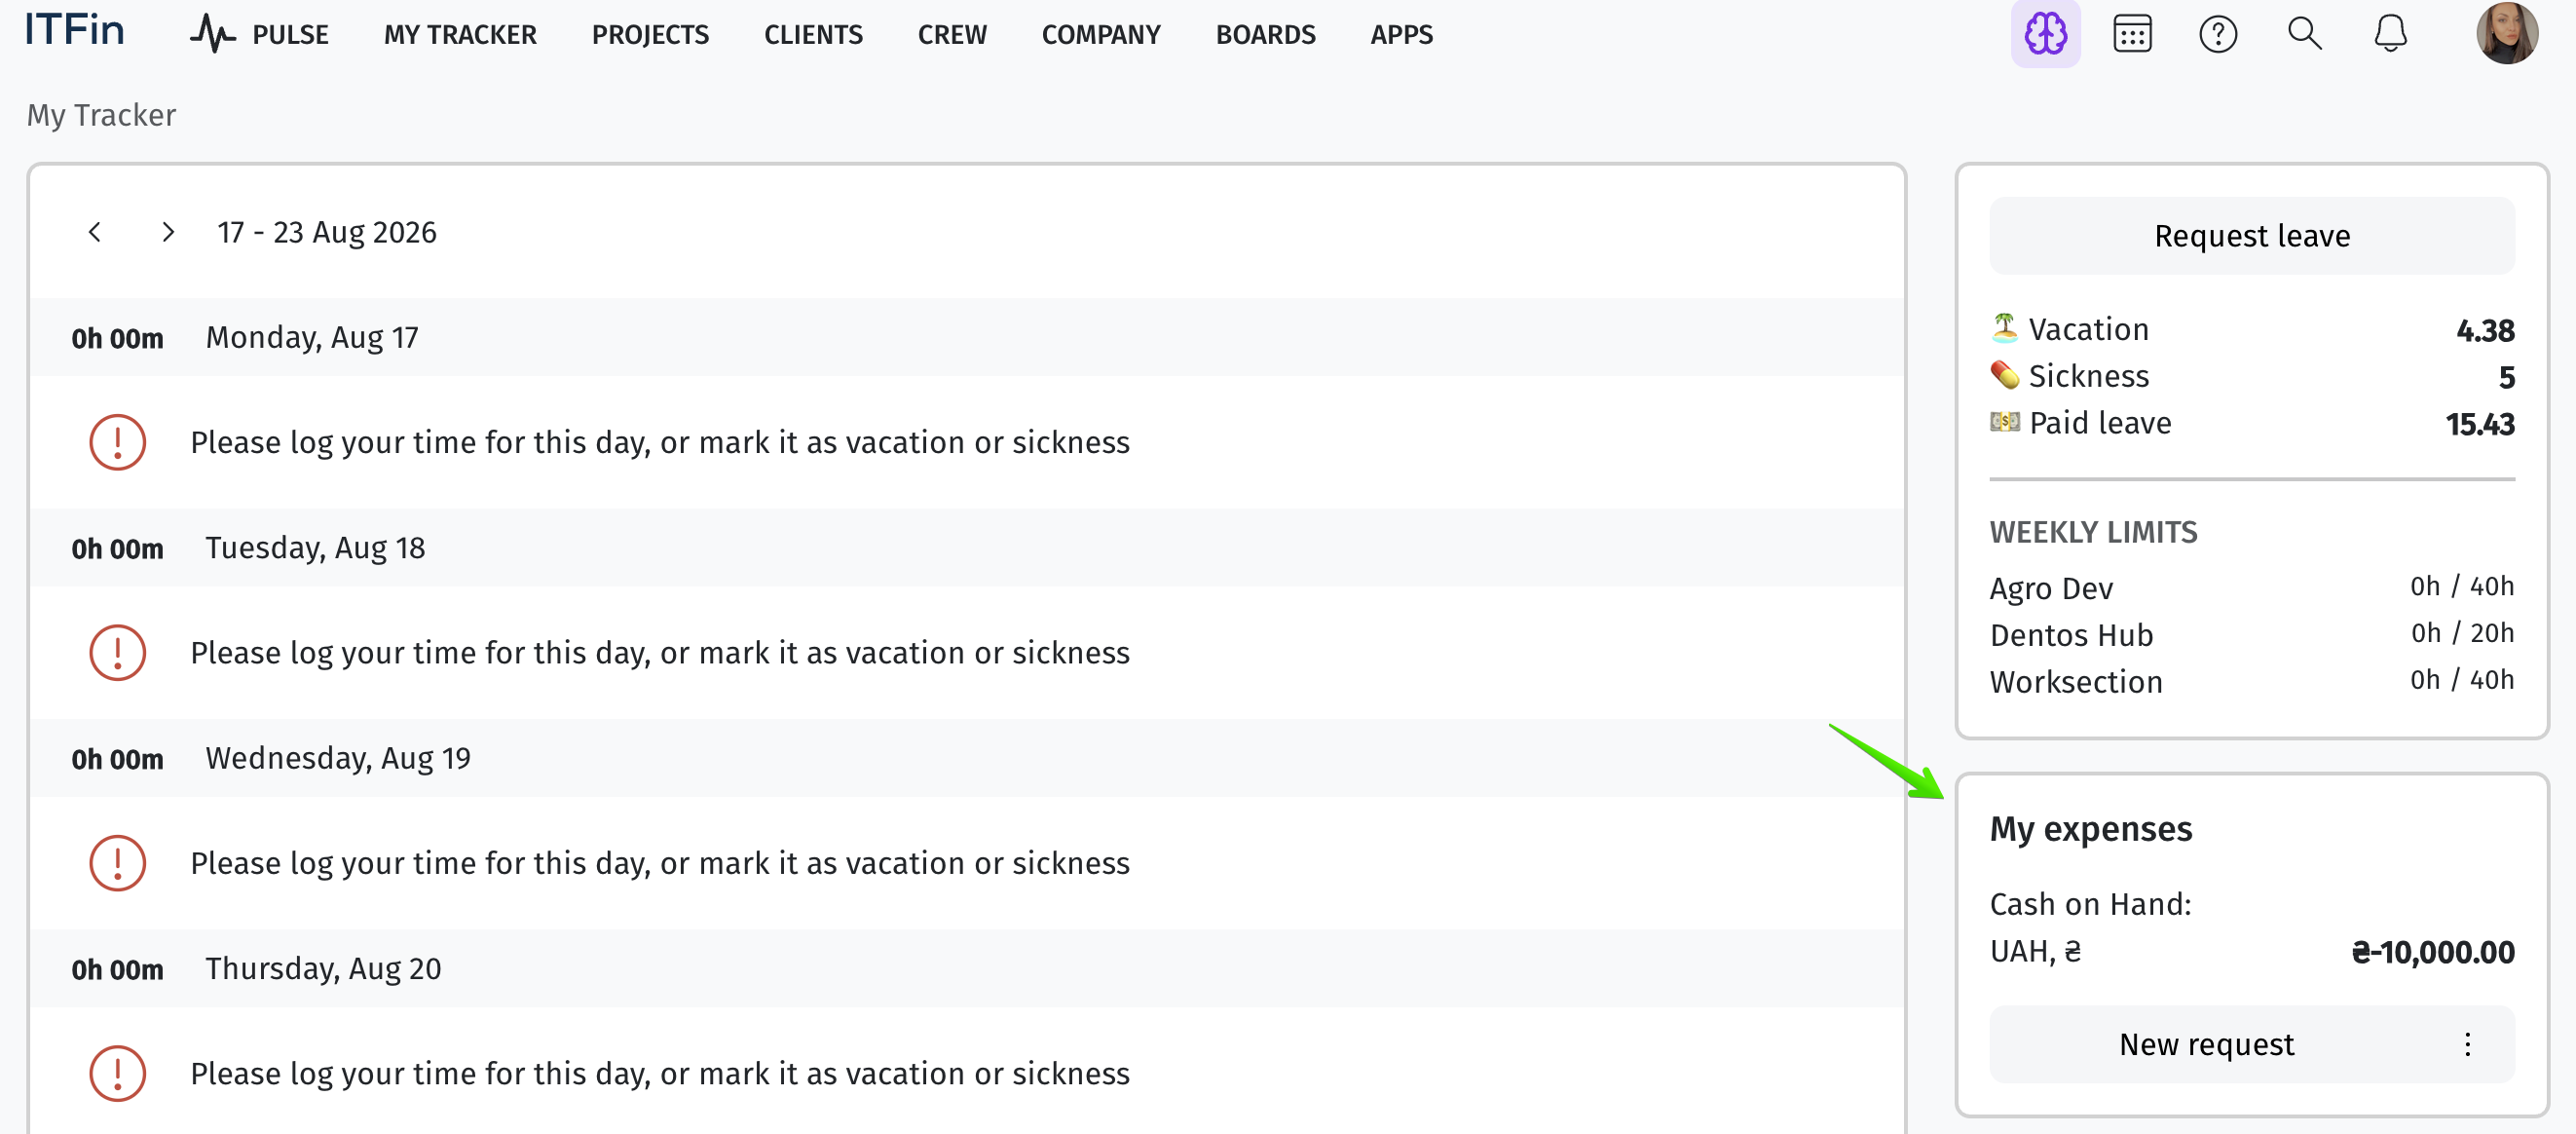
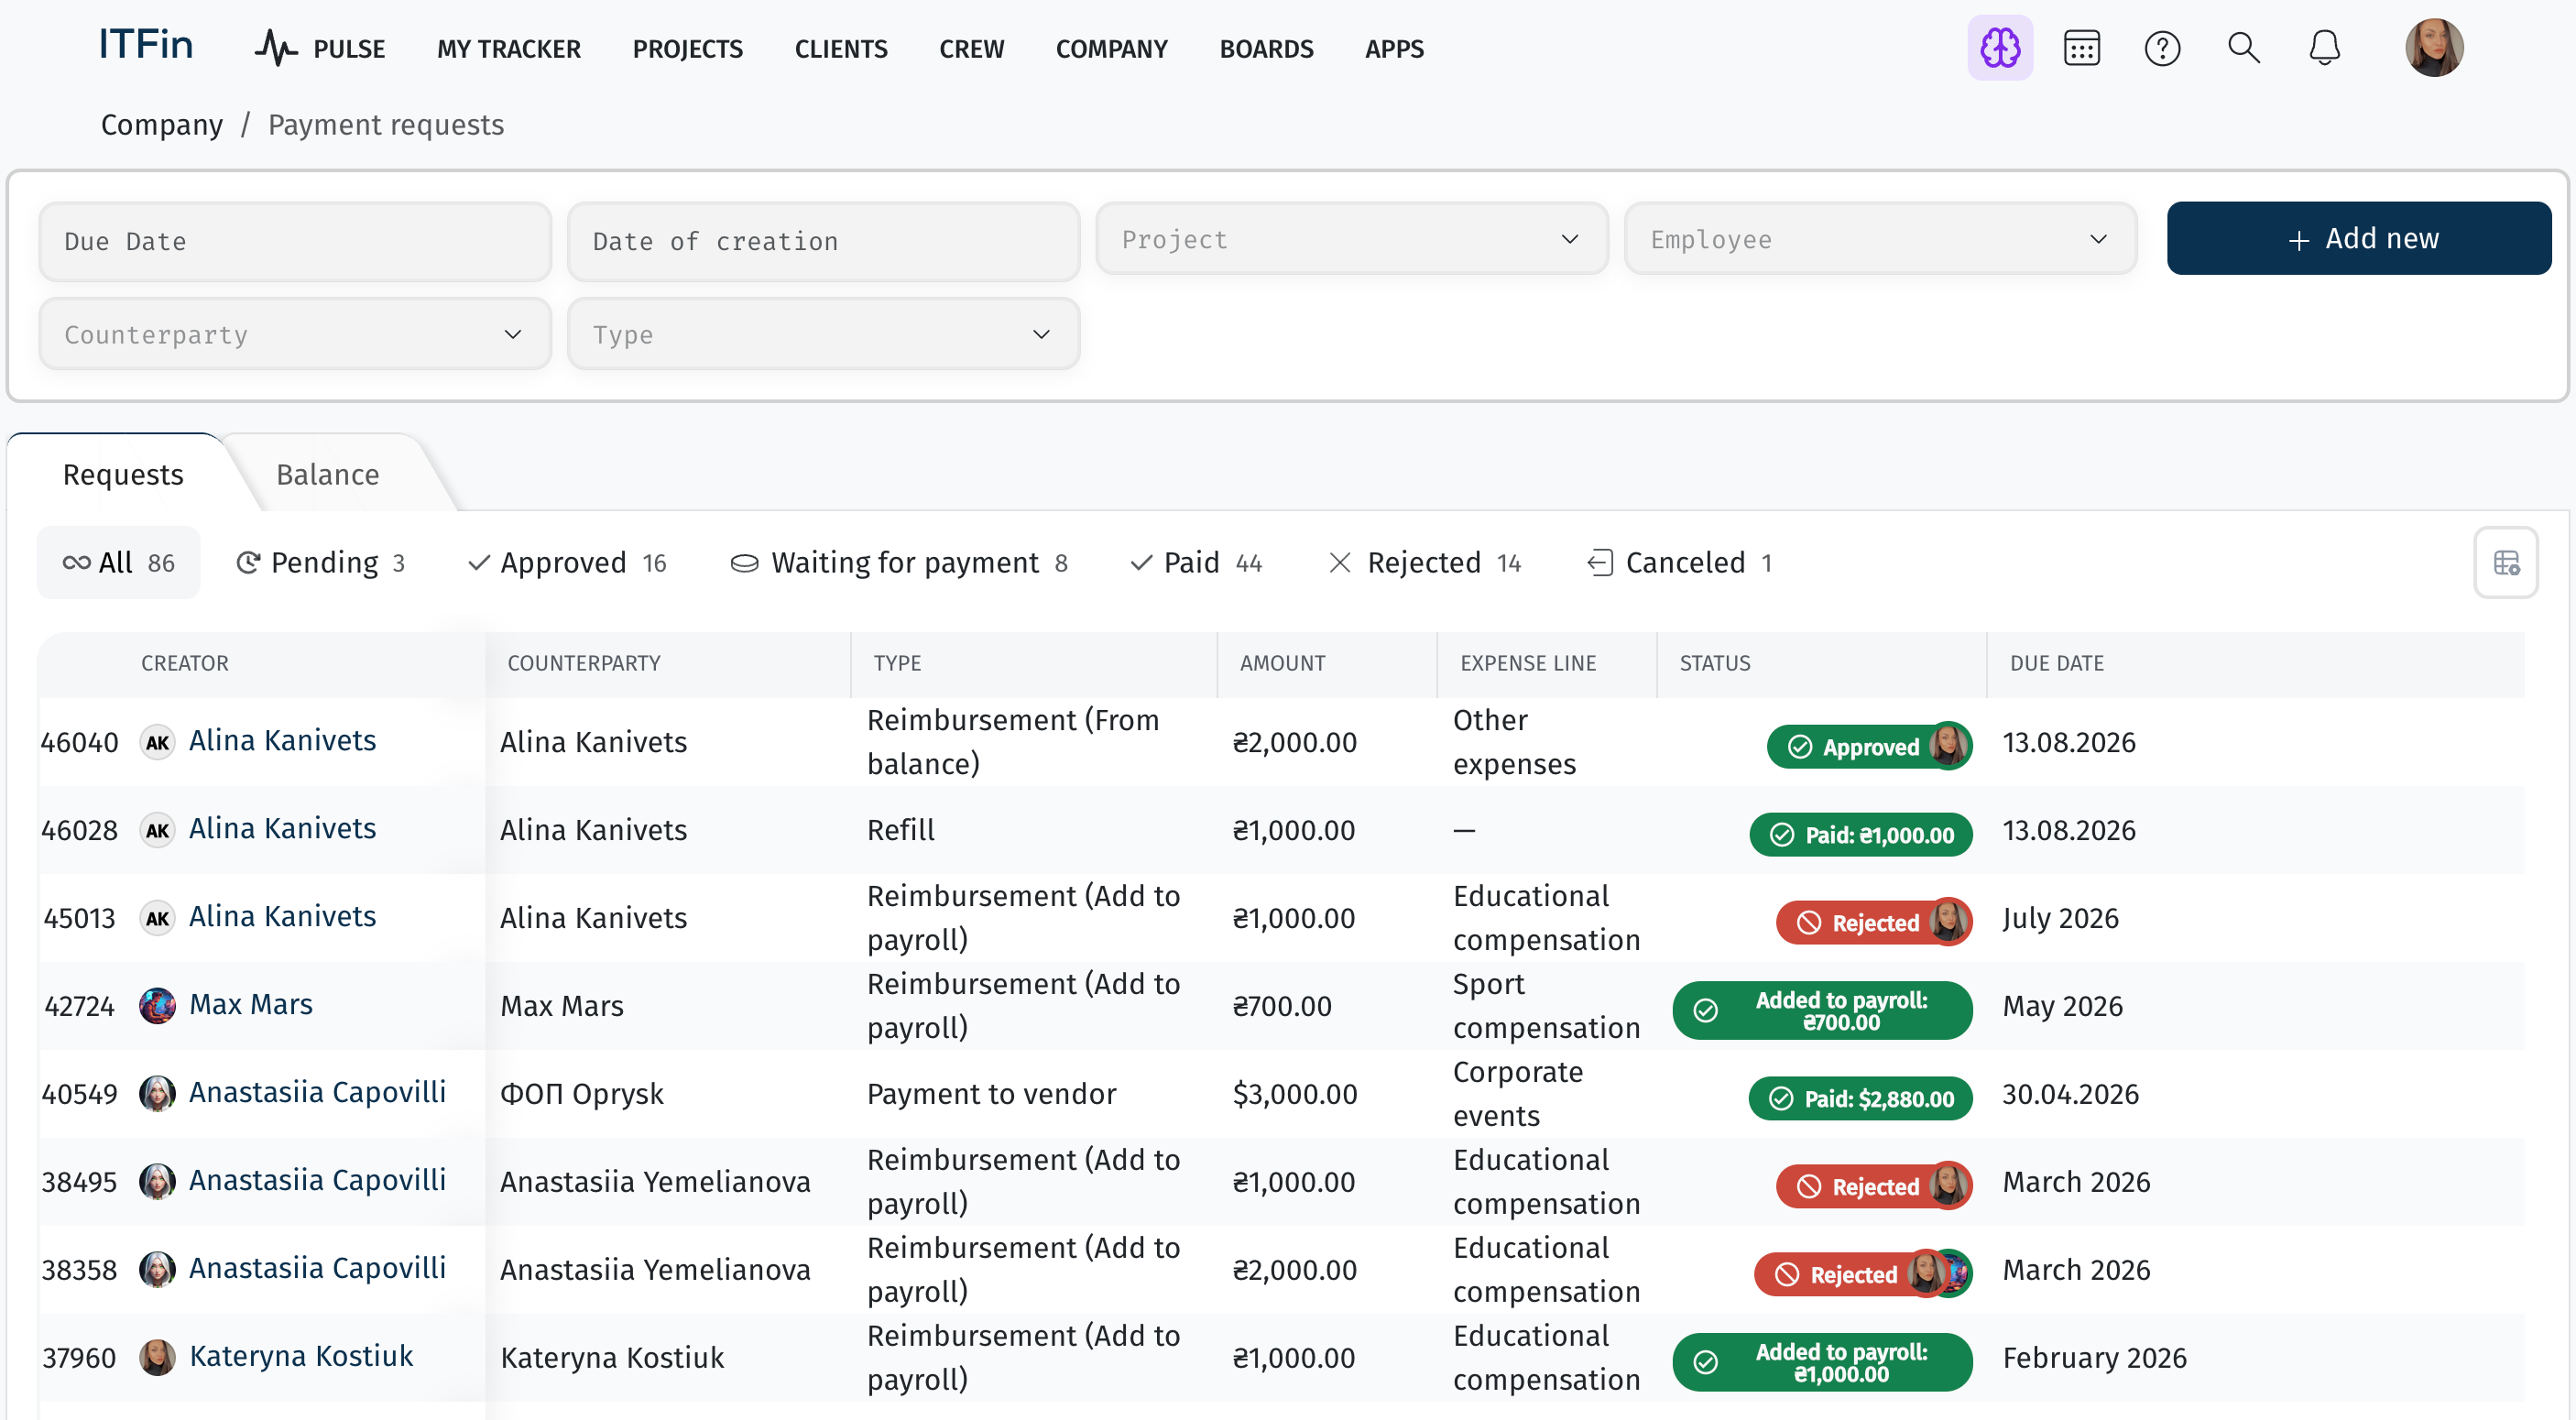
The accountant will be able to track all payment requests in one place:
Step 2. Configure Request Types in the Payment Requests Section
Request types allow you to configure the level of detail required when an employee submits a request and when it is subsequently processed by an accountant or finance manager.
Request types are created under Settings > Payment Requests.
For Payment to vendor requests, the income/expense category, project, counterparty, and other details specified in the request type settings will be automatically added to the invoice created by the accountant after the request is approved.
The accountant can edit these fields or fill them in manually when processing the request if the employee does not have access to certain data, such as counterparties.
Request Type Settings
Approvers
If AM and PM roles are specified, approvers will be determined based on the project selected in the request.
For other roles and approvers, the standard system logic applies, with approvers determined based on the initiator.
If the Project field is enabled in the request type settings, employees will be able to select either the project specified in the selected request type settings or projects they have access to based on their scopes (all projects, projects where they are assigned as PM or AM, or projects where the employee is allocated).
The Counterparty field is available to employees only if they have permission to view counterparties in the system.
In general, if fields such as Project, Counterparty, Employee, or Income/Expense Category are added to the request type settings but the employee does not have permission to access the corresponding data, these fields will not be displayed.
These fields will need to be completed by the accountant, who must also be configured as an approver for all requests so they can edit the request before approval.
Step 3. Creating a Request by an Employee
The employee selects the required request type:
-
Payment to vendor — affects the counterparty balance.
-
Reimbursement — non-accountable funds.
-
Refill — accountable funds.
Type — select one of the configured request types.
Amount — the amount to be paid.
Due date — the date by which the payment should be made.
Files — attach supporting documents or receipts.
💰Reimbursement
Reimbursement via Payroll
Before using reimbursement requests via payroll, make sure that the P&L Policy specifies which accounting entry should be created in the payroll for employee expense reimbursements. If necessary, create a separate account for tracking reimbursements.

The accounting entry configured in the Expense Reimbursement field will be used by default unless a different line type is selected in the Payroll Line Types field.
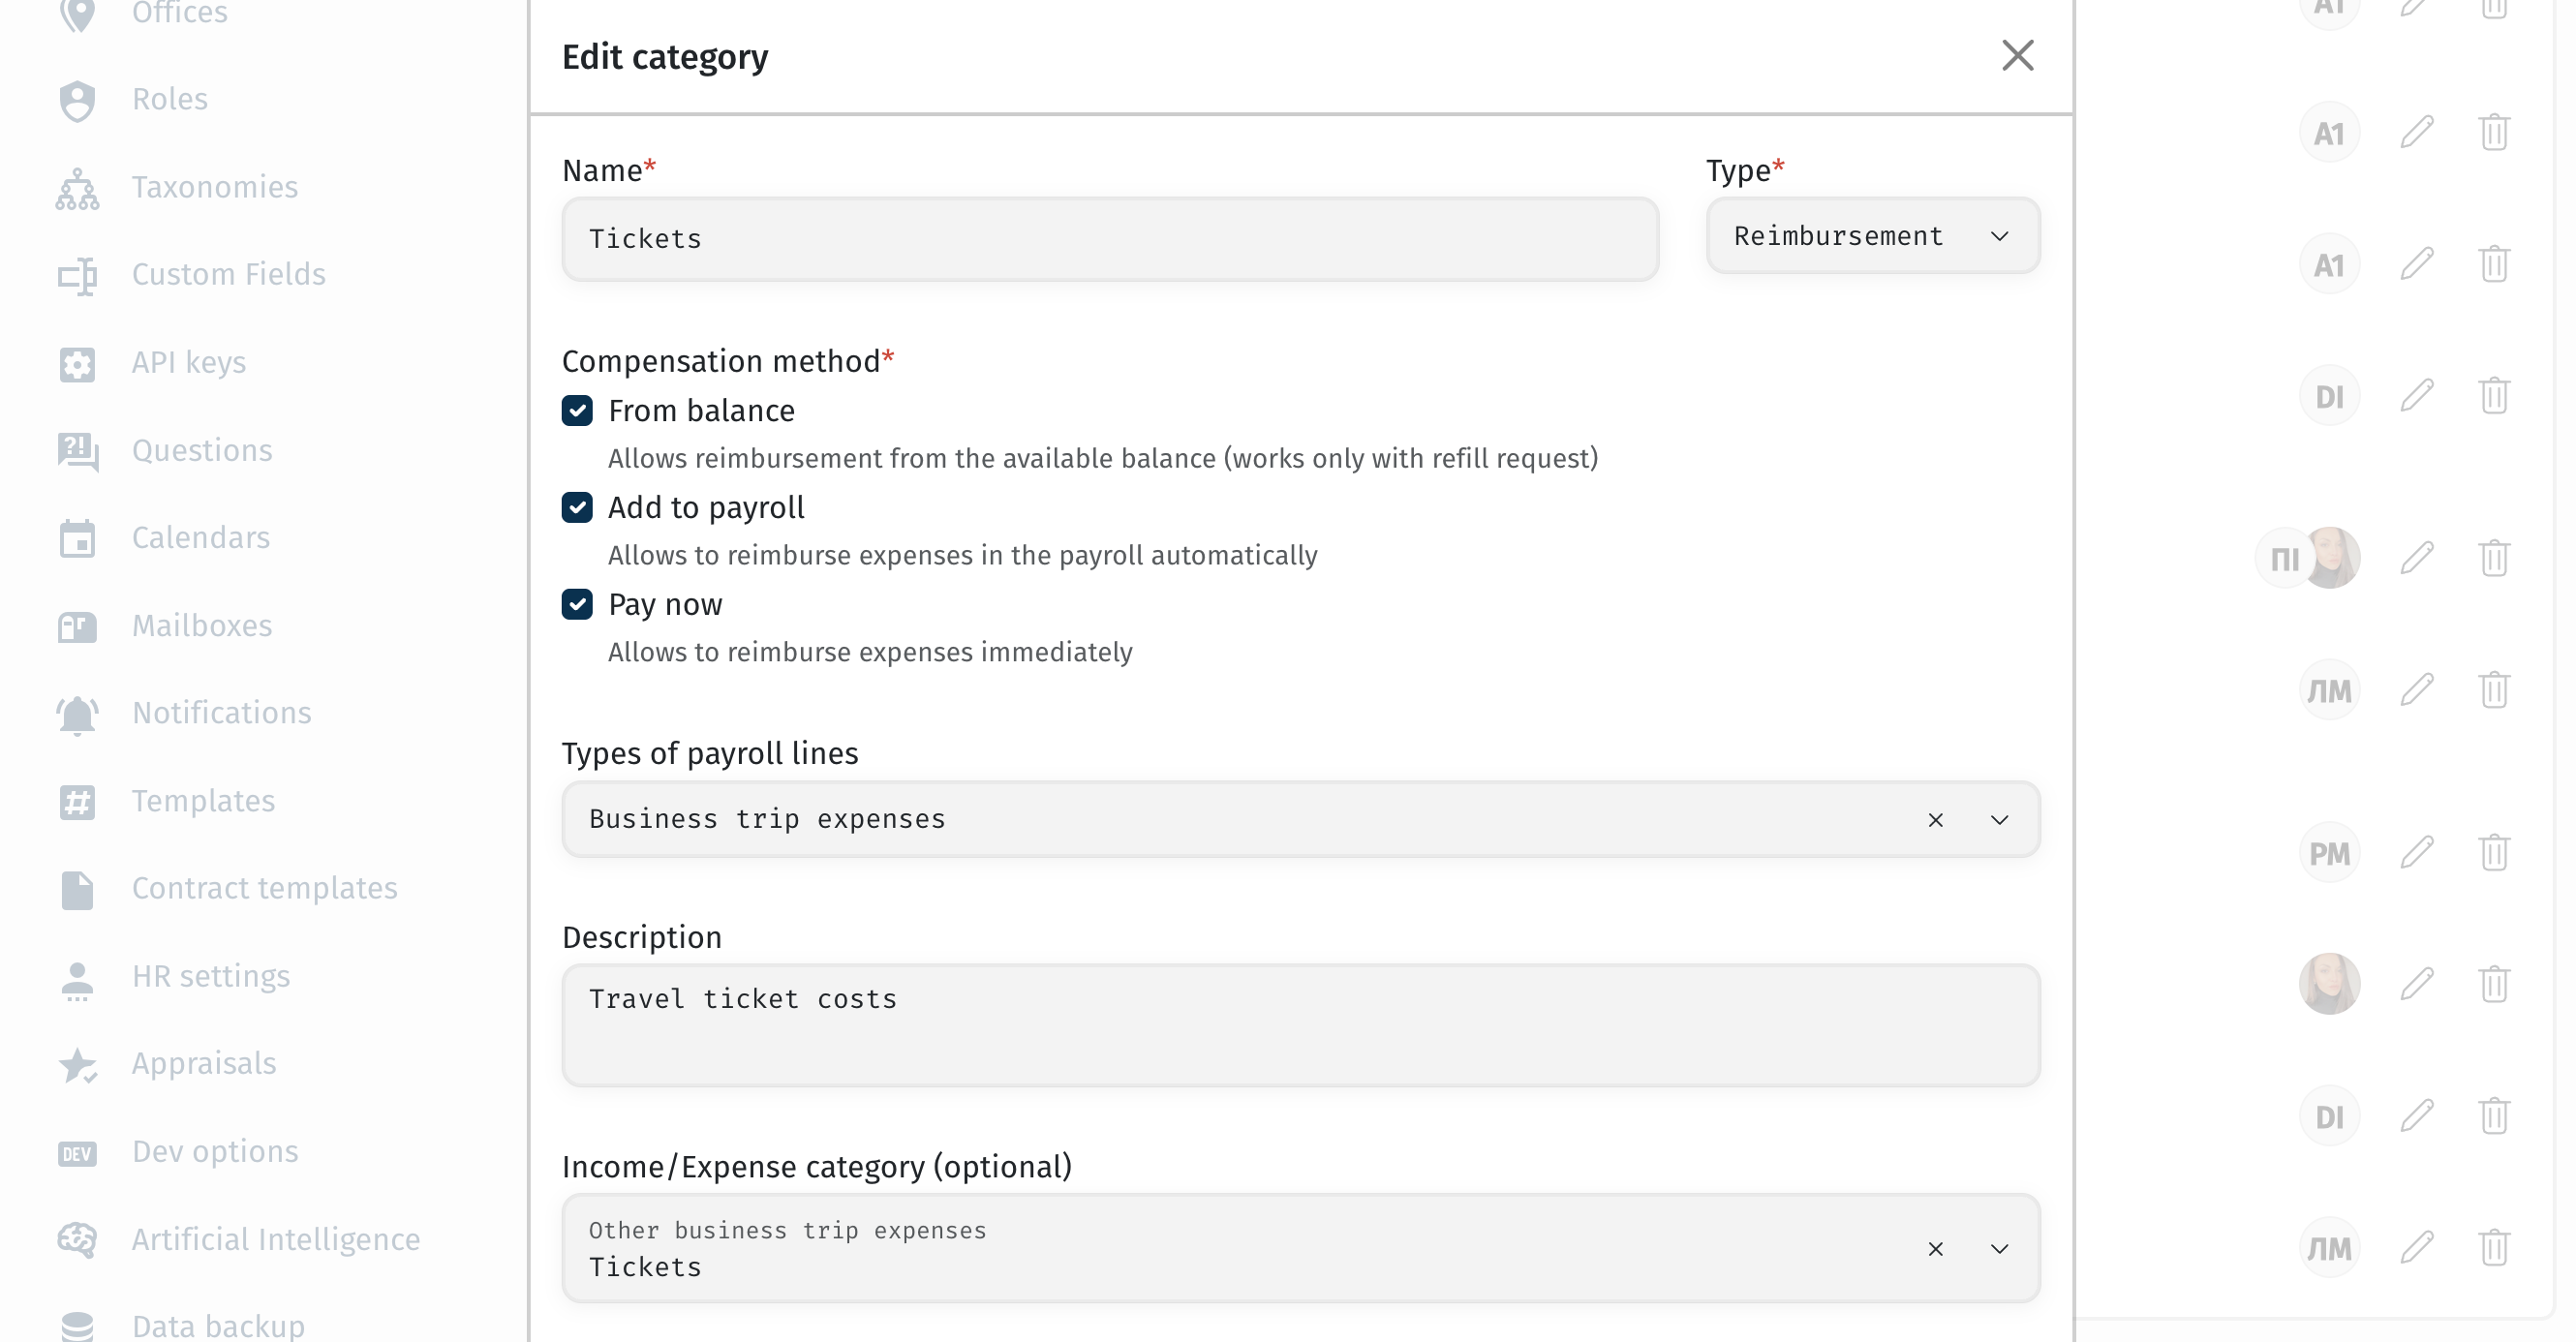
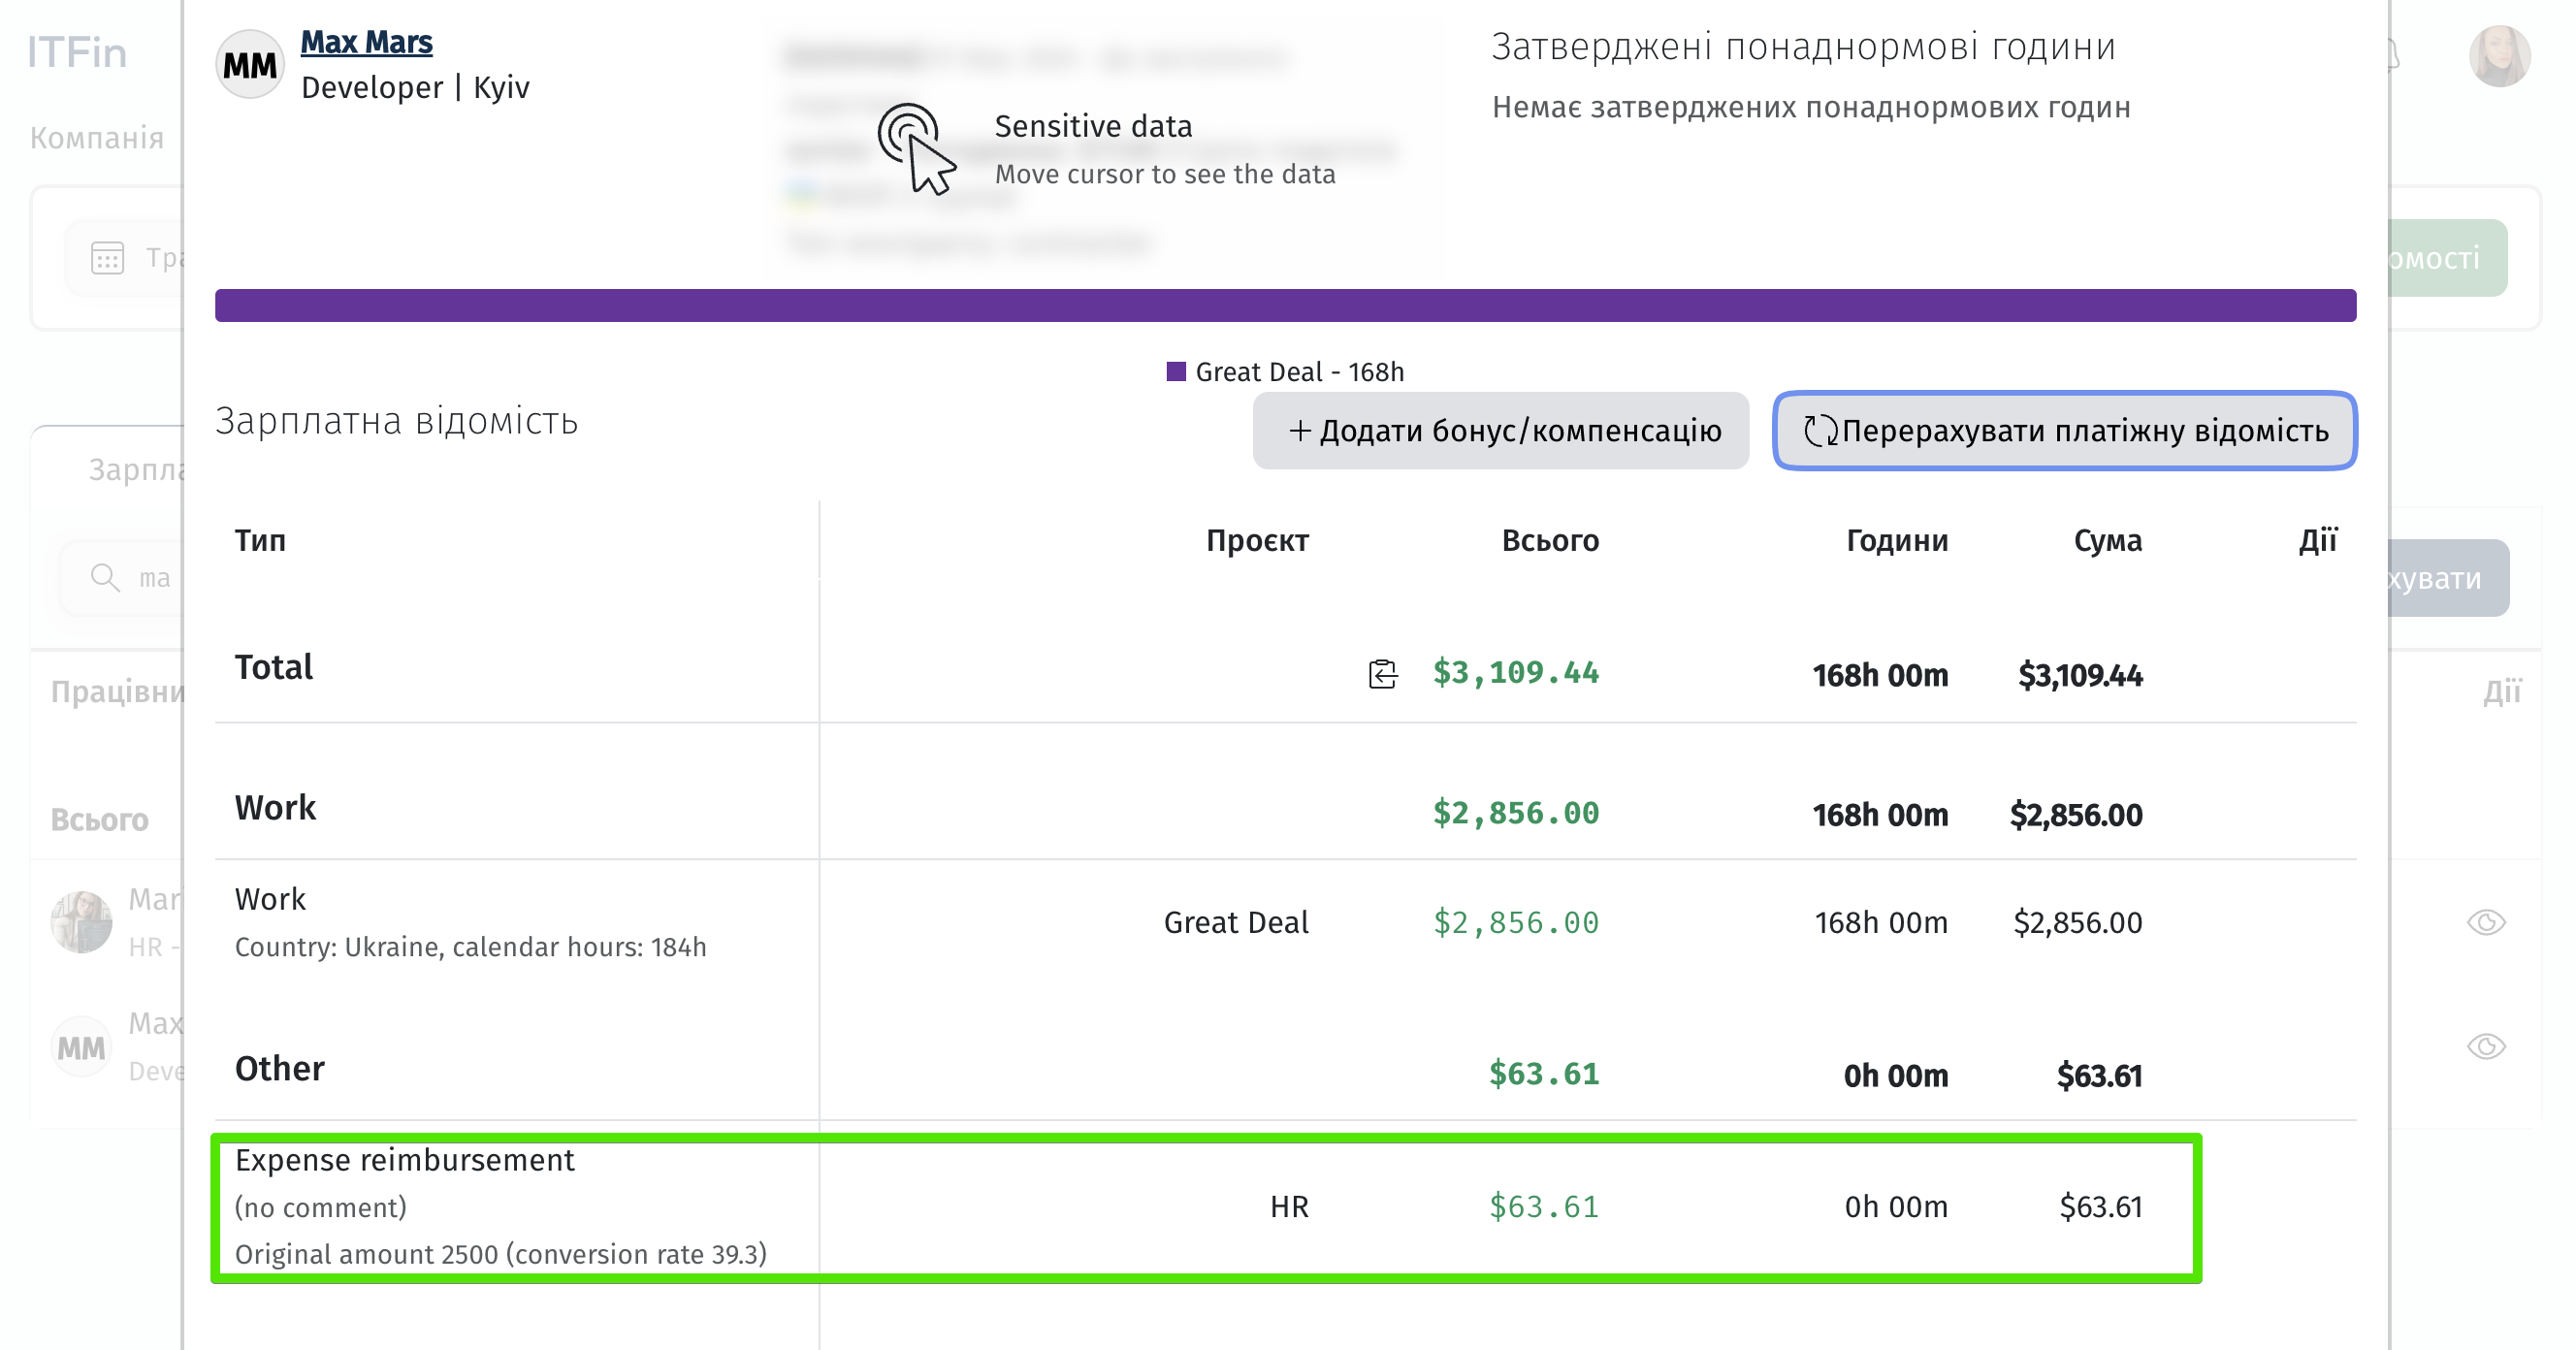
If a specific payroll line type is specified for the request type, the approved amount will be displayed under that line in the payroll and will generate the accounting entry configured for it.

Once the request is approved and the payroll is recalculated, the amount will be added to the employee’s payout as part of their salary.

After the payroll is recalculated, the system generates the accrual entry configured in the P&L Policy for the Expense Reimbursement line or for another payroll line type specified for the request.

The request author cannot cancel an approved request. However, approvers can reject it as long as the payroll has not been locked and the financial period has not been closed.
If the request is rejected, make sure to recalculate the payroll and regenerate the financial entries in P&L.
Step 1. Configure Request Types
Request types are created under Settings > Payment Requests.
Step 2. Grant Employees Access to Create Reimbursement Requests
finance_payment_requests_view_reimbursementfinance_payment_requests_extendedStep 3. Approve the Request
If the request is to be paid via payroll, once it is approved, the payroll must be recalculated so that the amount is added to the employee’s salary.
💰Pay Now
This request type is used when an employee makes a payment from their personal account, which the company does not have corporate access to, and needs to be reimbursed for the expense.
In this case, the transaction is recognized as a company expense immediately when the funds are transferred to the employee, without an additional vendor payment step.
What happens after a Pay Now request is approved:
-
No accounting entries are created automatically when the request is approved.
-
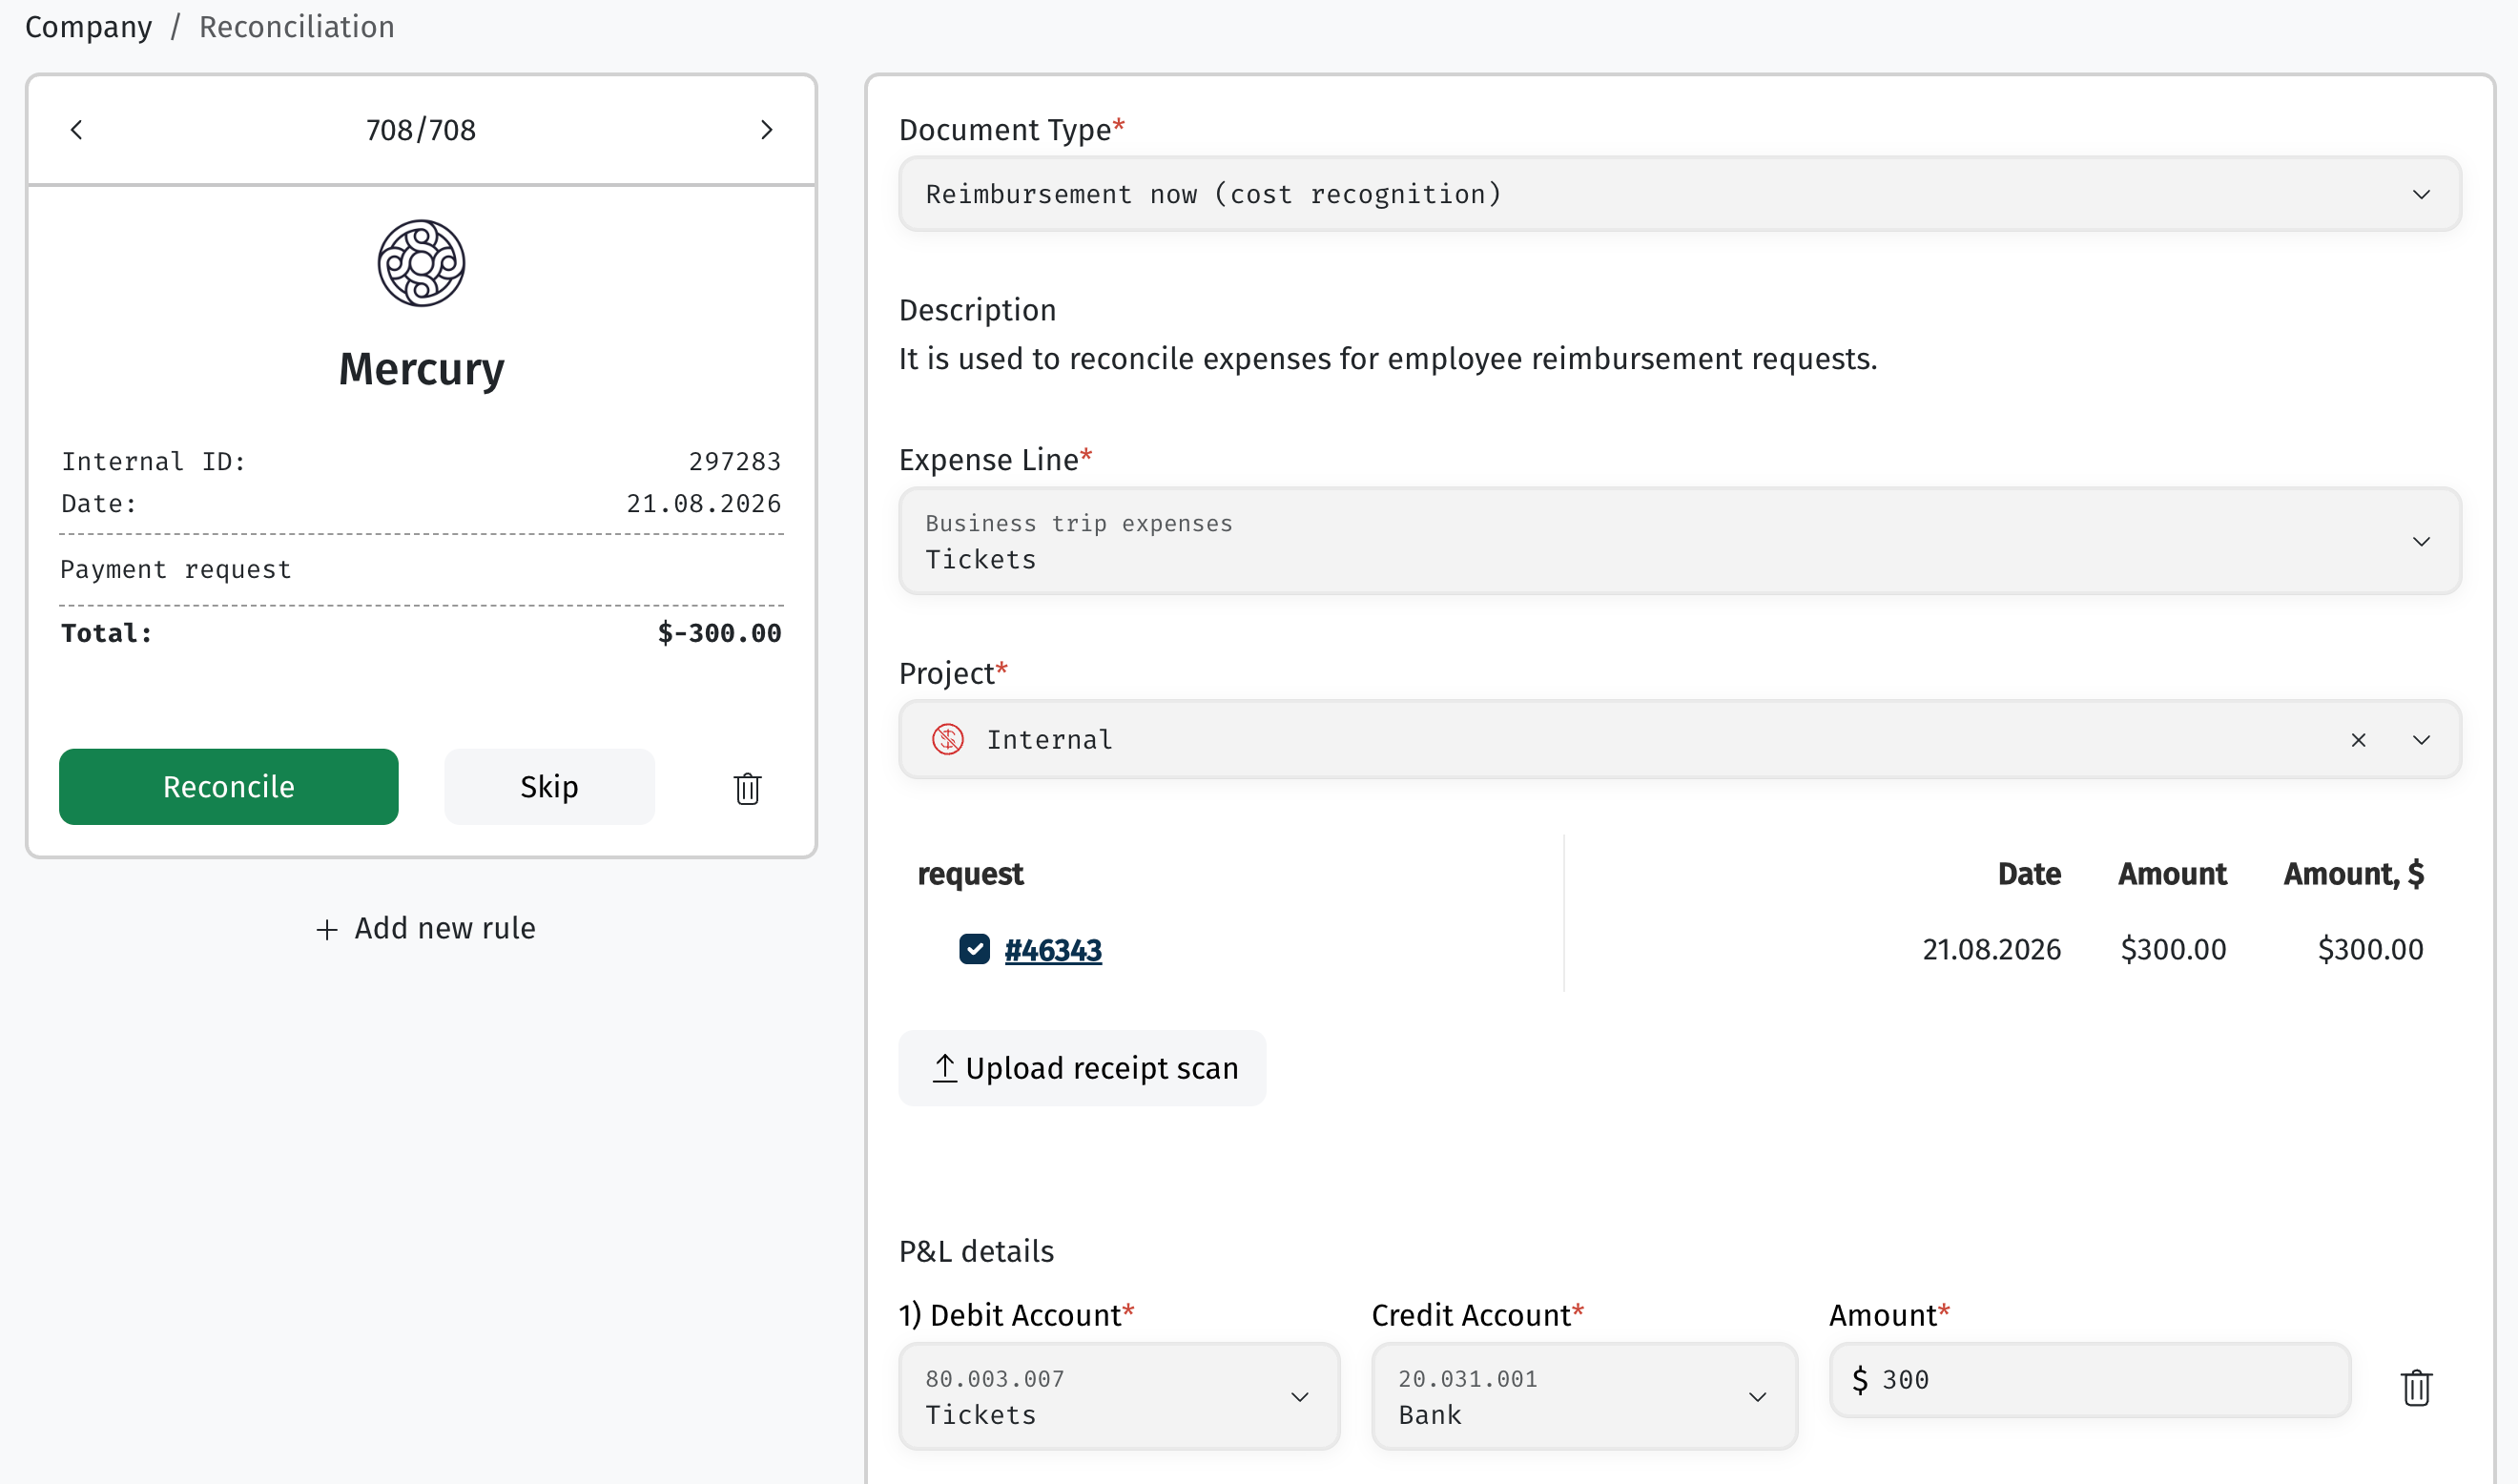
The expense recognition entry is created only when the payment is reconciled.
📌 Typical accounting entry:
Dr — Expense account: 80.xxx.xxx
Cr — Bank account: 20.xxx.xxx
This means that the transaction is immediately recognized as a company expense, with no further reporting required from the employee.
Important
When transferring funds to the employee:
-
Reconcile the payment as an expense.
-
Link the payment to the corresponding request.
✅ This will automatically change the request status to Paid.
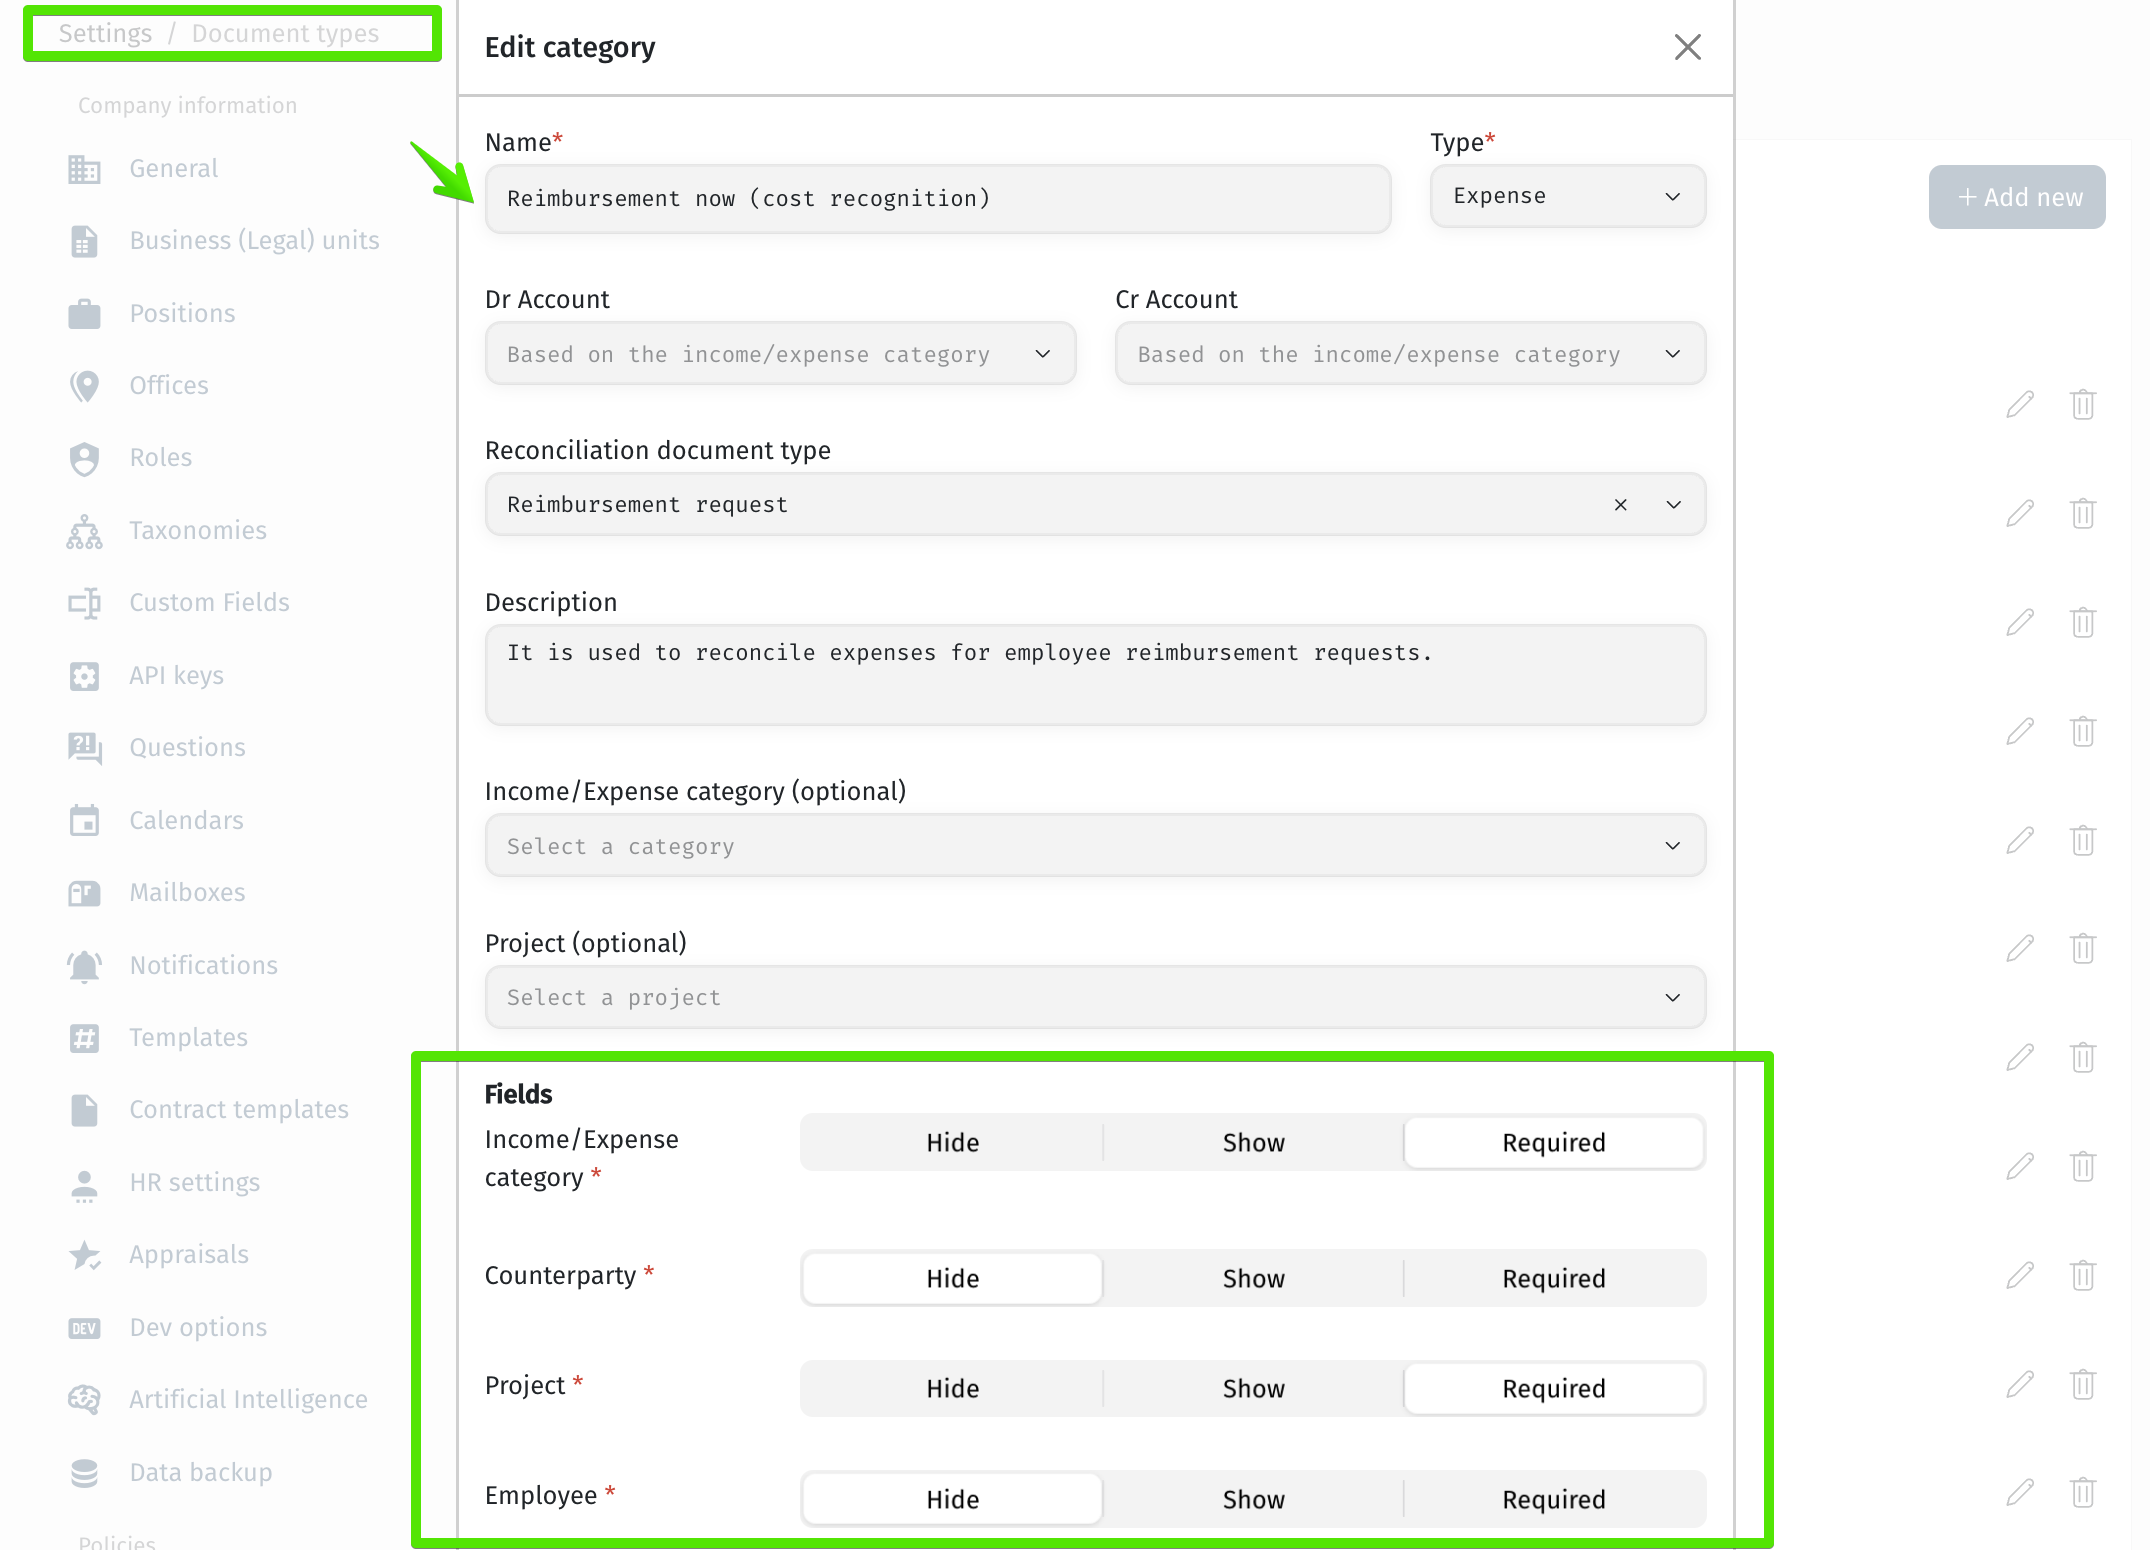
For a reimbursement request to automatically change to Paid after the payment is approved, you must first create a separate document category in the approval document type settings.
This category should be specifically assigned to documents that are linked to reimbursement requests. This allows the system to correctly identify that the payment relates to the corresponding request and update its status automatically.
Example of a Document Type category setup for payment approval:
After approval, the following accounting entry will be created:

Reimbursement from Balance
This request type is used exclusively in combination with the balance refill functionality.
It is intended for cases where an employee reports expenses paid using corporate funds previously transferred to the employee’s personal account, which the company does not have corporate access to.
📌 This request allows the expense to be recorded against the employee’s balance and reduces the remaining amount of funds previously provided to the employee.
More details about the process of reporting accountable funds are provided in the section below.
Payment to Vendor
-
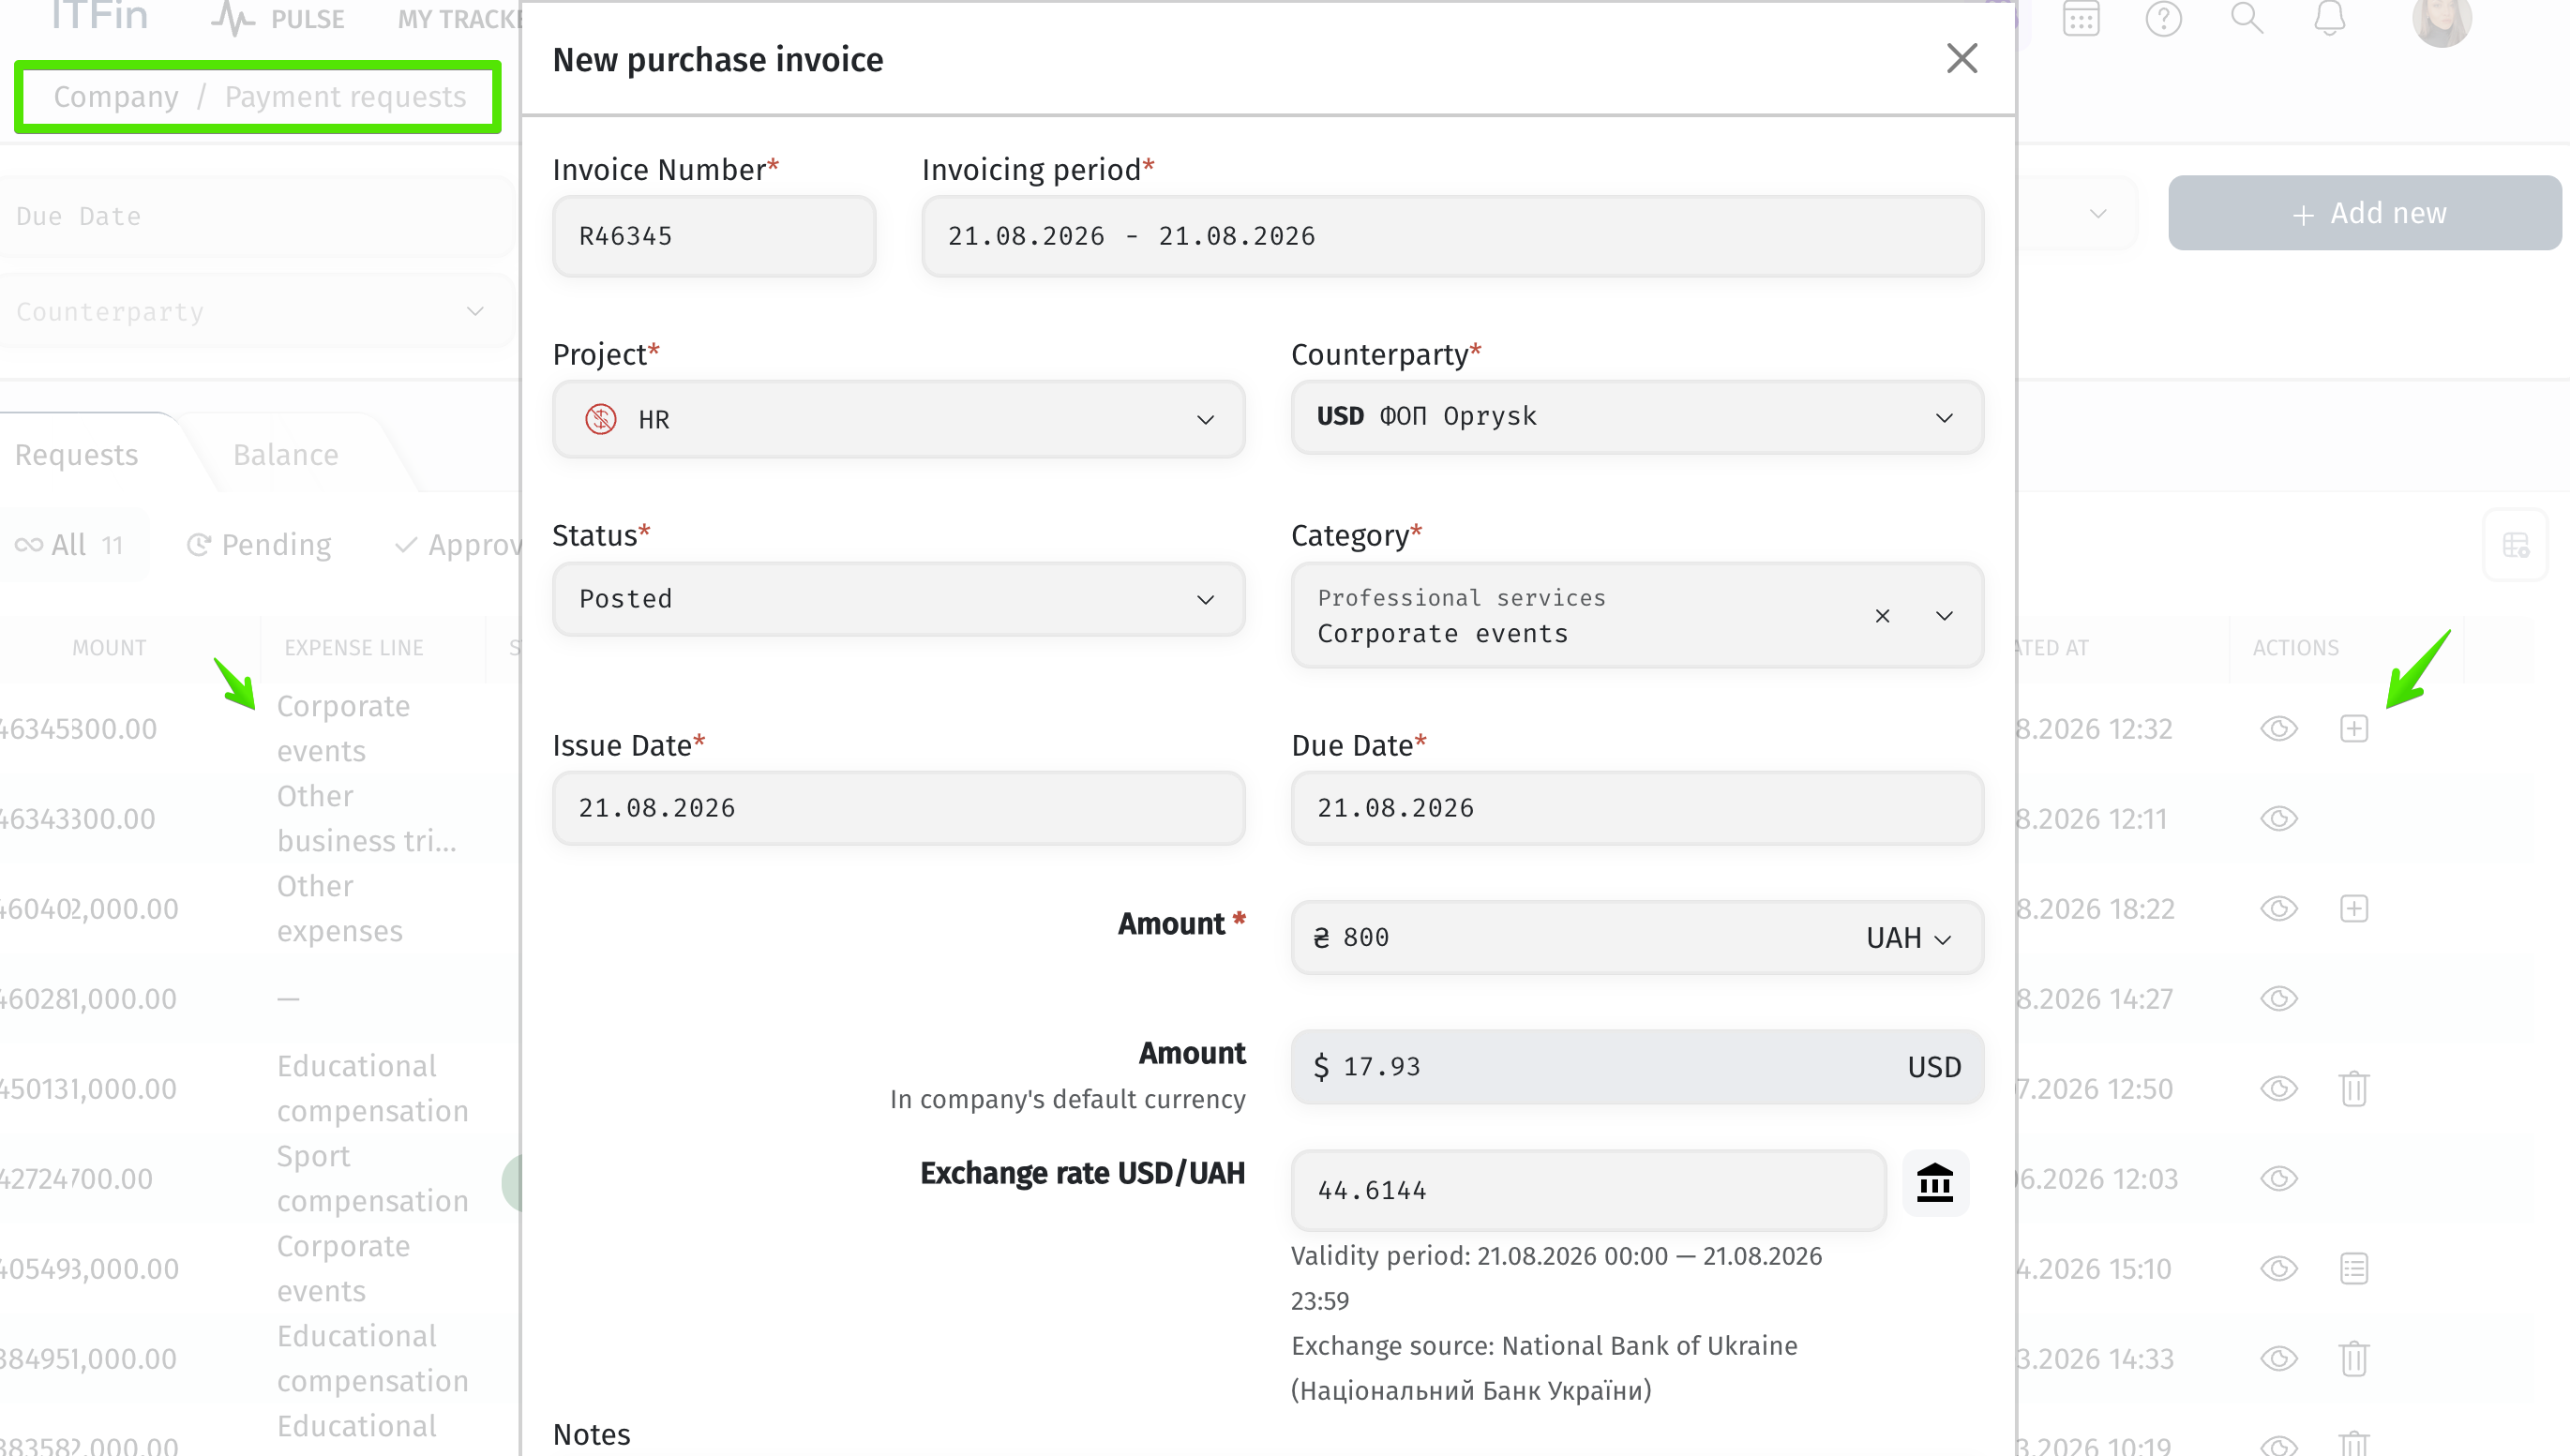
Once the vendor payment request is approved, the option to create a purchase invoice becomes available.
-
The invoice is automatically created with the Published status. After the P&L is generated, the corresponding accounting entry is created in the General Ledger.
-
The accounting entry for the invoice is determined according to the rules configured in the P&L Policy and the expense category selected in the invoice.
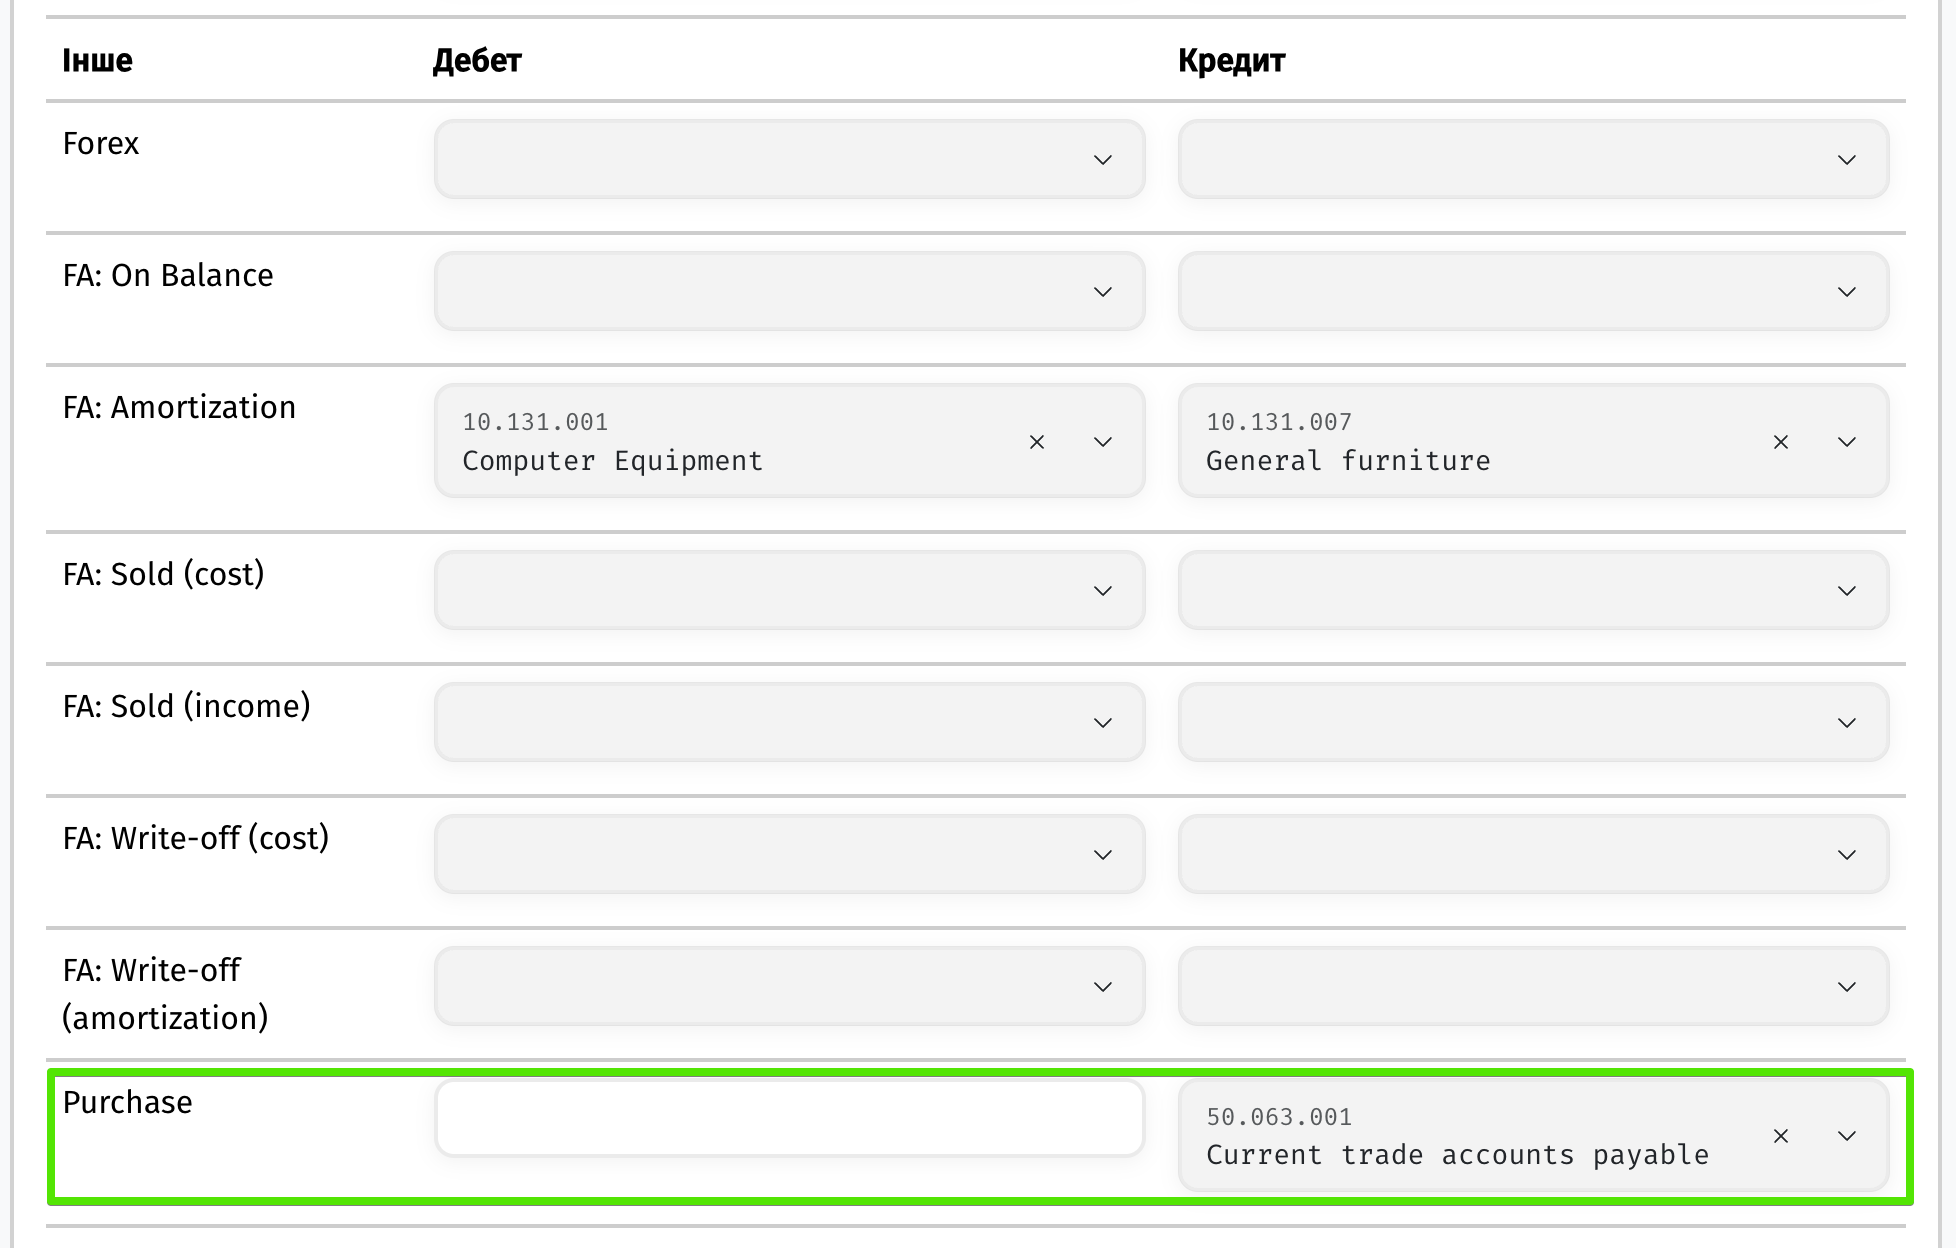
Based on the created invoice, the accountant makes the payment to the vendor, uploads the bank statement to the system, and reconciles the transaction by specifying, on the debit side of the entry, the account where the accounts payable balance is accumulated (in our examples, this is 50.063.001). This is the same account specified in the P&L Policy.
During reconciliation, the accountant also selects the invoice that was paid by the company so that its status is changed to Paid.
For this process to work, payment approval via Document Type must be configured, and Purchase invoice must be selected as the Reconciliation document type for the corresponding document type.
Step 1. Configure Request Types
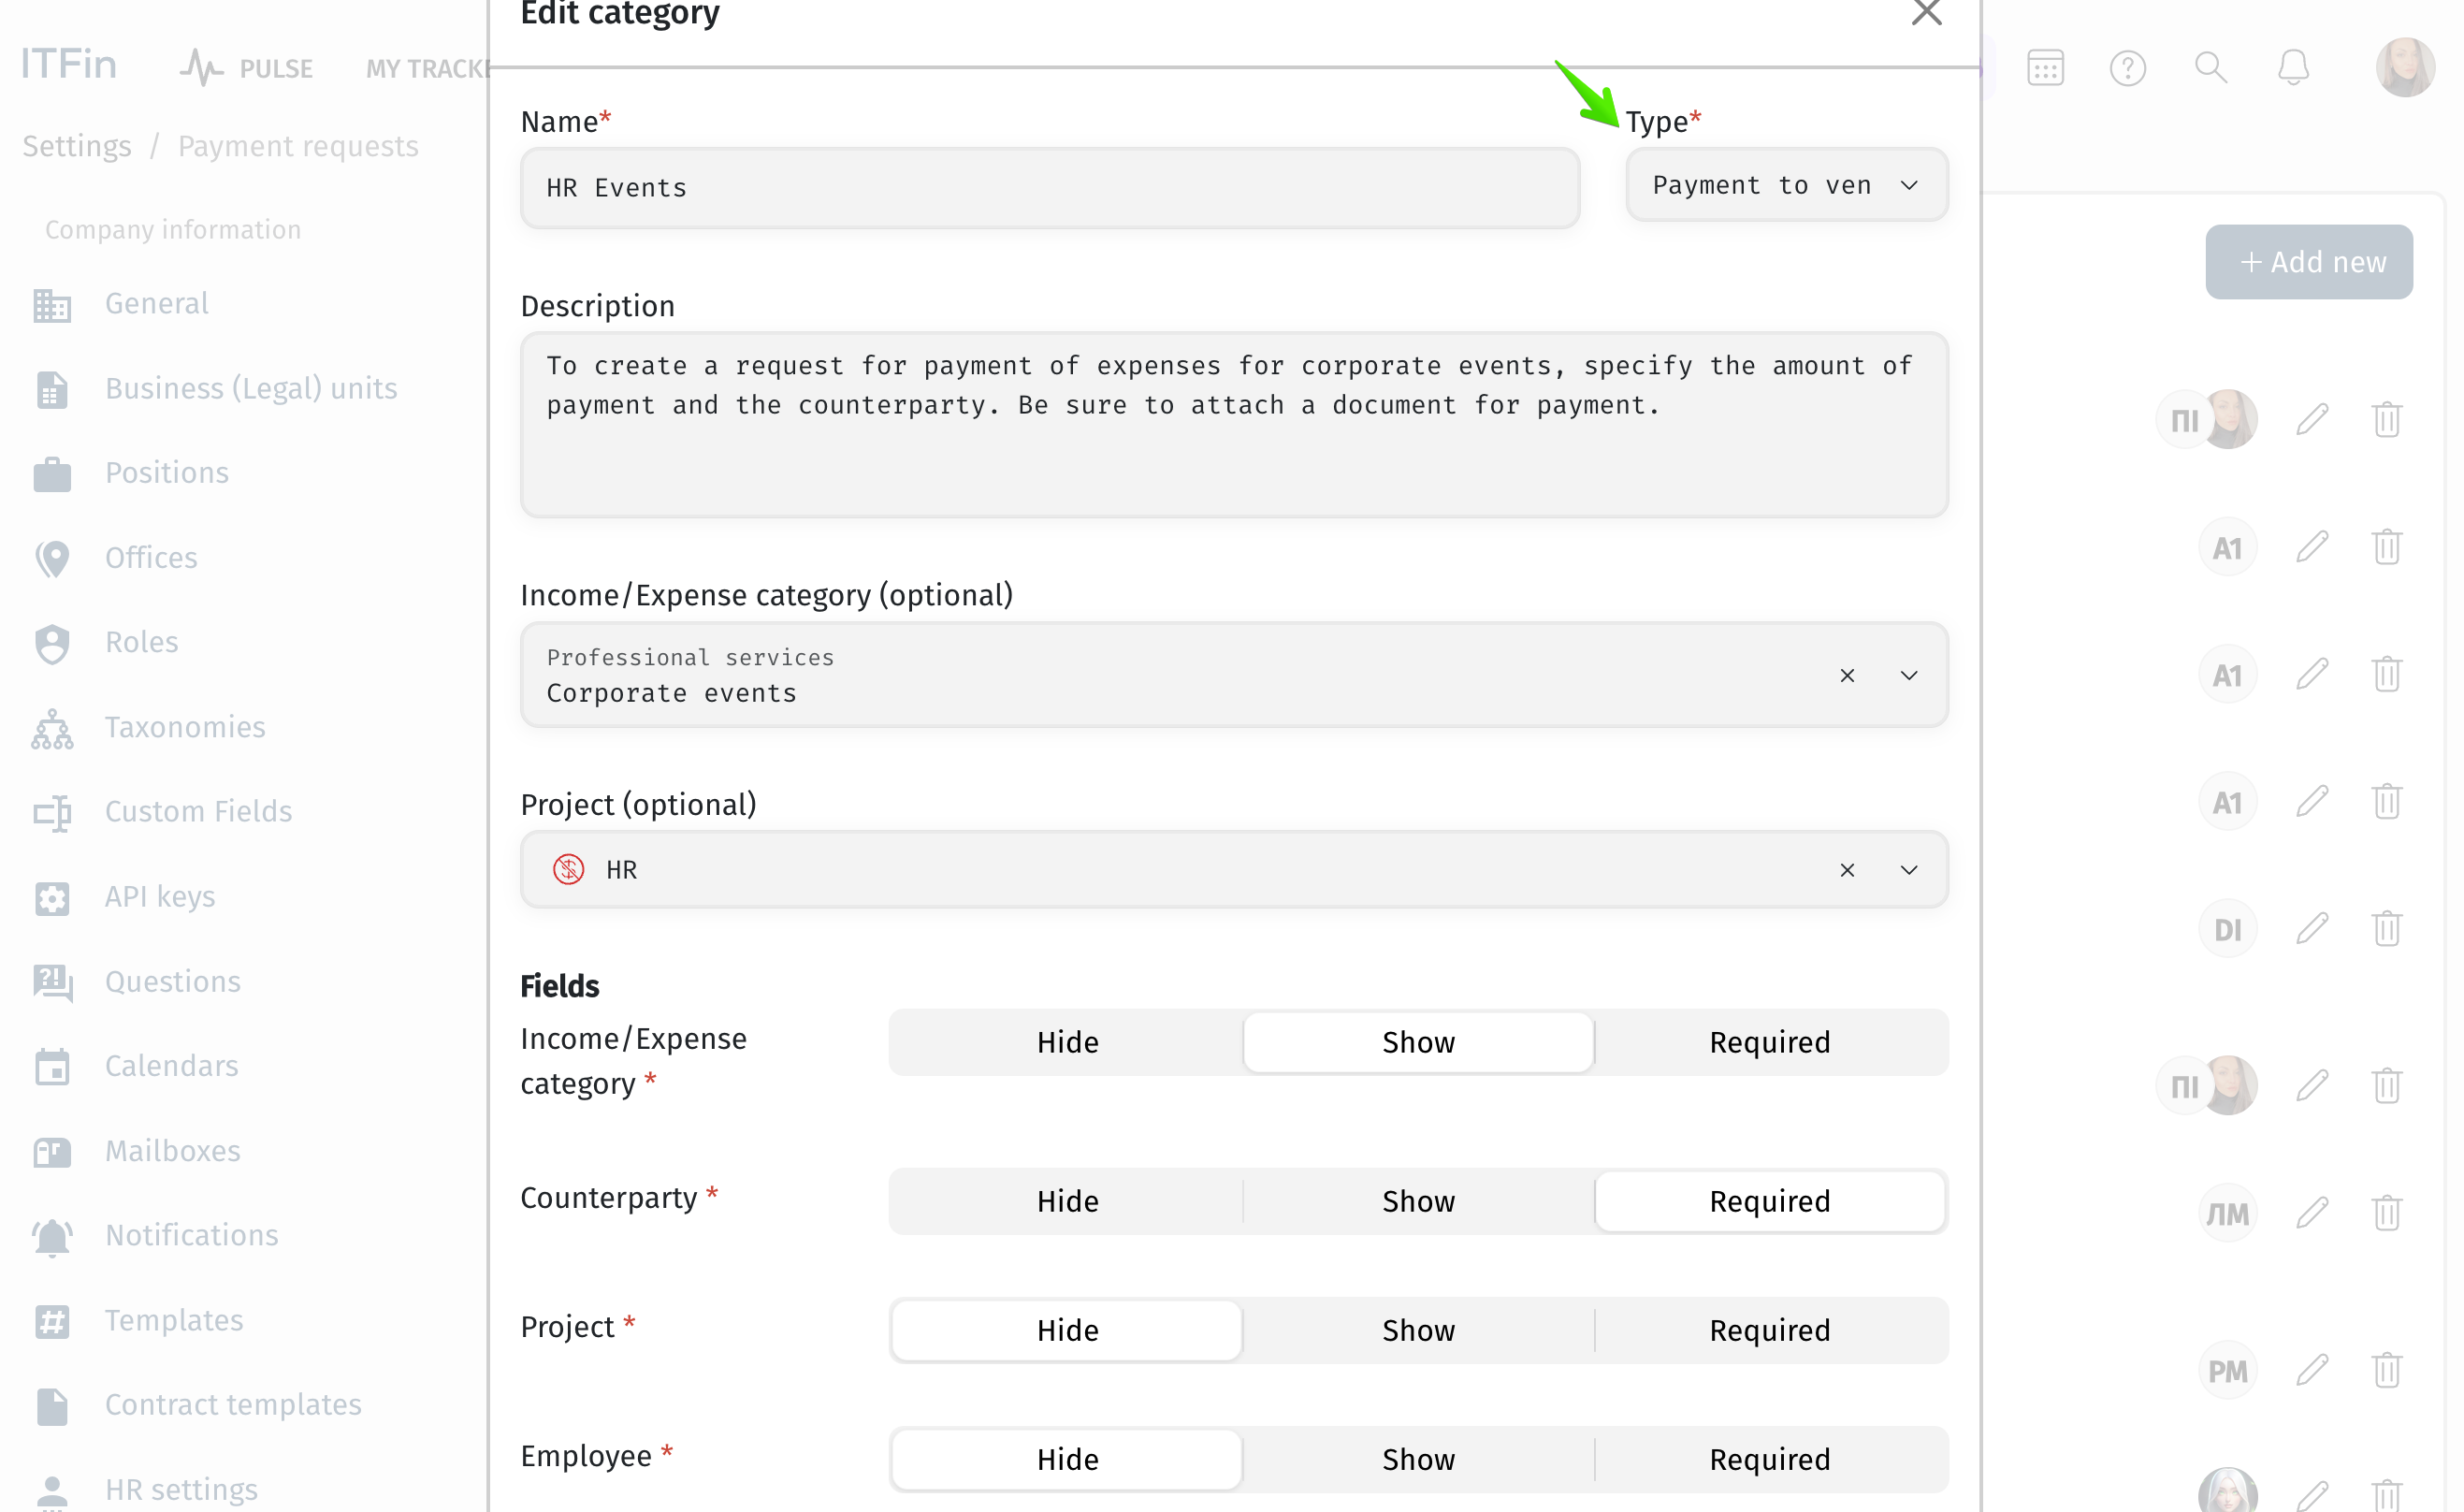
For Payment to Vendor requests, the income/expense category, project, counterparty, and other details specified in the request type settings will be automatically added to the invoice created by the accountant after the request is approved.
The accountant (or another employee with permission to manage this functionality) can edit these fields or fill them in manually when processing the request if the employee does not have access to certain data, such as counterparties.
Step 2. Grant Employees Access to Create Vendor Payment Requests
finance_payment_requests_view_reimbursementfinance_payment_requests_extendedStep 3. Approve the Request
First, make sure that all required details are specified in the request. If necessary, complete or edit them before approving the request.
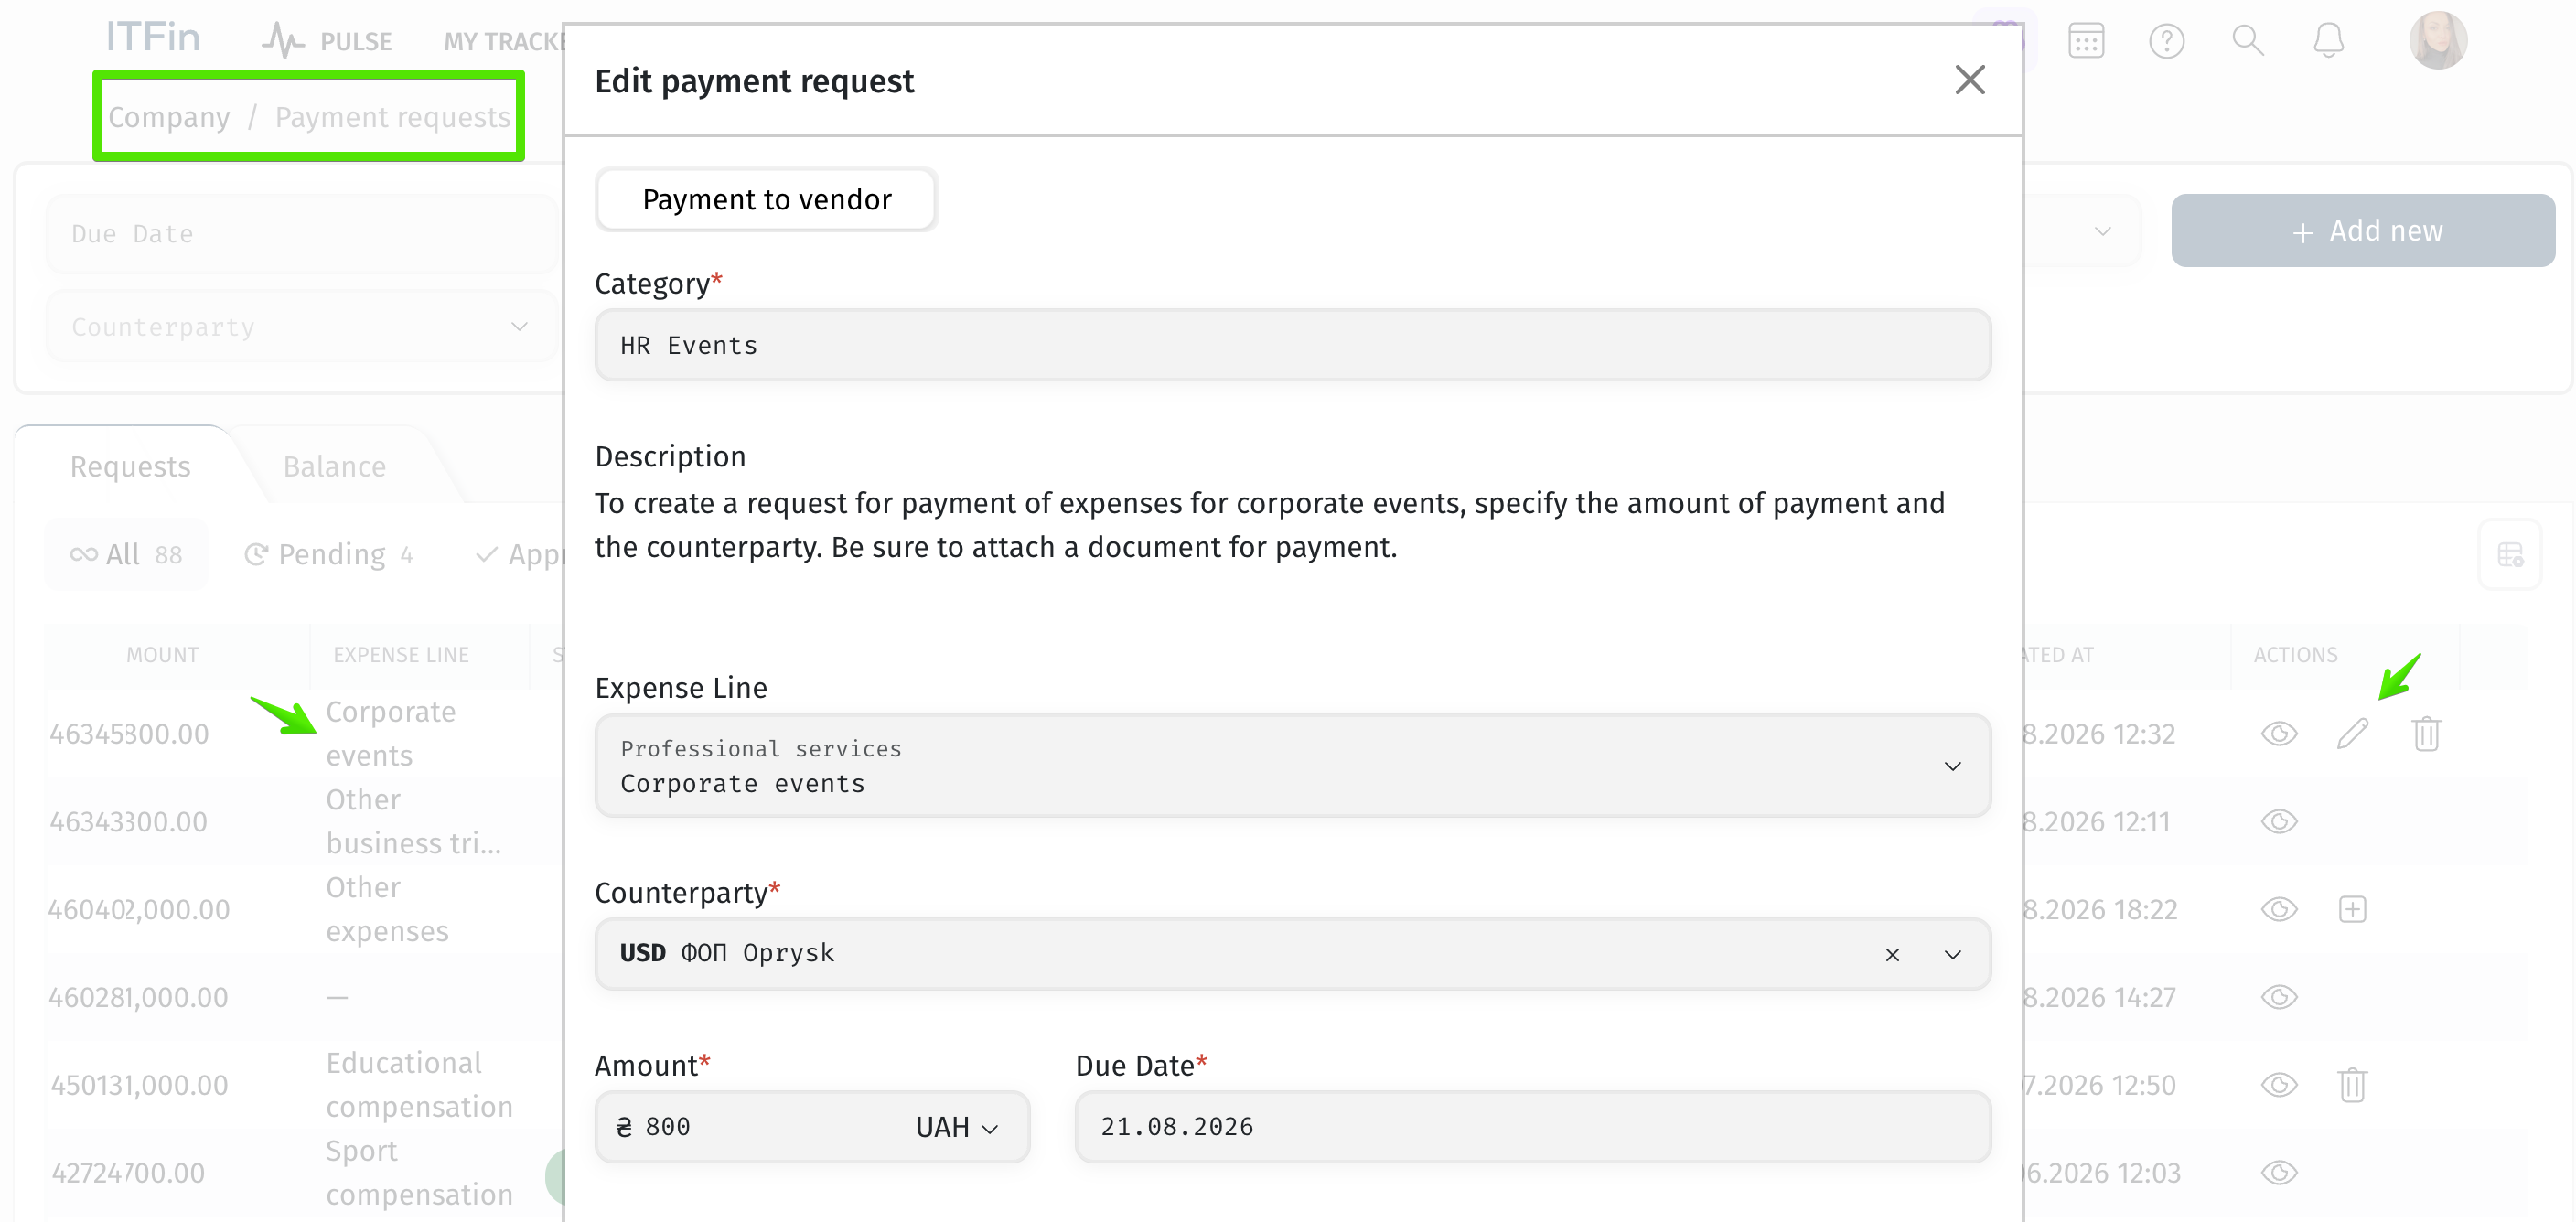
General communication regarding the request can take place in the comments section of the request:
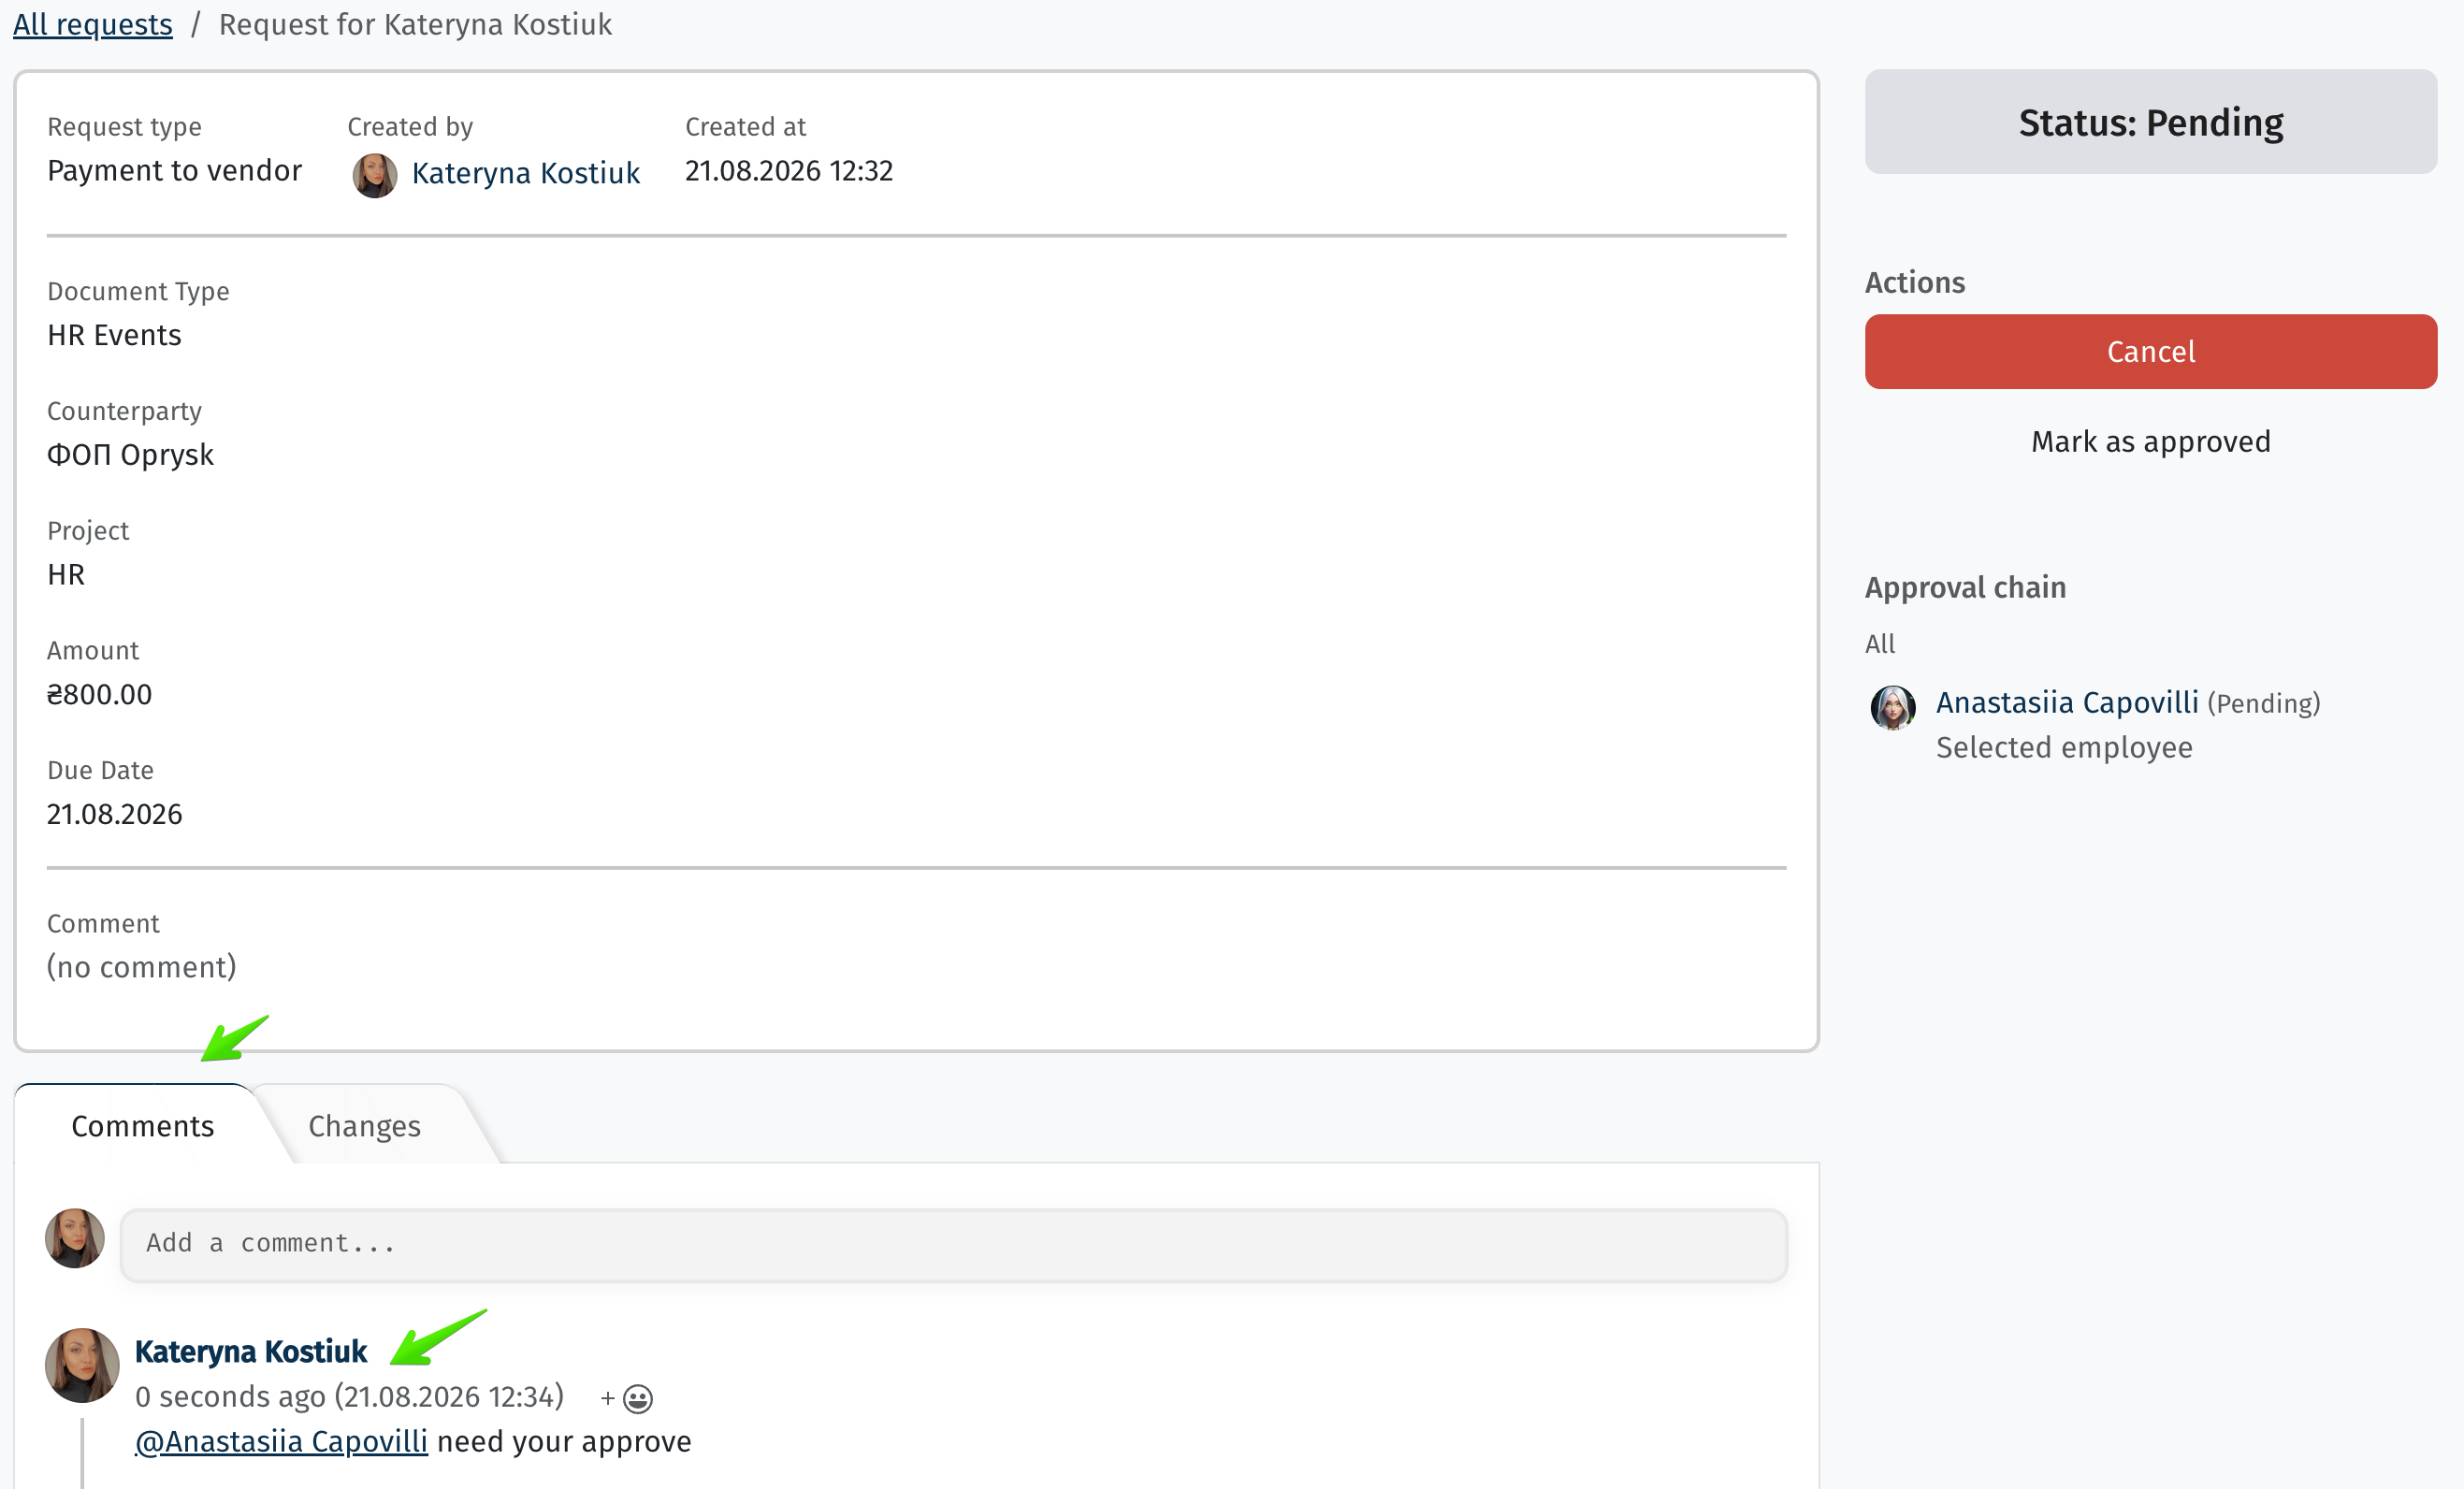
Once the request is approved, the employee will no longer be able to cancel it.
Step 4. Create a Purchase Invoice for the Request
Before creating the purchase invoice, make sure that the P&L Policy includes a rule for generating accounting entries for purchase invoices and that the expense categories are mapped to the corresponding accounts in the Chart of Accounts.
Once the request is approved, the employee will no longer be able to cancel it.
Step 4. Create a Purchase Invoice for the Request
Before creating the purchase invoice, make sure that the P&L Policy includes a rule for generating accounting entries for purchase invoices and that the expense categories are mapped to the corresponding accounts in the Chart of Accounts.
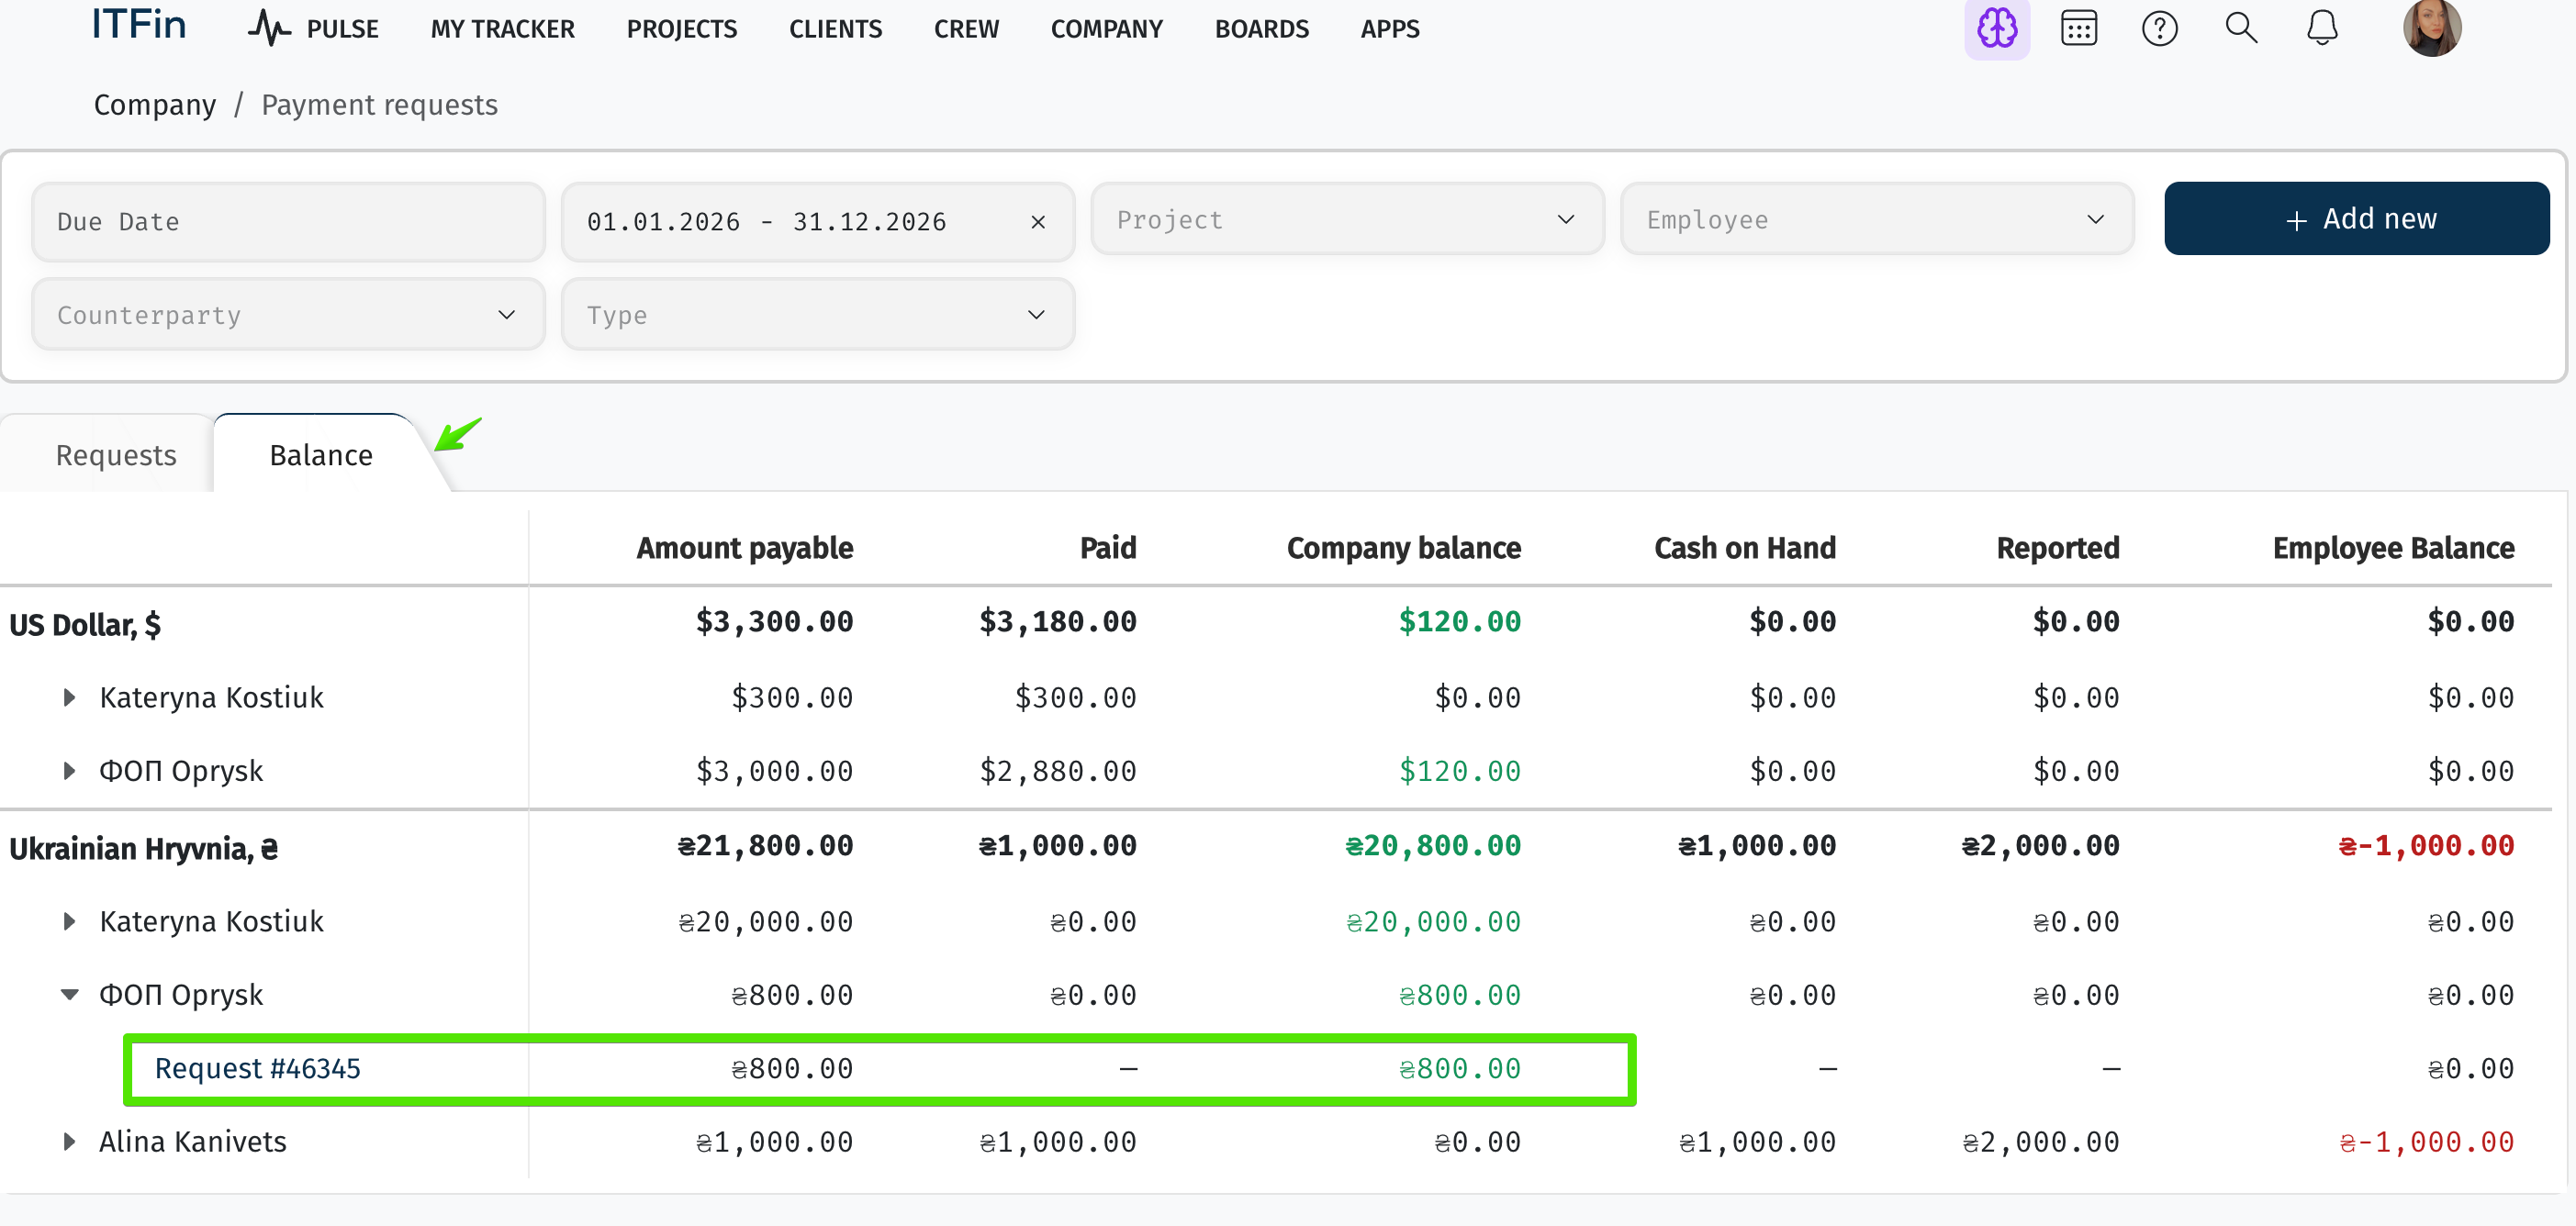
You can track the balance of payments to counterparties on the Balances tab:
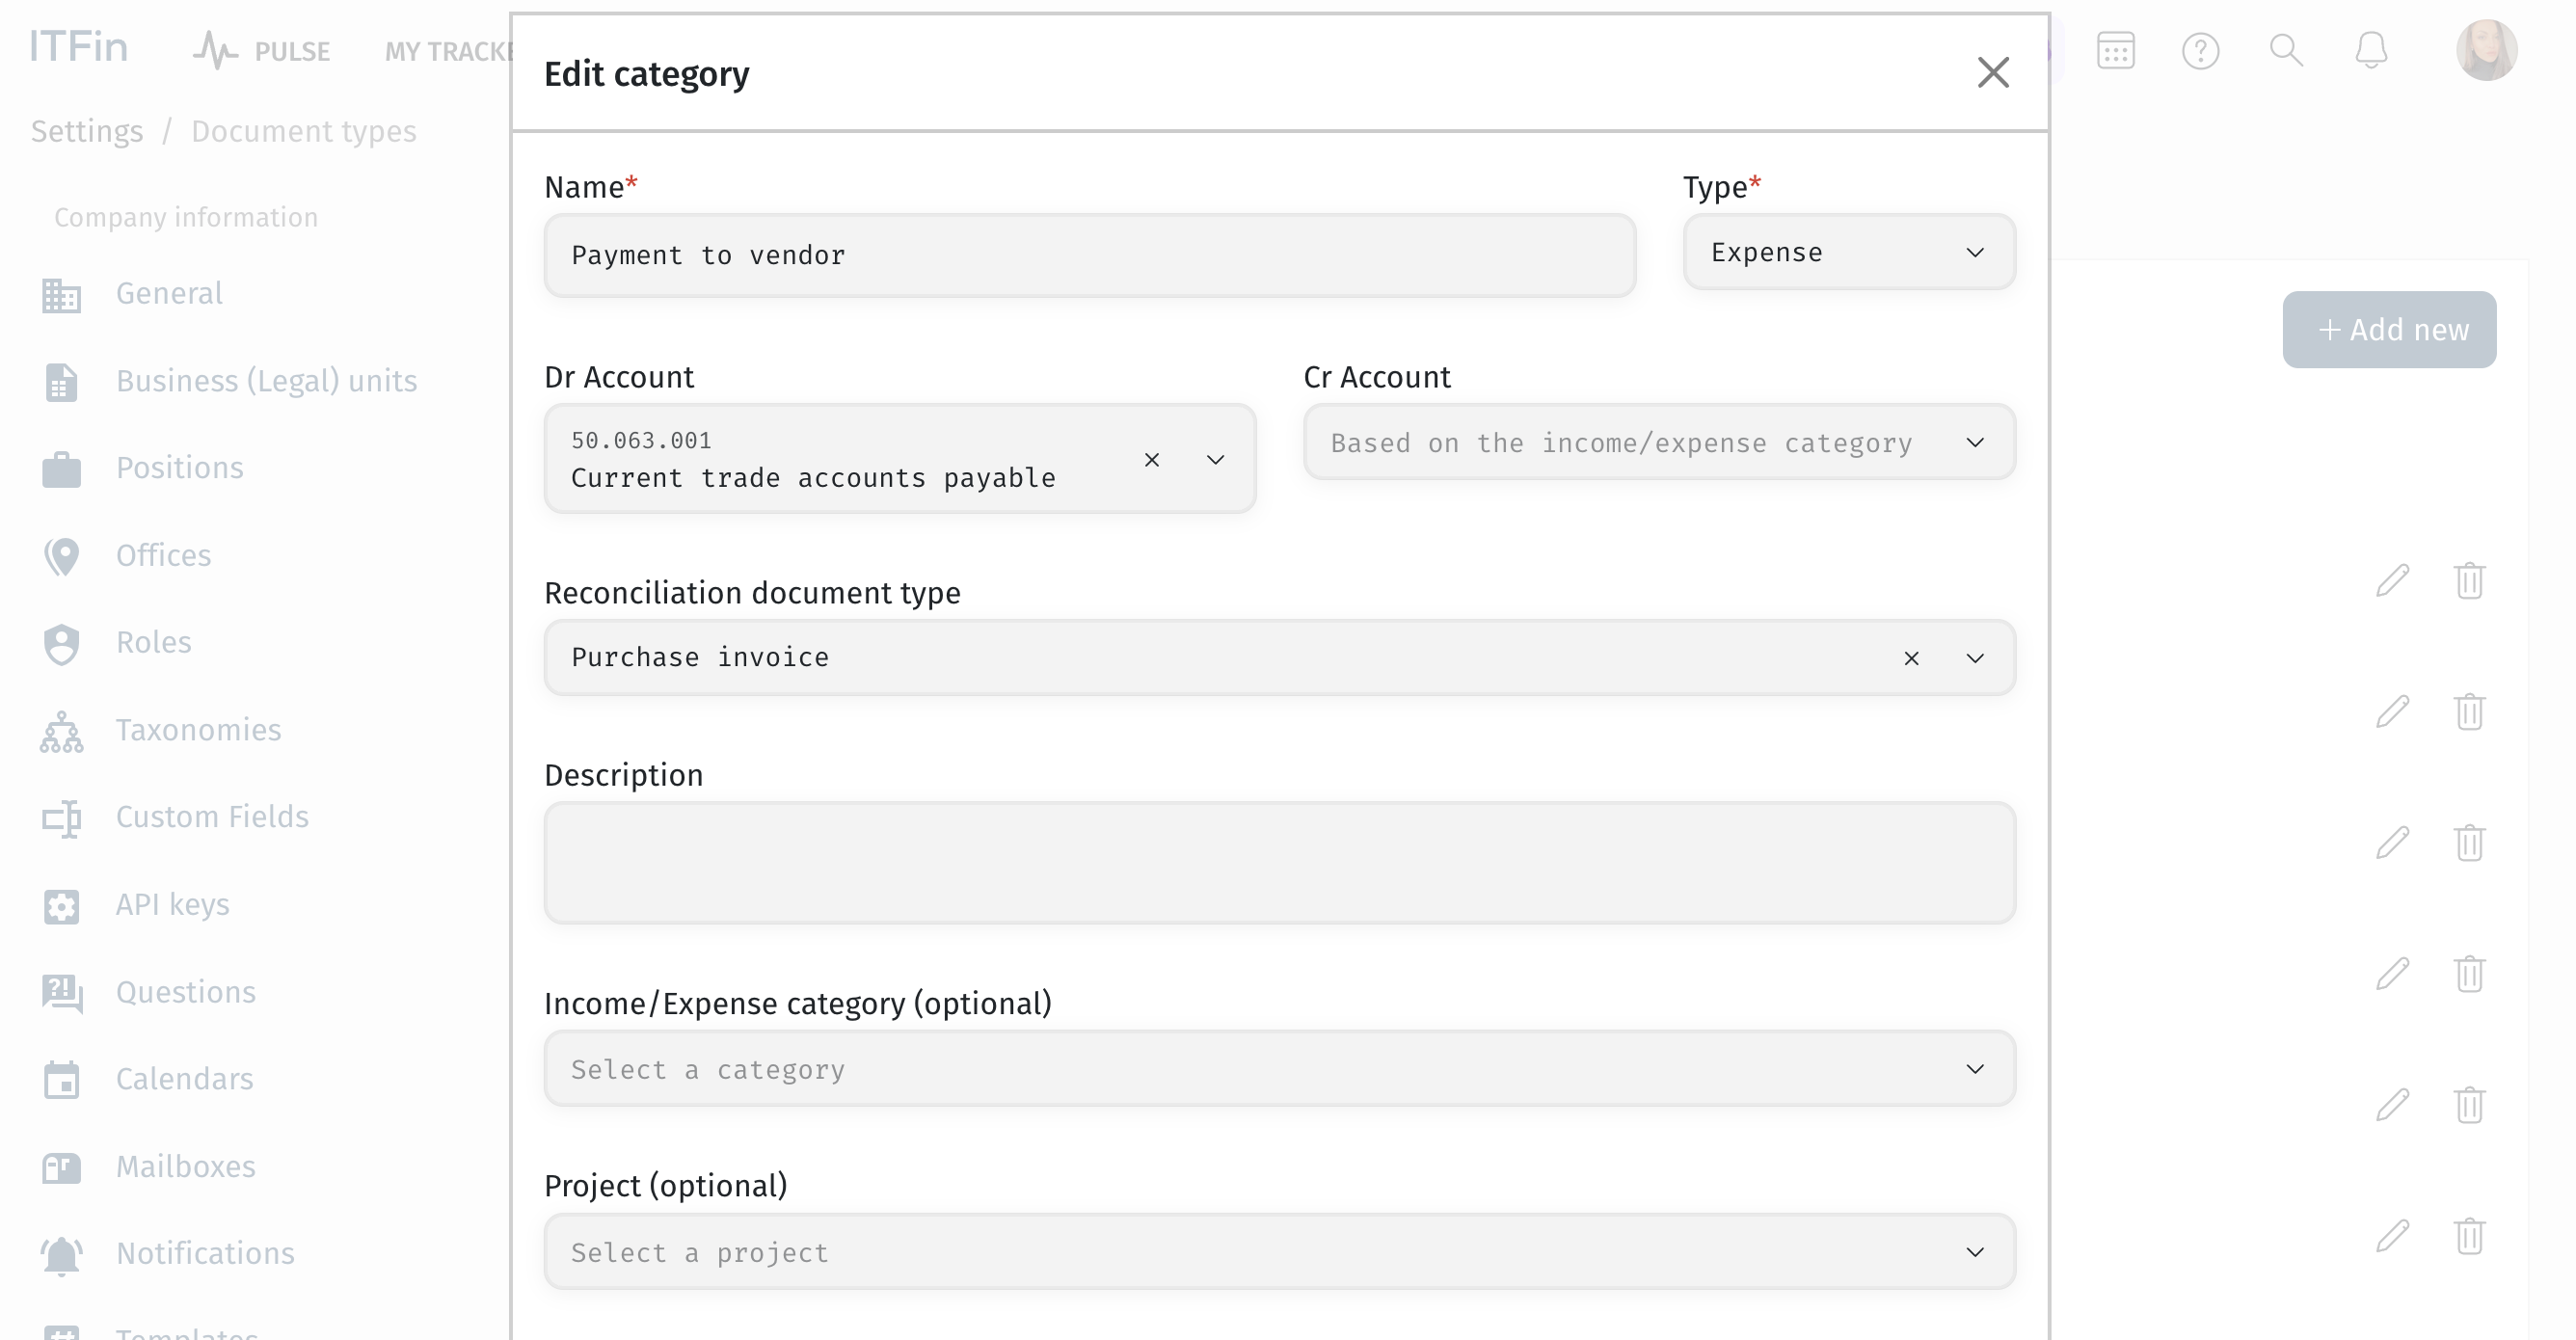
Step 5. Configure the Document Type for Approving Vendor Payment Transactions
Make sure to specify that such payments must be reconciled with Purchase Invoices.
Step 6. Make the Payment and Reconcile It with the Created Purchase Invoice
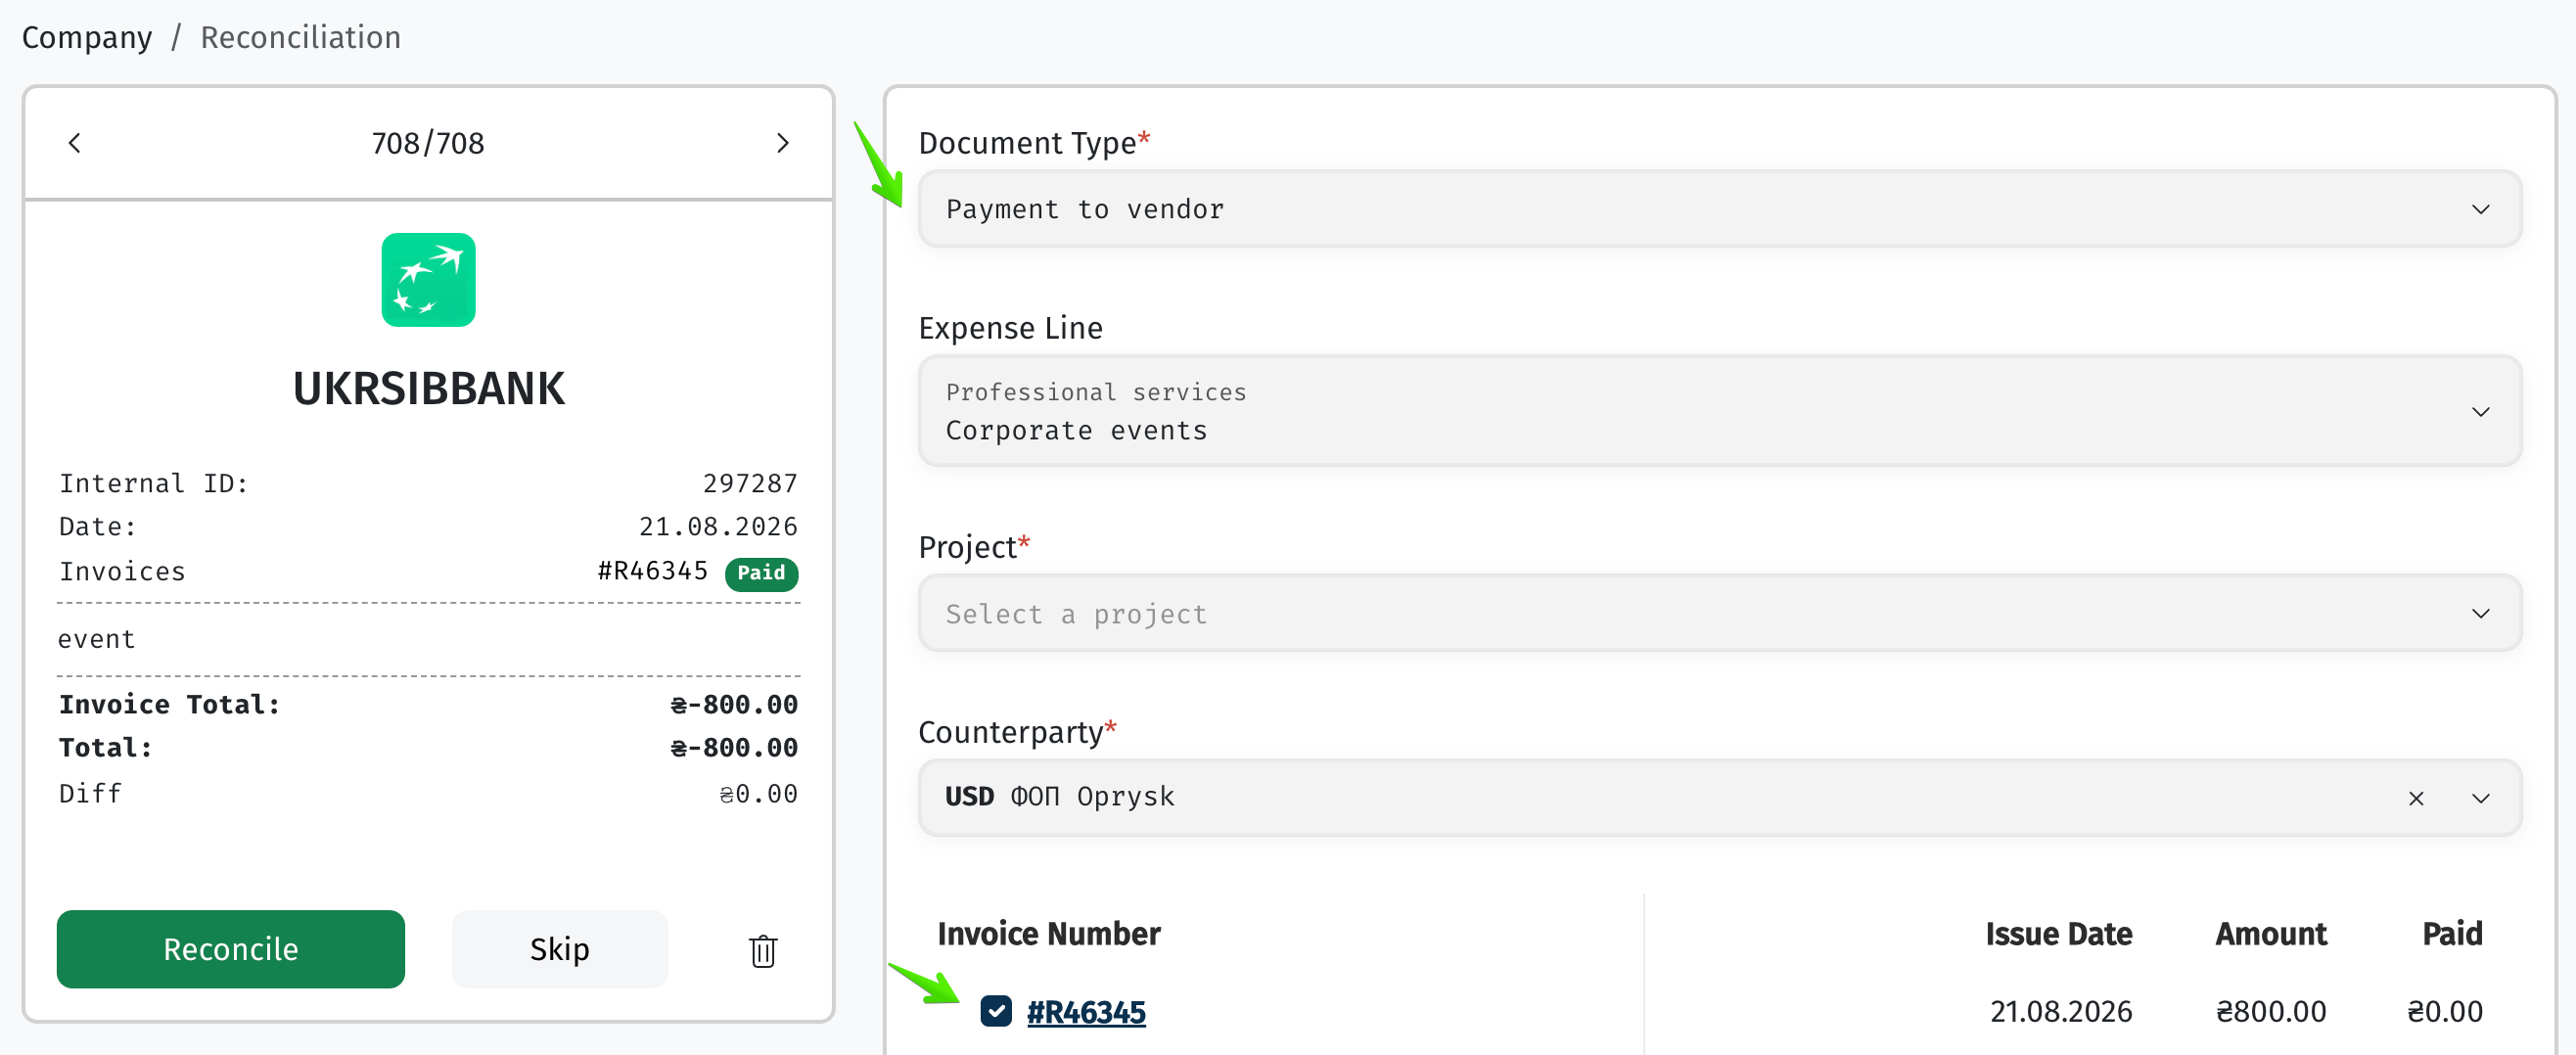
Once the payment is reconciled, the status of both the Purchase Invoice and the Vendor Payment Request will be changed to Paid.
The system will generate two accounting entries:
-
Creation of the Purchase Invoice and recognition of the amount payable to the vendor:
-
Settlement of the amount payable when the rent payment transaction is reconciled:

Refill and Reporting on the Use of Accountable Funds
The Refill request type is used when your company provides an employee with funds to pay for goods or services required by the company.
Example: An office manager requests UAH 20,000 to purchase office supplies. After making the purchase, they must provide receipts for the amounts spent.
💡 Important Information on Accounting for Accountable Funds
From an accounting perspective, transferring funds to an employee is not an expense, but merely a transfer of funds between accounts.
Therefore, to correctly use these request types, you should first create a bank or Cash on Hand account for each employee who will receive accountable funds, or set up a shared virtual Cash on Hand account to which all funds issued to employees will be transferred.
This allows transactions to be recorded correctly and account balances to be accurately reflected in the system.
After the employee reports on the use of the funds using a Reimbursement (from balance) request, you can use this report to create a transaction to recognize the expense.
If you use a single virtual Cash on Hand account for accountable funds, you can view each employee’s balance in Payment Requests → Balance.
When accountable funds are transferred to an employee, they are recorded in financial accounting as a transfer of funds to a virtual Cash on Hand account.
Thus, the funds remain the company’s property until the employee reports on how they were used.
The employee’s current balance can be tracked under Payment Requests → Balance.