Step-by-Step Setup
Step 1. Create a user in Jira who has the necessary access to projects (browse projects), the user list (browse users), and data — or select an existing user with these permissions.
Step 2. Add a Source in the system: if you’re using self-hosted Jira, you’ll need to provide a login (email) and password; іf it’s Jira Cloud, you’ll need to provide a login (email) and an API key.
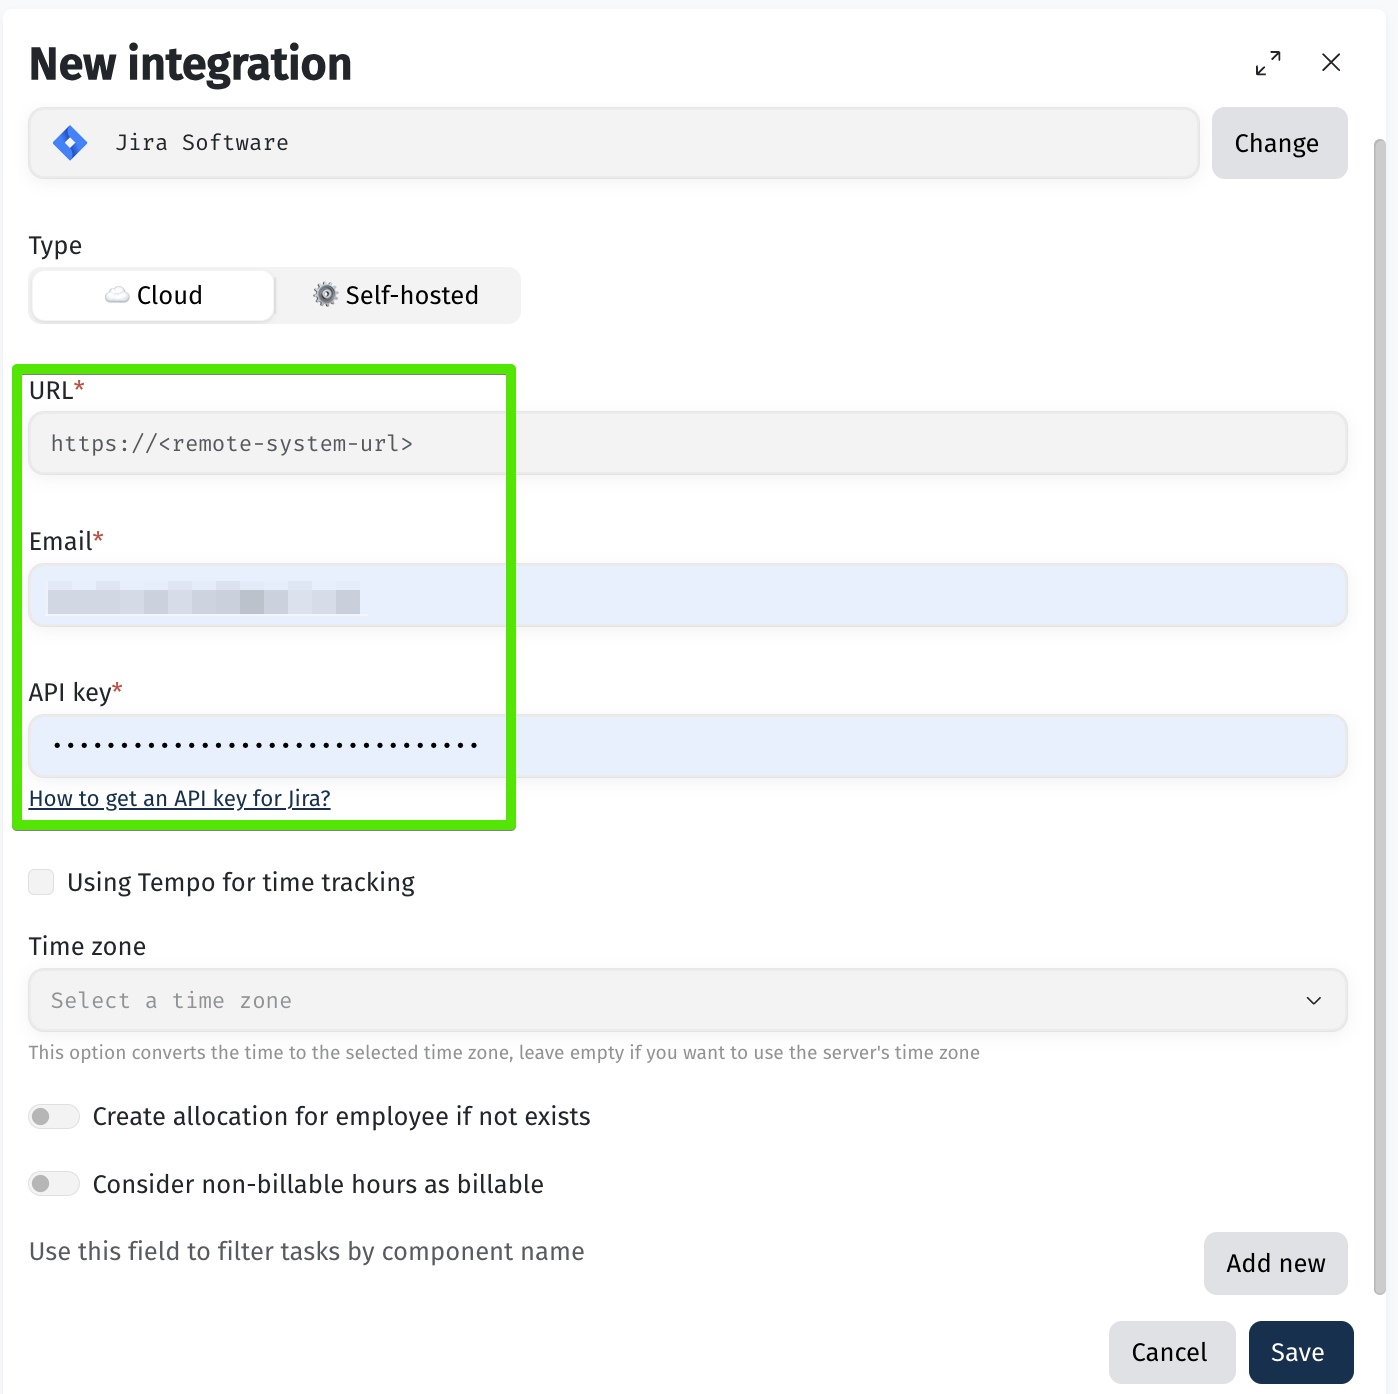
If you are using Tempo, enable the corresponding option and add the API key generated in Tempo.

Step 3. Configure project integration within the added Source.
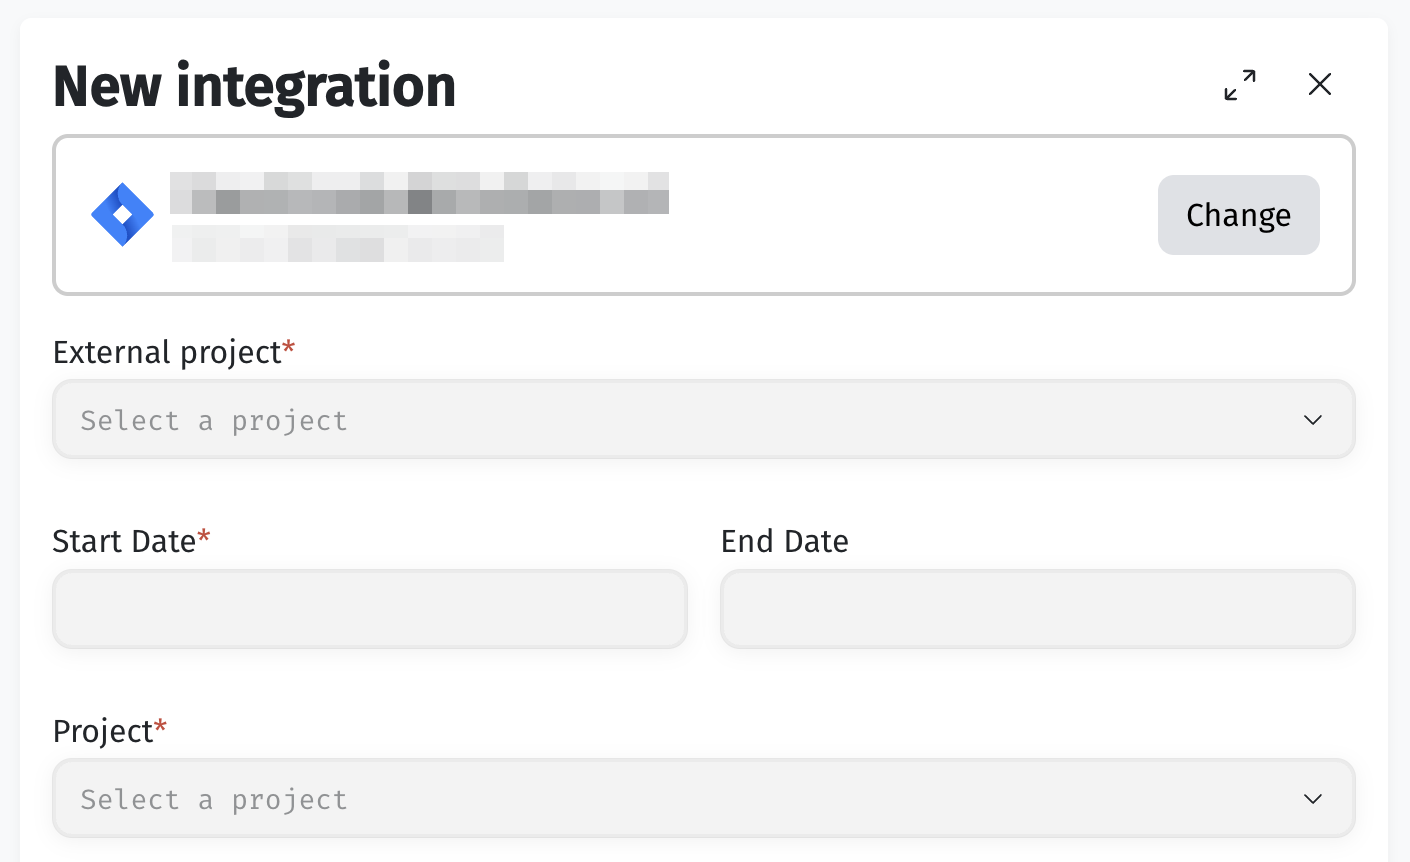
You need to specify the following fields:
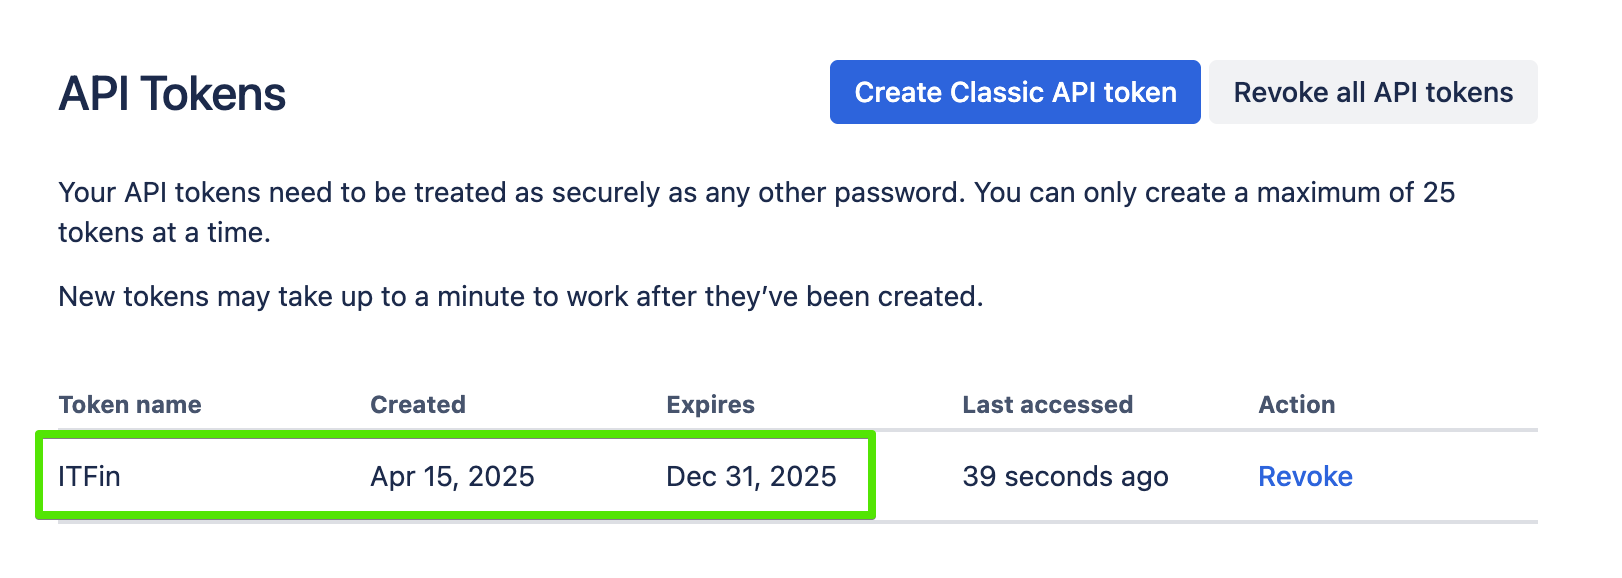
How to generate an API key in Jira?
An admin role is not required to generate an API key in Jira; you only need access to projects, tasks, and relevant data.
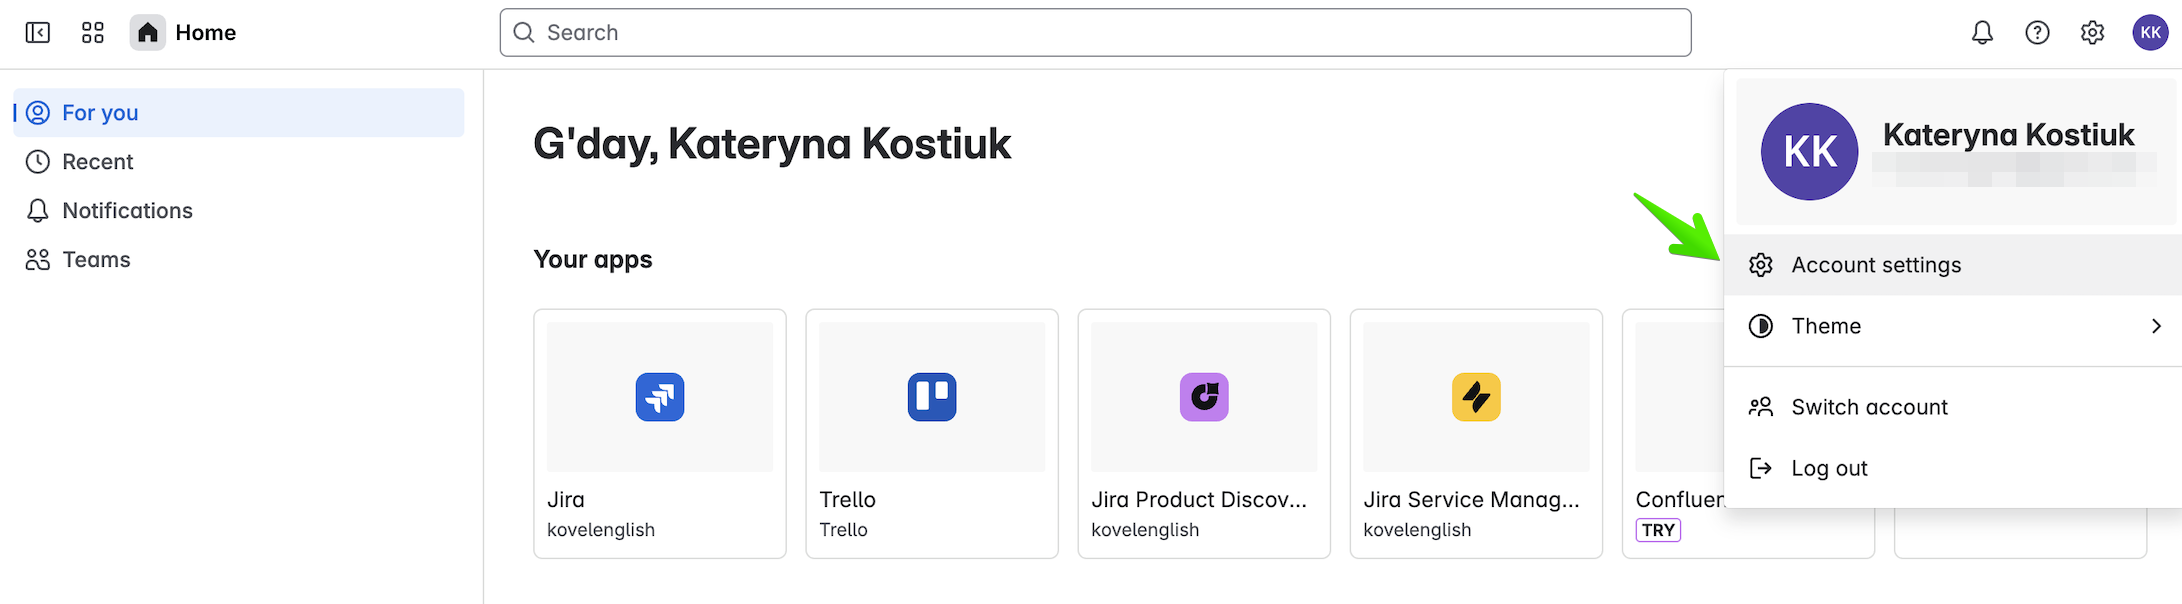
Step 1: Go to your Account settings in Jira.

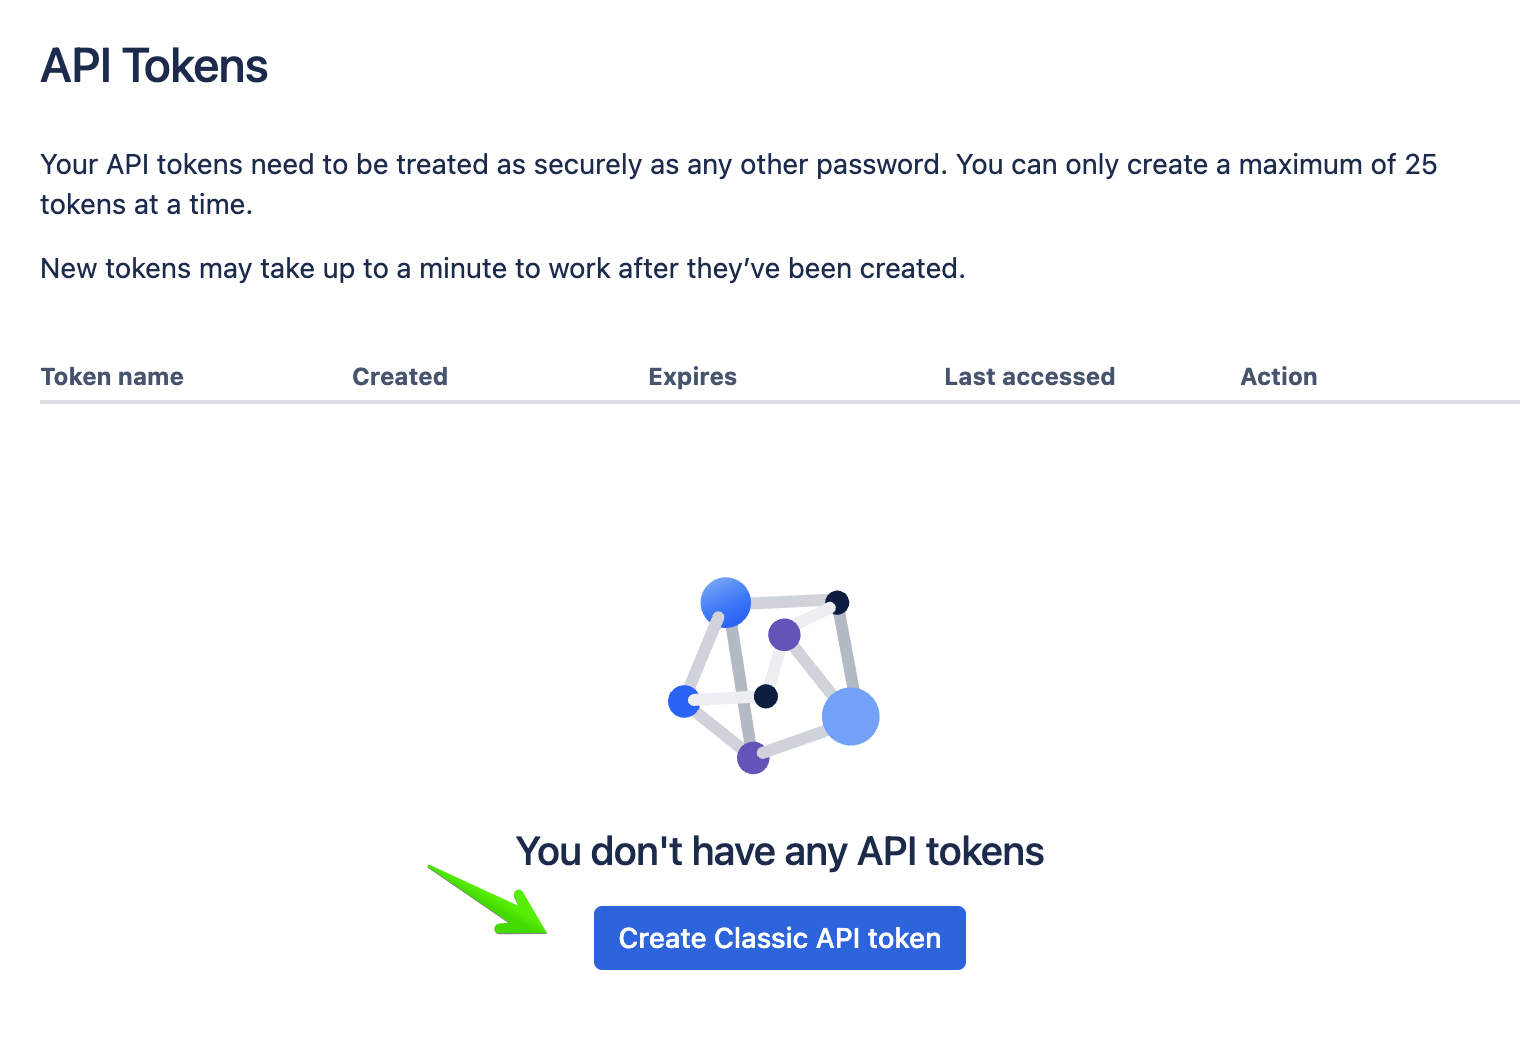
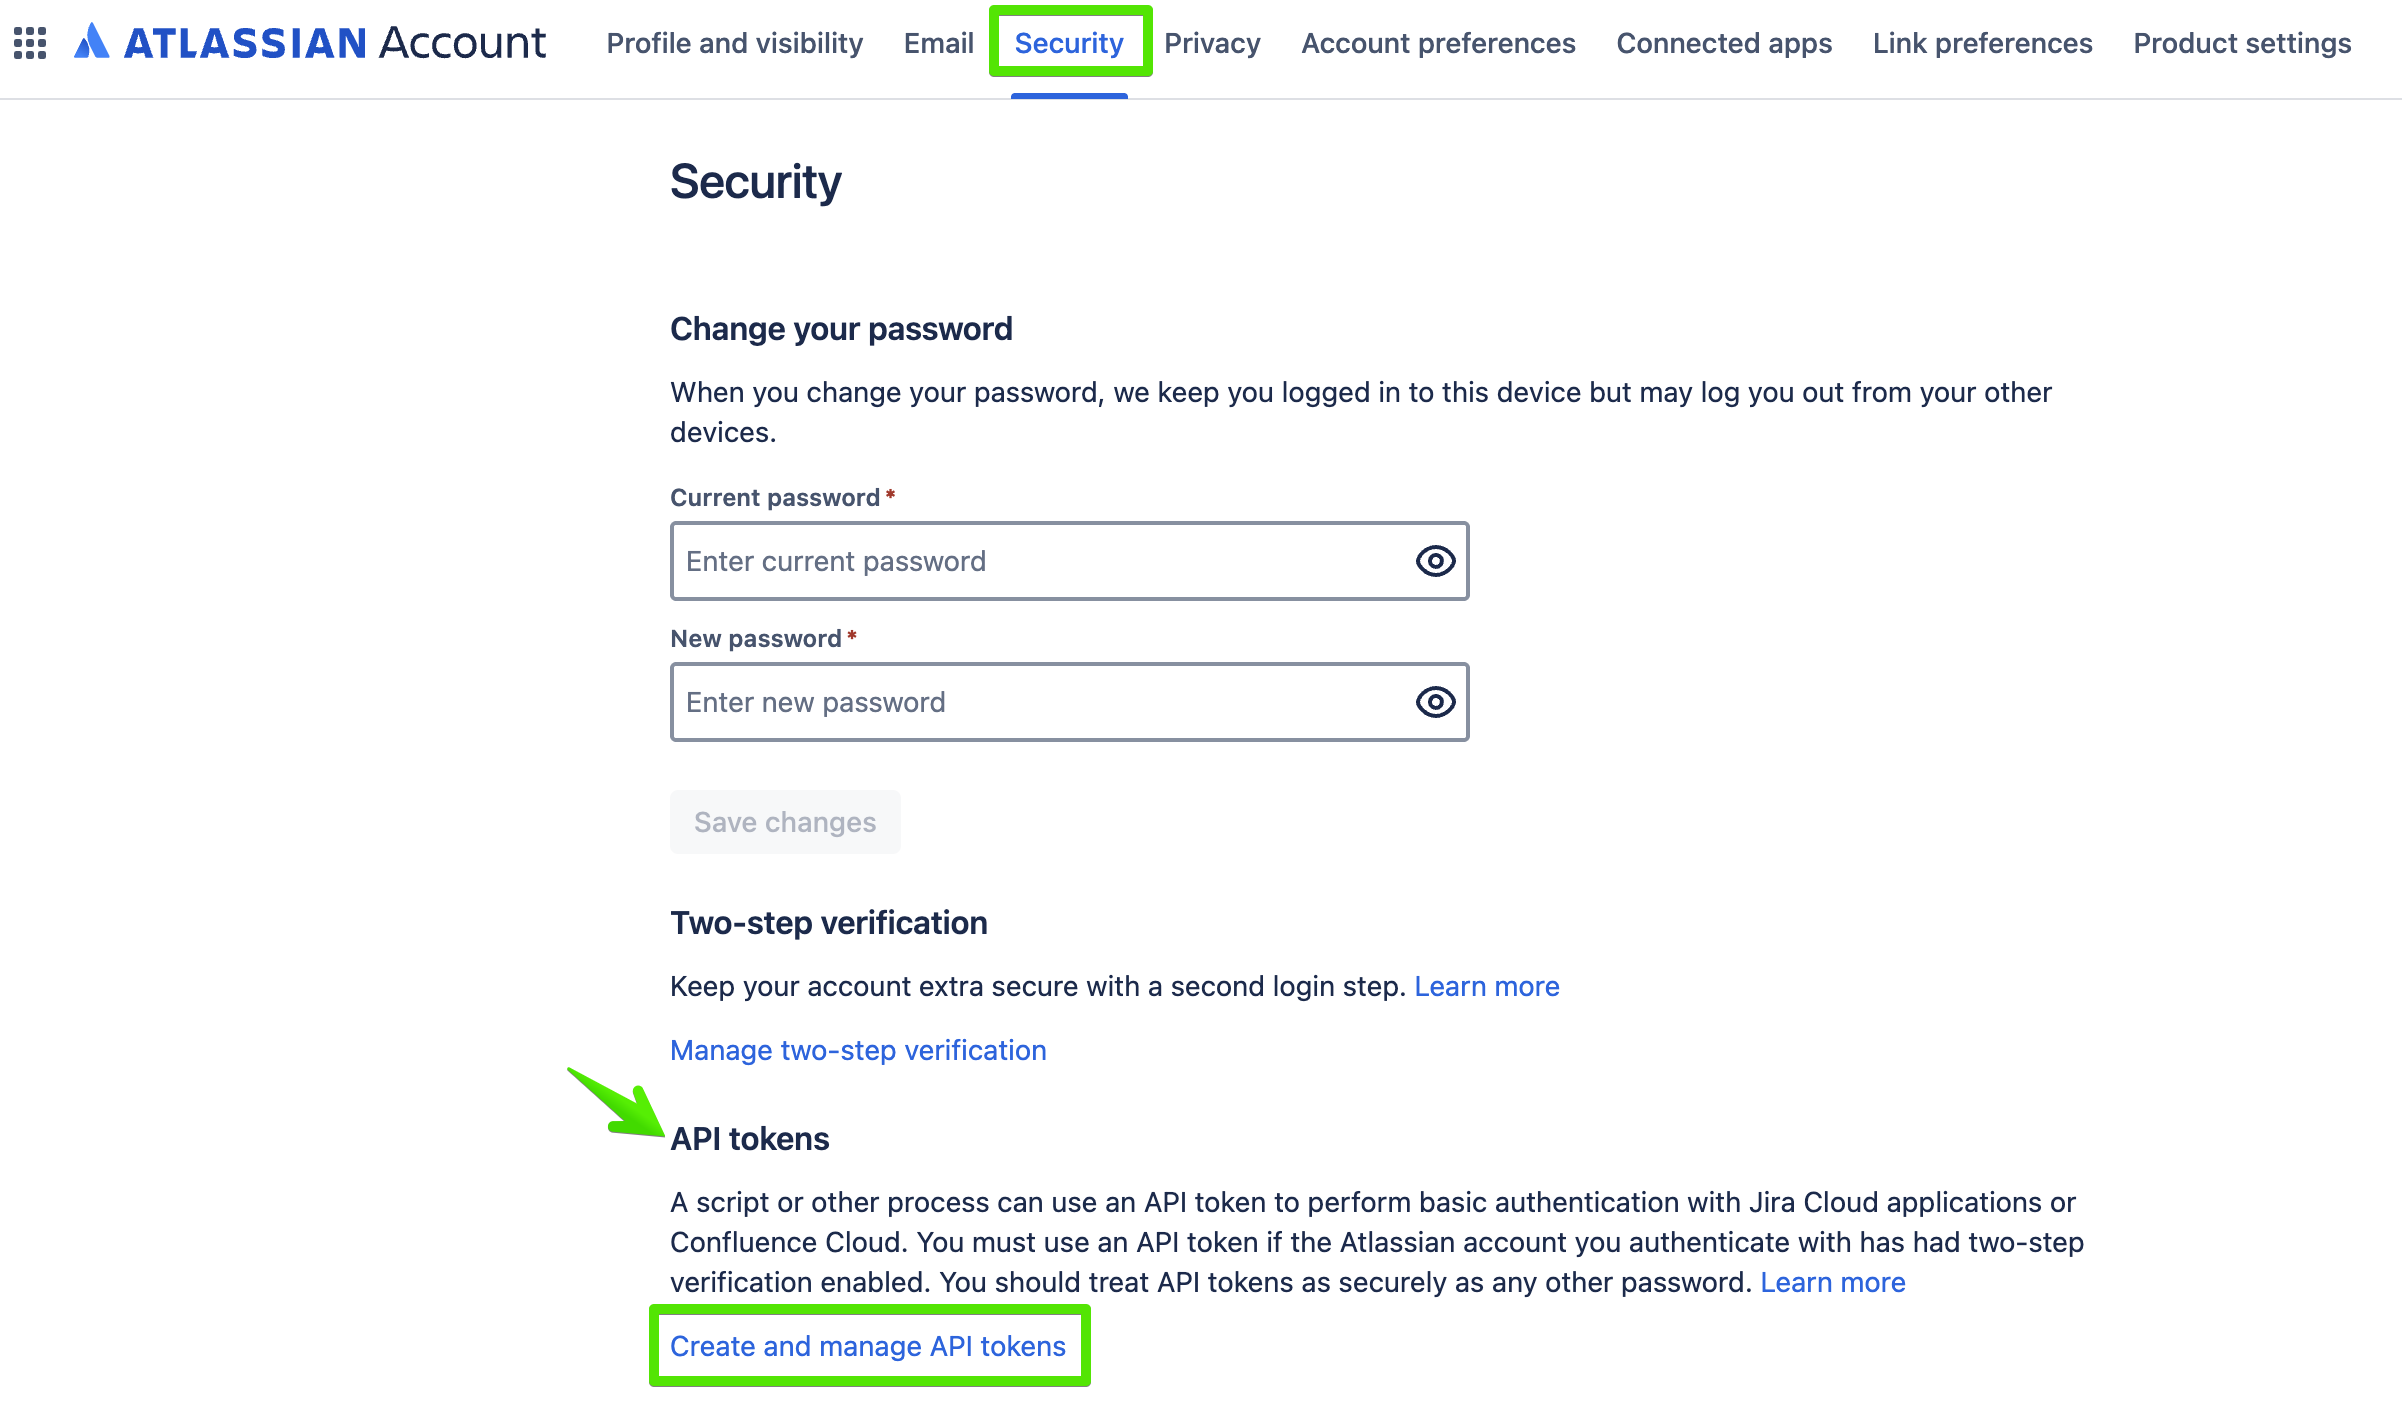
Step 2: Go to Security > API Token > Create and manage API tokens.
Step 3: In the opened window, click Create classic API token.