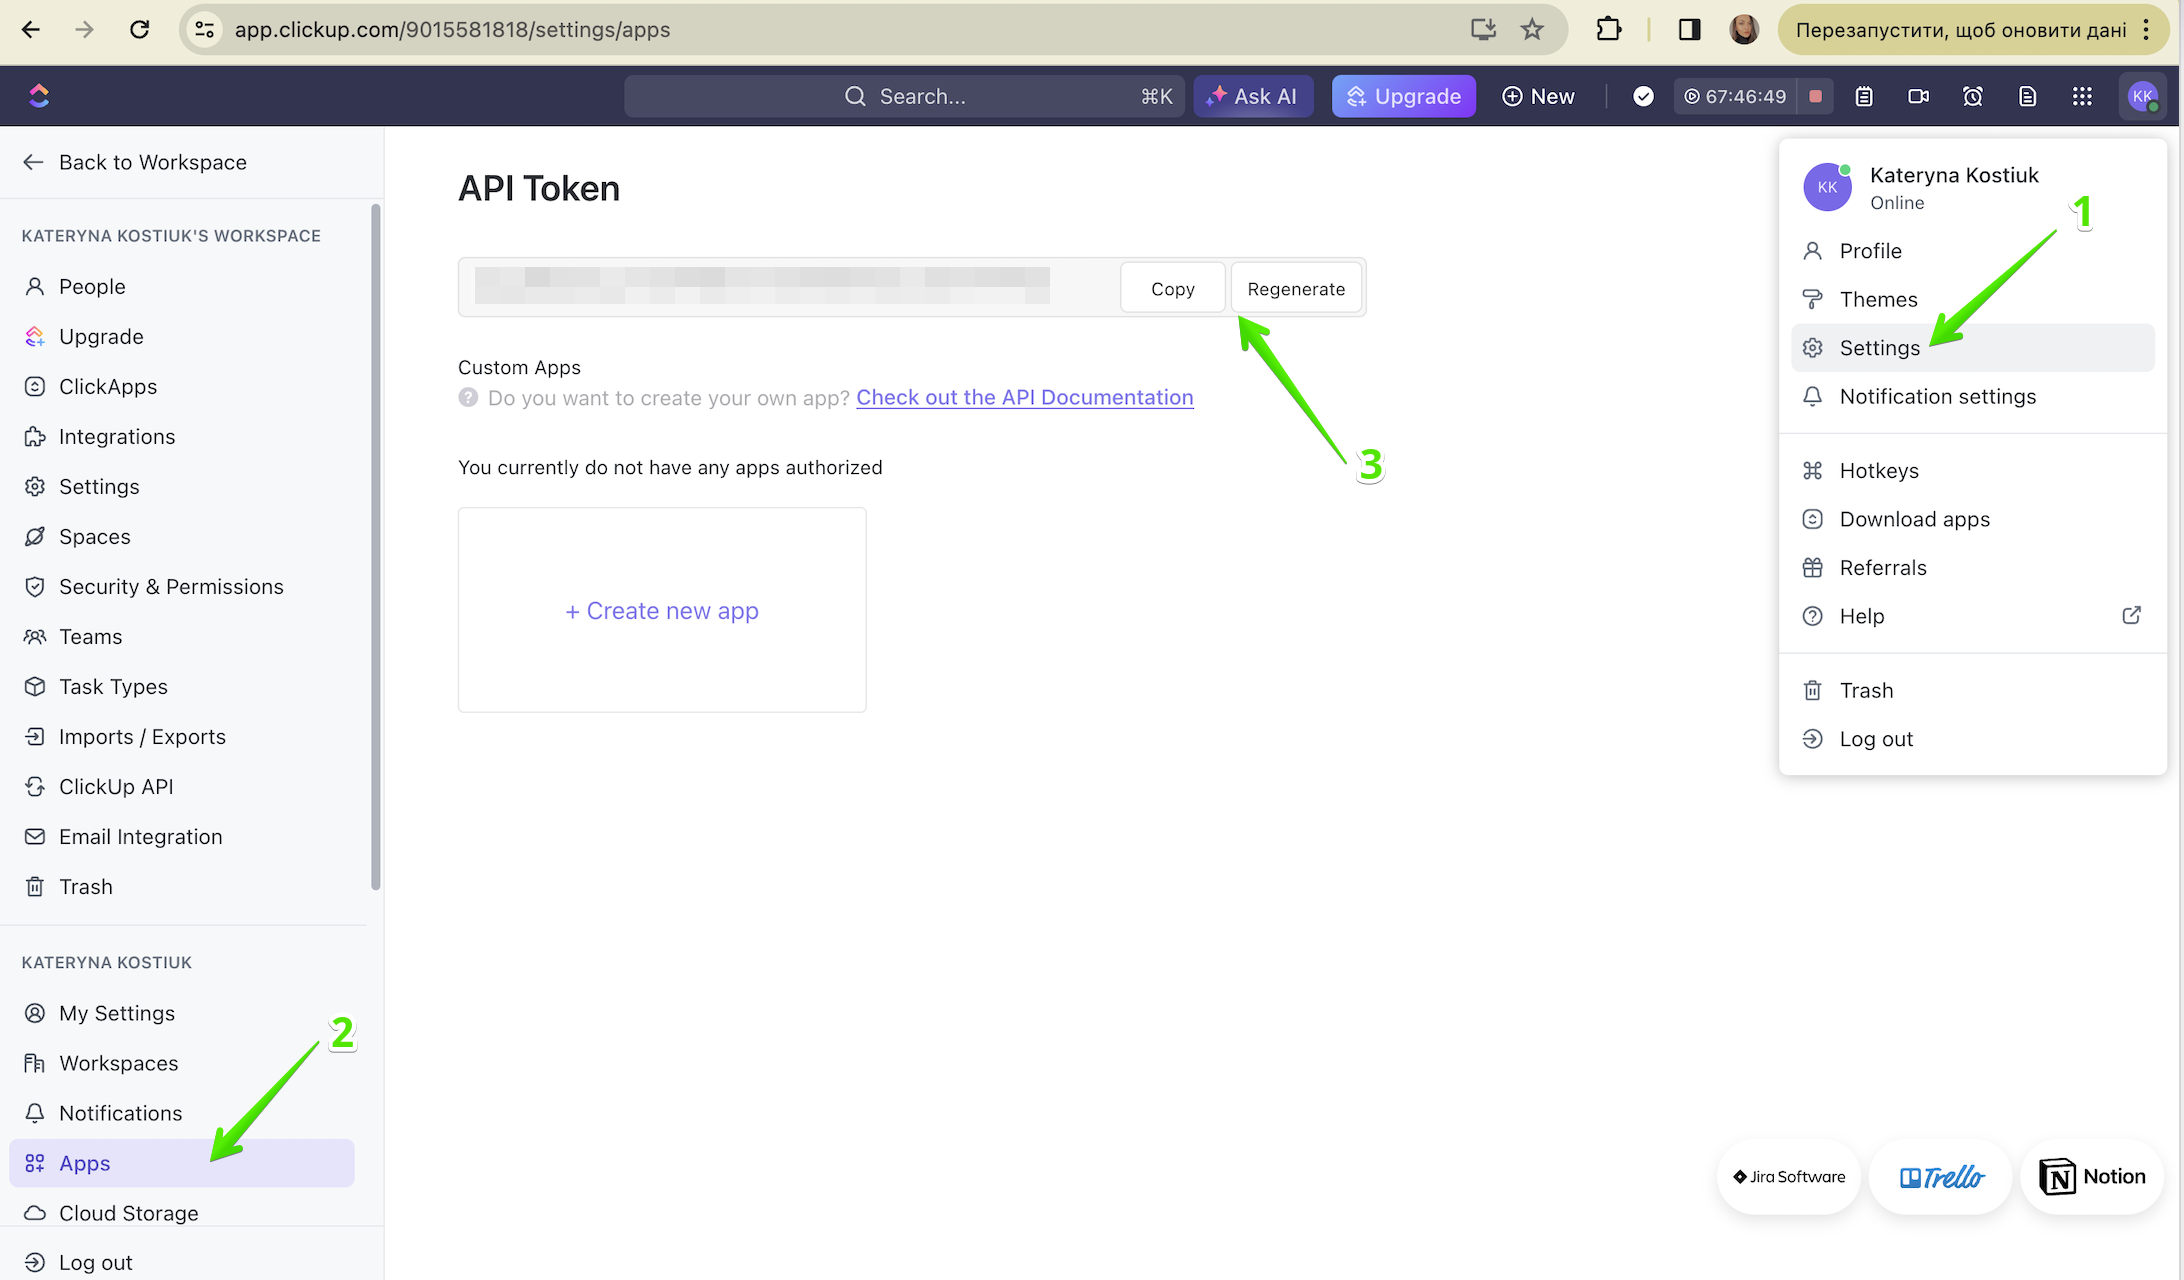
To add integration with ClickUp, you need to go to your profile settings, select the Apps tab > API token, and generate it.

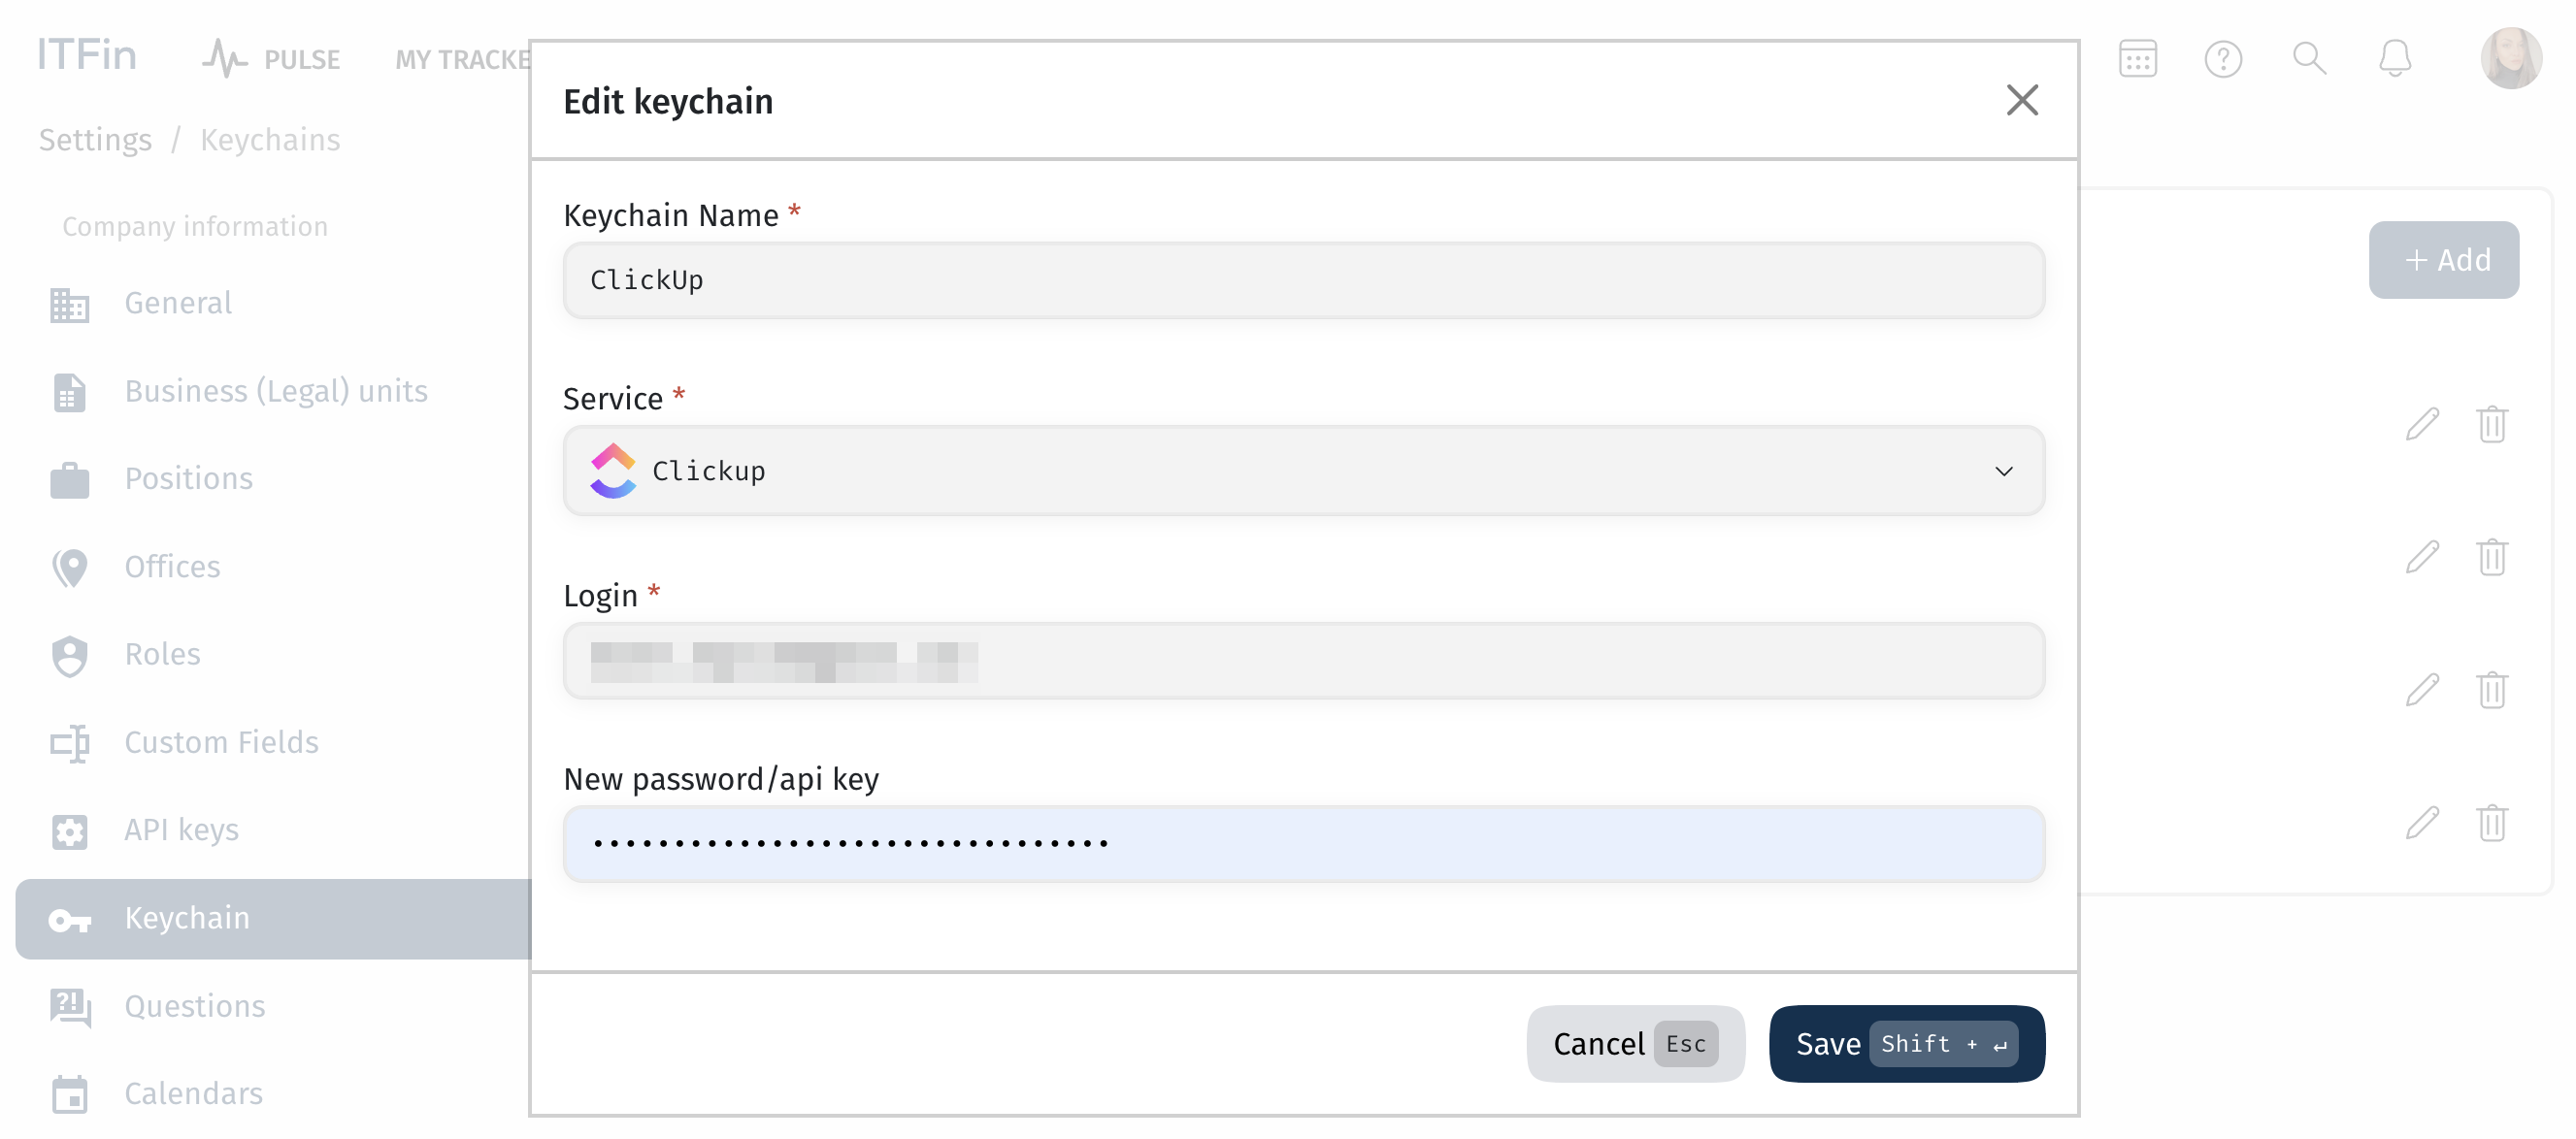
After obtaining the API token, the next step is to create a key in the ITFin system. To do this, go to Settings > Keychain and select +Add. Enter a name, choose the service, and add the login (the email address linked to the ClickUp profile) and the generated key, then save it.

After this, you can add the integration in Projects > Integration and choose +Add Integration option. Enter a name, set the integration start date, and choose the previously added key.
After the first synchronization, you can view a table with synchronization data under the Projects > Integration, including when it last occurred. You can also manually update the synchronization, edit, or delete it.