This section is dedicated to invoicing clients. Users create invoices for their clients according to the project's agreements and invoicing frequency. This section contains all invoices for the company that have ever been created in the system.
Interface overview
In the center of the page, there is a table that displays the main data related to invoices:
PAID— invoice paidPARTIALLY PAID— a part of the invoice amount has been paid, but there is still an outstanding balanceDRAFT— invoice created but not yet verified or sent to the client (still editable)READY TO SEND— invoice verified and awaiting client dispatch (editing is blocked)SENT— invoice sent to the client and awaiting payment (no outstanding balance)LATE— outstanding balance 0–15 daysSHORT DEBT— outstanding balance 15–30 daysLONG DEBT— outstanding balance 30–60 days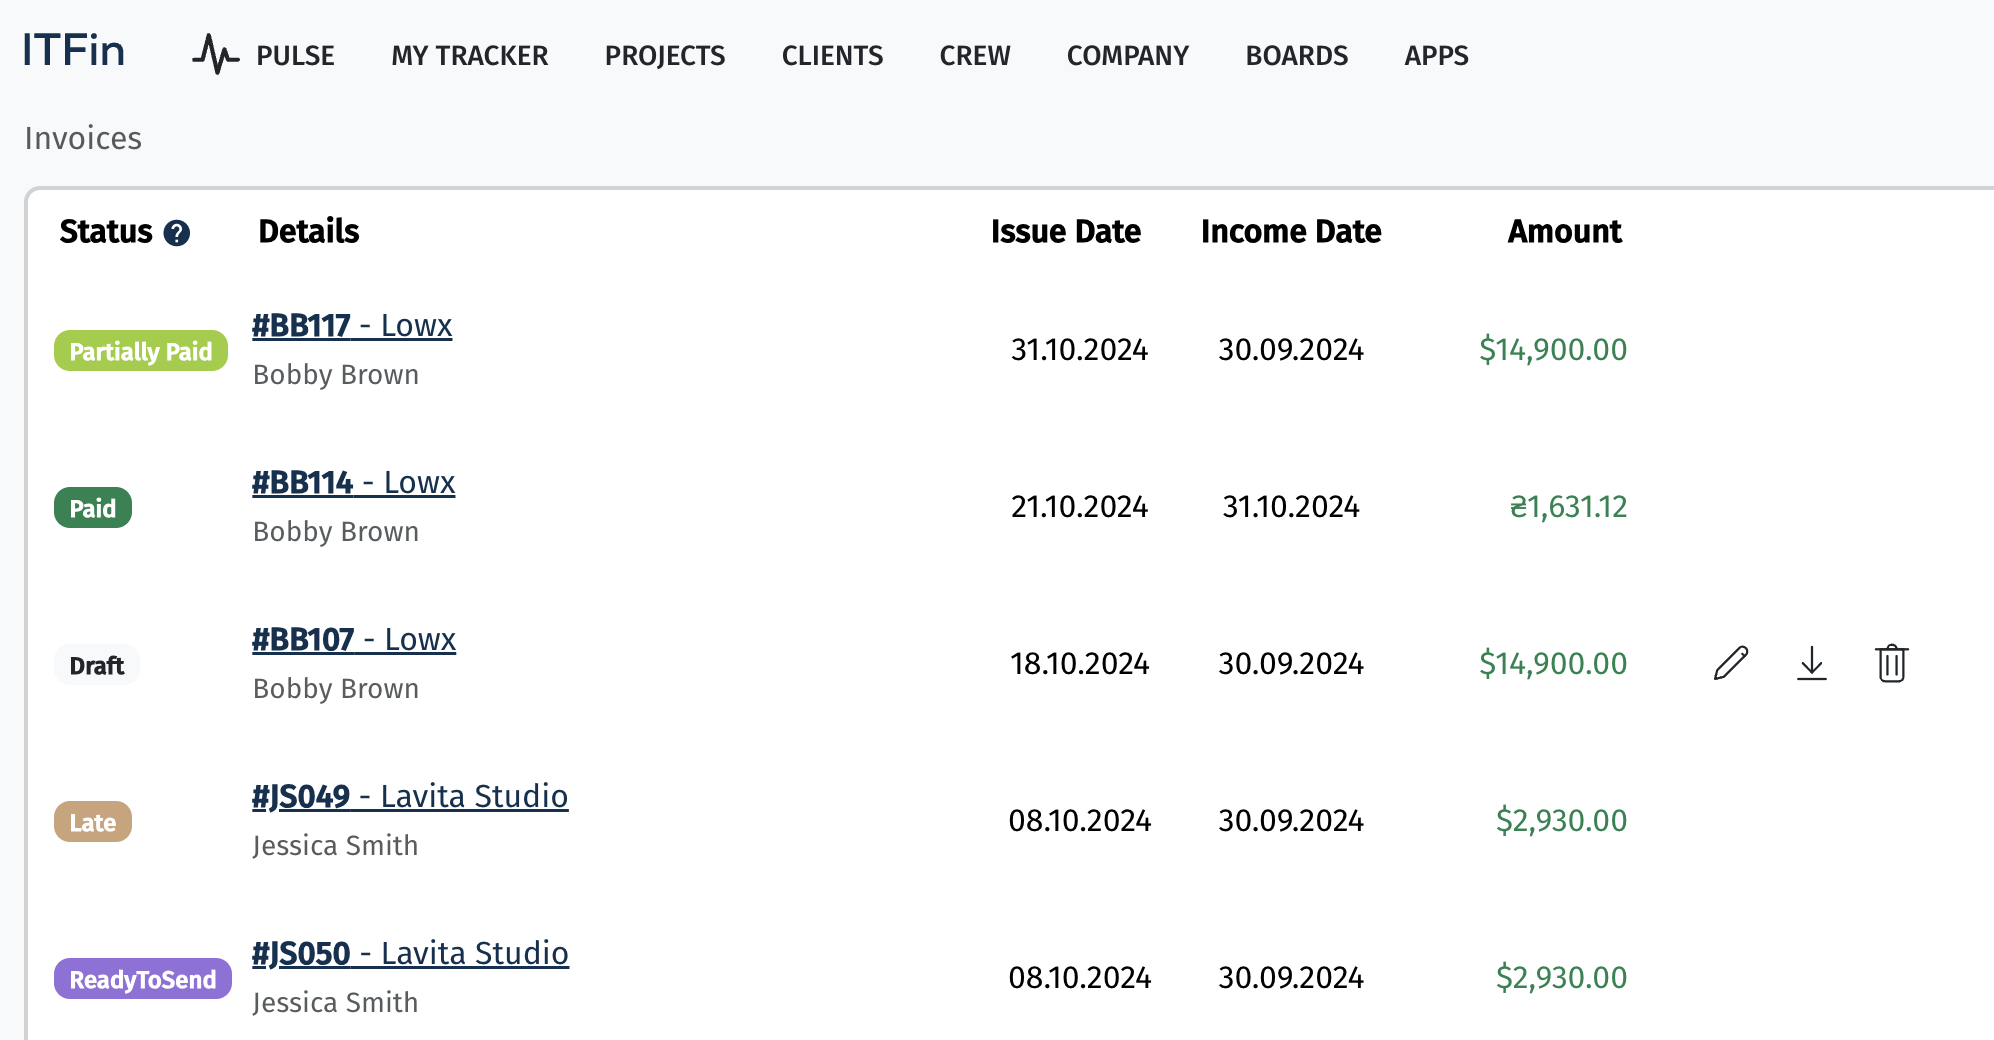
The system has two types of invoicing:
• Automatic
• Manual
In the automatic mode, the system recommends what to include in the invoice. This type can only be used when creating a Regular Invoice.
For Time & Material projects, the system calculates the expected hours (based on agreements and involvement) and the actual hours reported by employees on the project. The system will check and display which tracking needs to be edited, clearly showing which employees are lacking hours. If you wish to issue the invoice despite the discrepancy between planned and actual reported hours, you should provide a reason in the notes.
For Fixed Price projects, milestones will be counted during the auto-generation of the invoice.
If services have been added to the project, the system will also suggest including their cost in the invoice.
In manual invoicing, the user must specify:
• the employee
• the rate
• the number of hours to be added to the invoice
Thus, the system will generate the invoice based on the entered data.
To create a new invoice, you need to click the +Add new option. On the right side of the page, filters have been added for quick searching of created invoices.
New invoice
IT companies issue invoices to their clients for services provided, outsourcing projects, and other revenue sources. These documents are the main source of the company’s revenue generation. Invoices are typically issued on a post-payment basis.
An invoice can be created in any currency, but the system records the amount in USD, based on the exchange rate on the invoice date. Reports display the amount in dollars, as all reports are generated in this currency.
IT companies generally use post-payment invoices, but prepayment invoices are also used. In the case of prepayment invoices, the invoice amount is not recognized as revenue until the income is officially recognized, as invoicing for a future period under the accrual method does not allow the amount to be considered as income. The Revenue Recognition section in the invoice details enables the accountant to recognize income once obligations under the prepayment invoice are fulfilled. Only then is the amount reflected as revenue in the P&L report.
A generated invoice can be sent to the client directly from the system or saved as a PDF to be sent separately. A Tracking Report with a detailed breakdown of the team’s billed hours can also be attached to the invoice email.
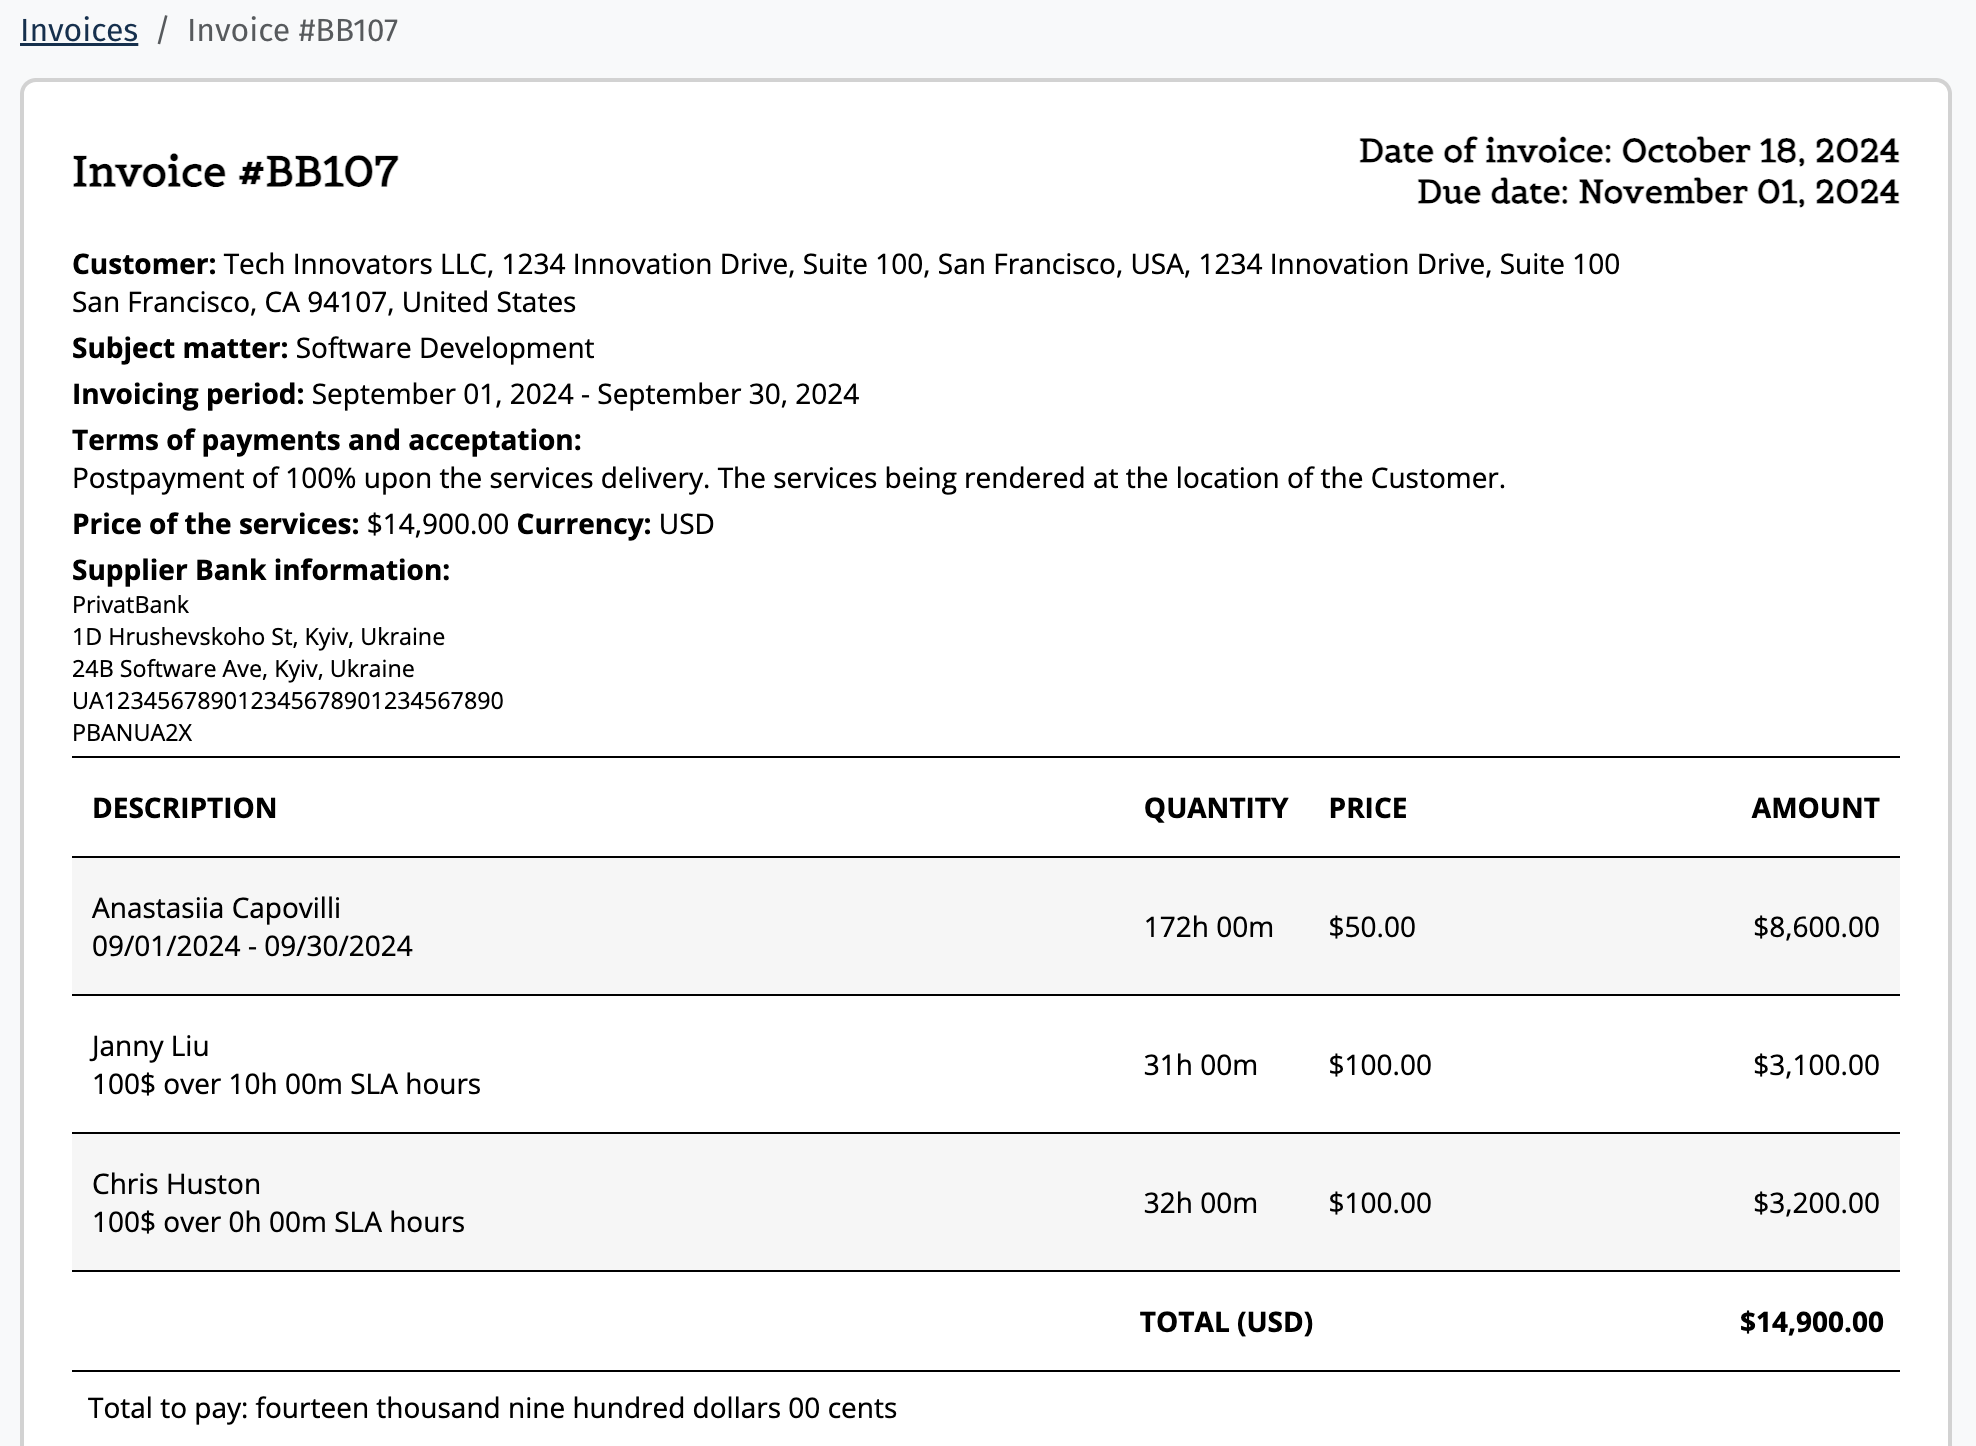
Once saved in the system with a Sent status, the invoice’s accounts receivable tracking begins. If unpaid for 15 days, the invoice moves into the overdue zone. The system has a dedicated Accounts Receivable report for analyzing outstanding receivables.

The system also offers integration with payment systems and banks. Once company accounts are set up, payments can be matched to invoice payments through transaction reconciliation, automatically updating the invoice status to Paid. Alternatively, the invoice status can be changed manually, though there is a risk of human error.
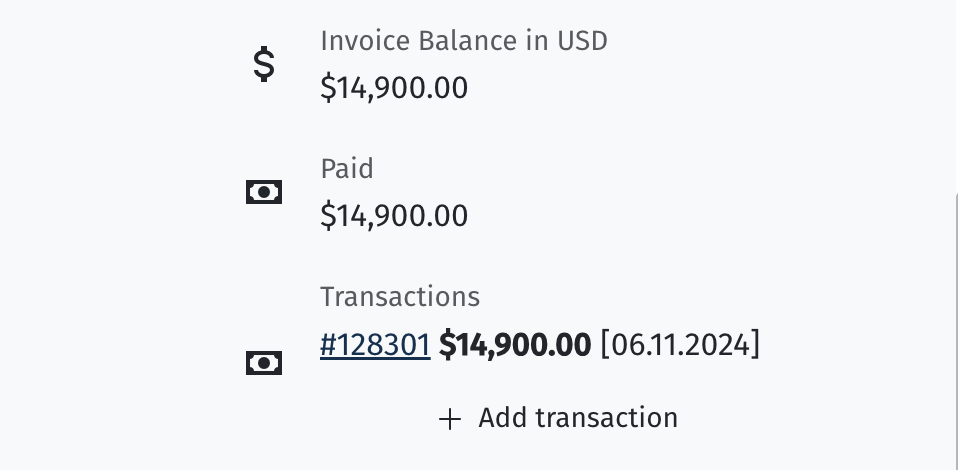
Each invoice also allows you to view related transactions and manually add them if, during the transaction reconciliation, it was not linked to the corresponding invoice.
Prepayment invoice
Let’s consider an example where a client pays for services several months in advance.
For instance, on October 1, the company received $50,000 as a prepayment for 3 months of software development services.
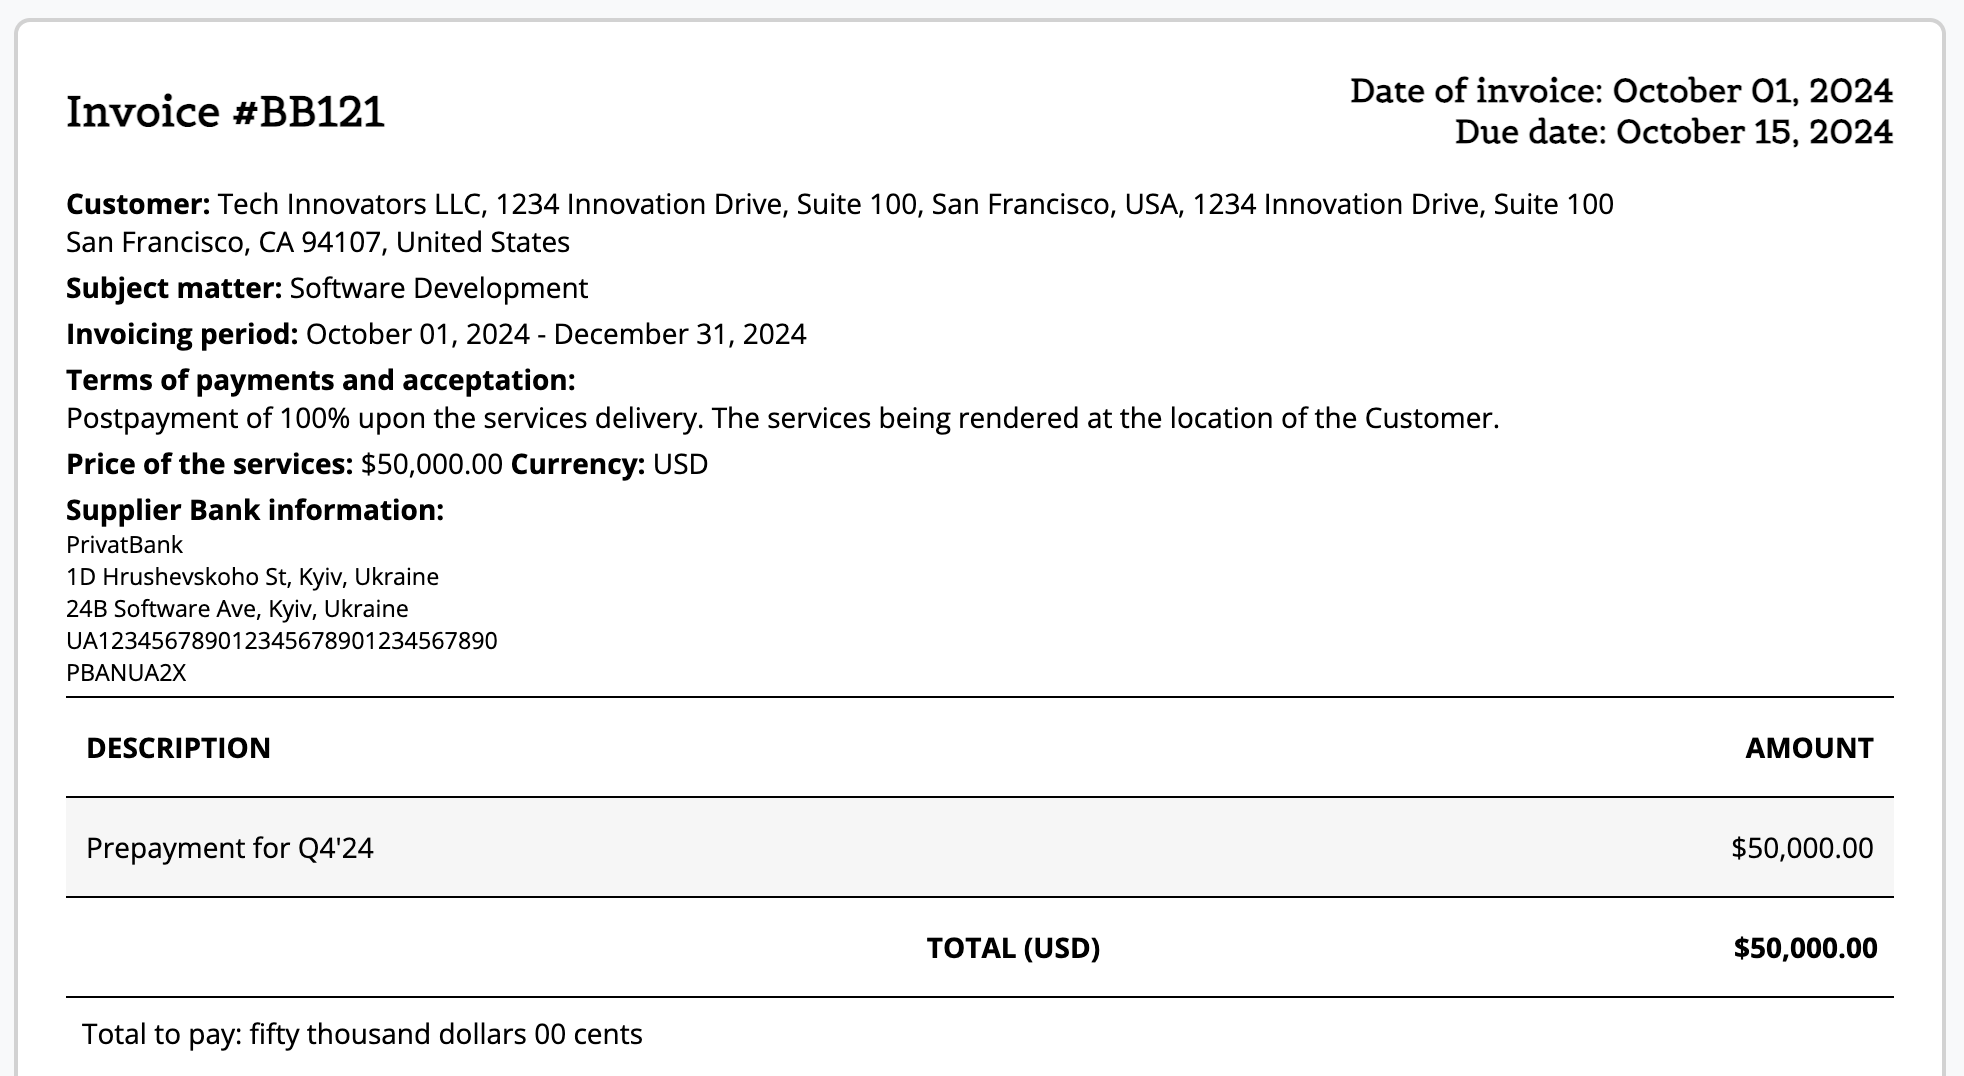
To correctly reflect this case in the P&L report, revenue from such an invoice should be recognized gradually. This means that revenue is recognized in portions as each period is completed, until the difference between the recognized revenue and the total invoice amount becomes zero.
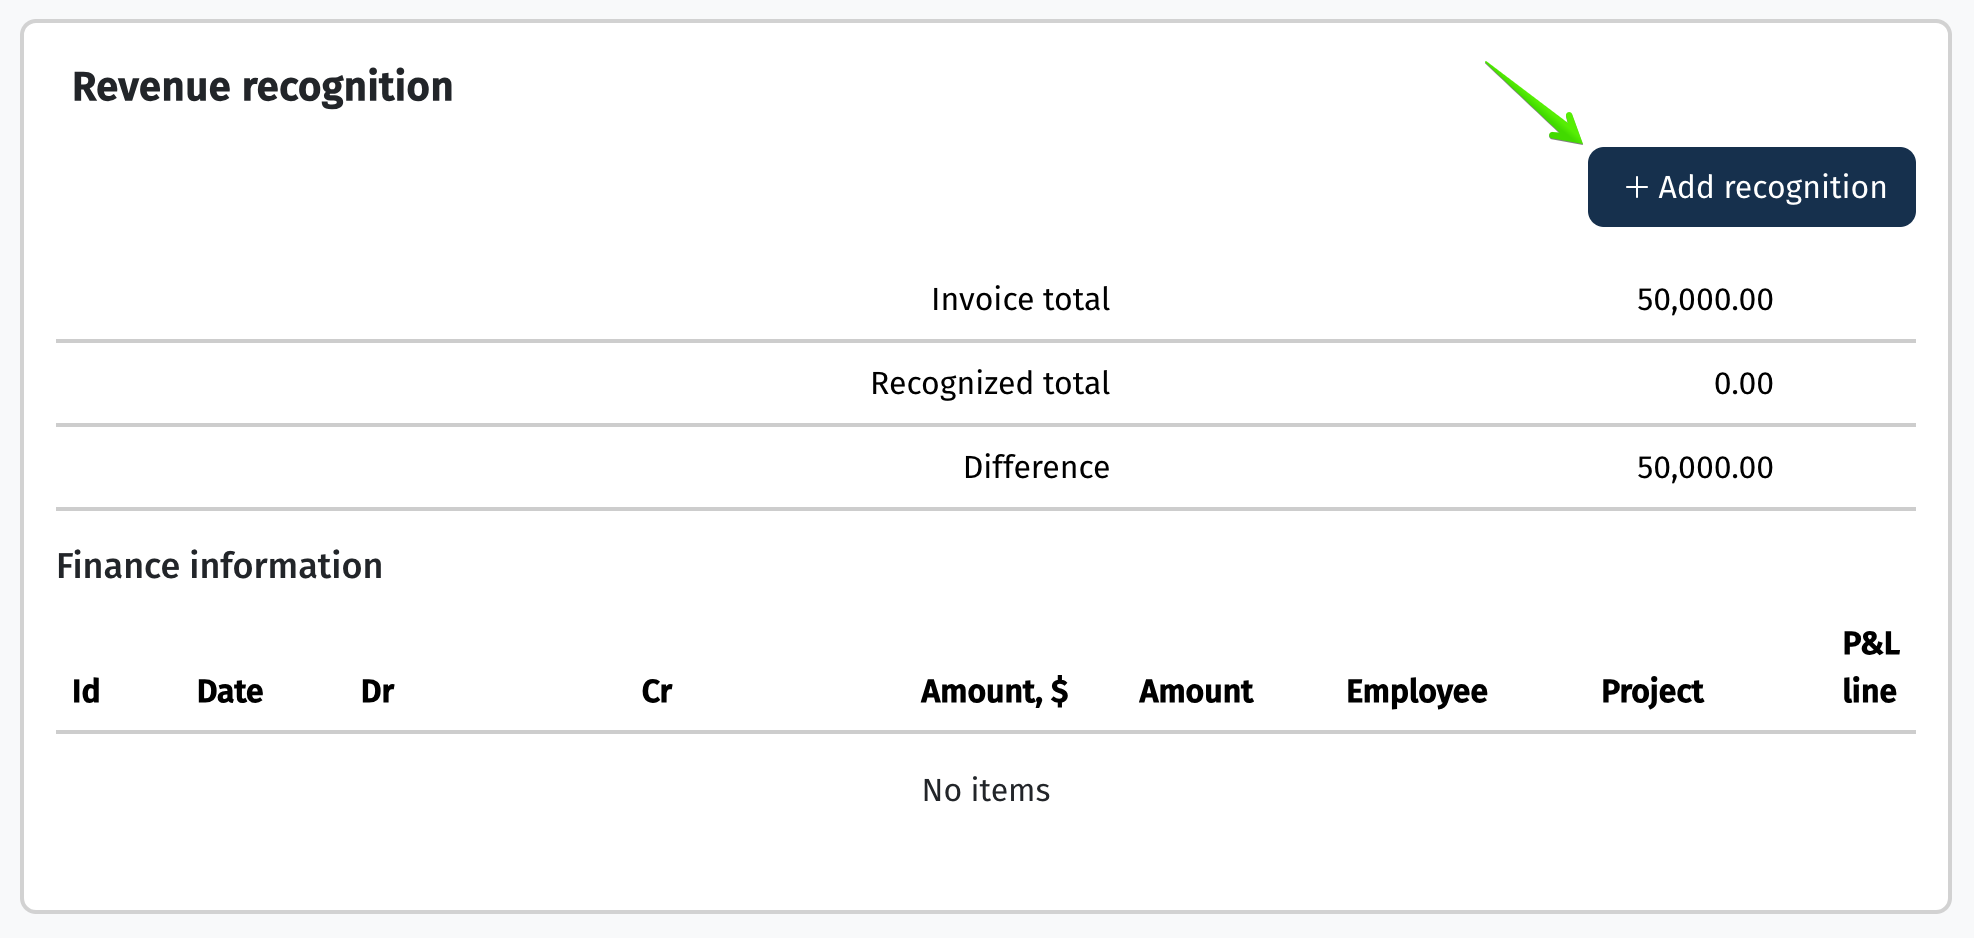
At the beginning of November, we aim to recognize revenue for the first portion of $10,000. To do this, scroll down the invoice page to the Revenue Recognition section and select the option +Add Recognition.
Specify the revenue recognition period and the amount.
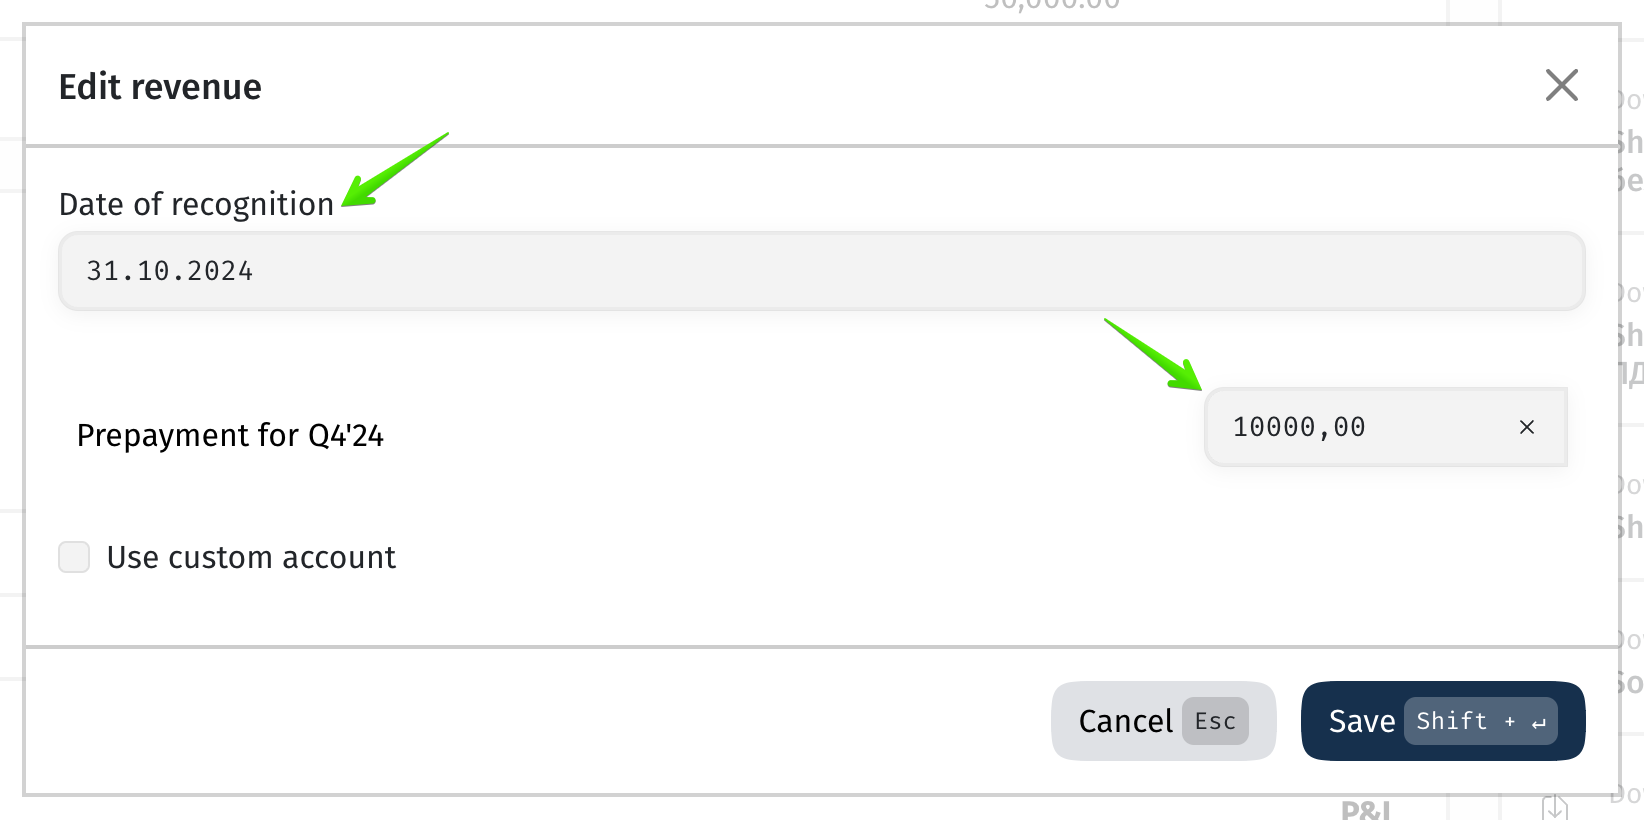
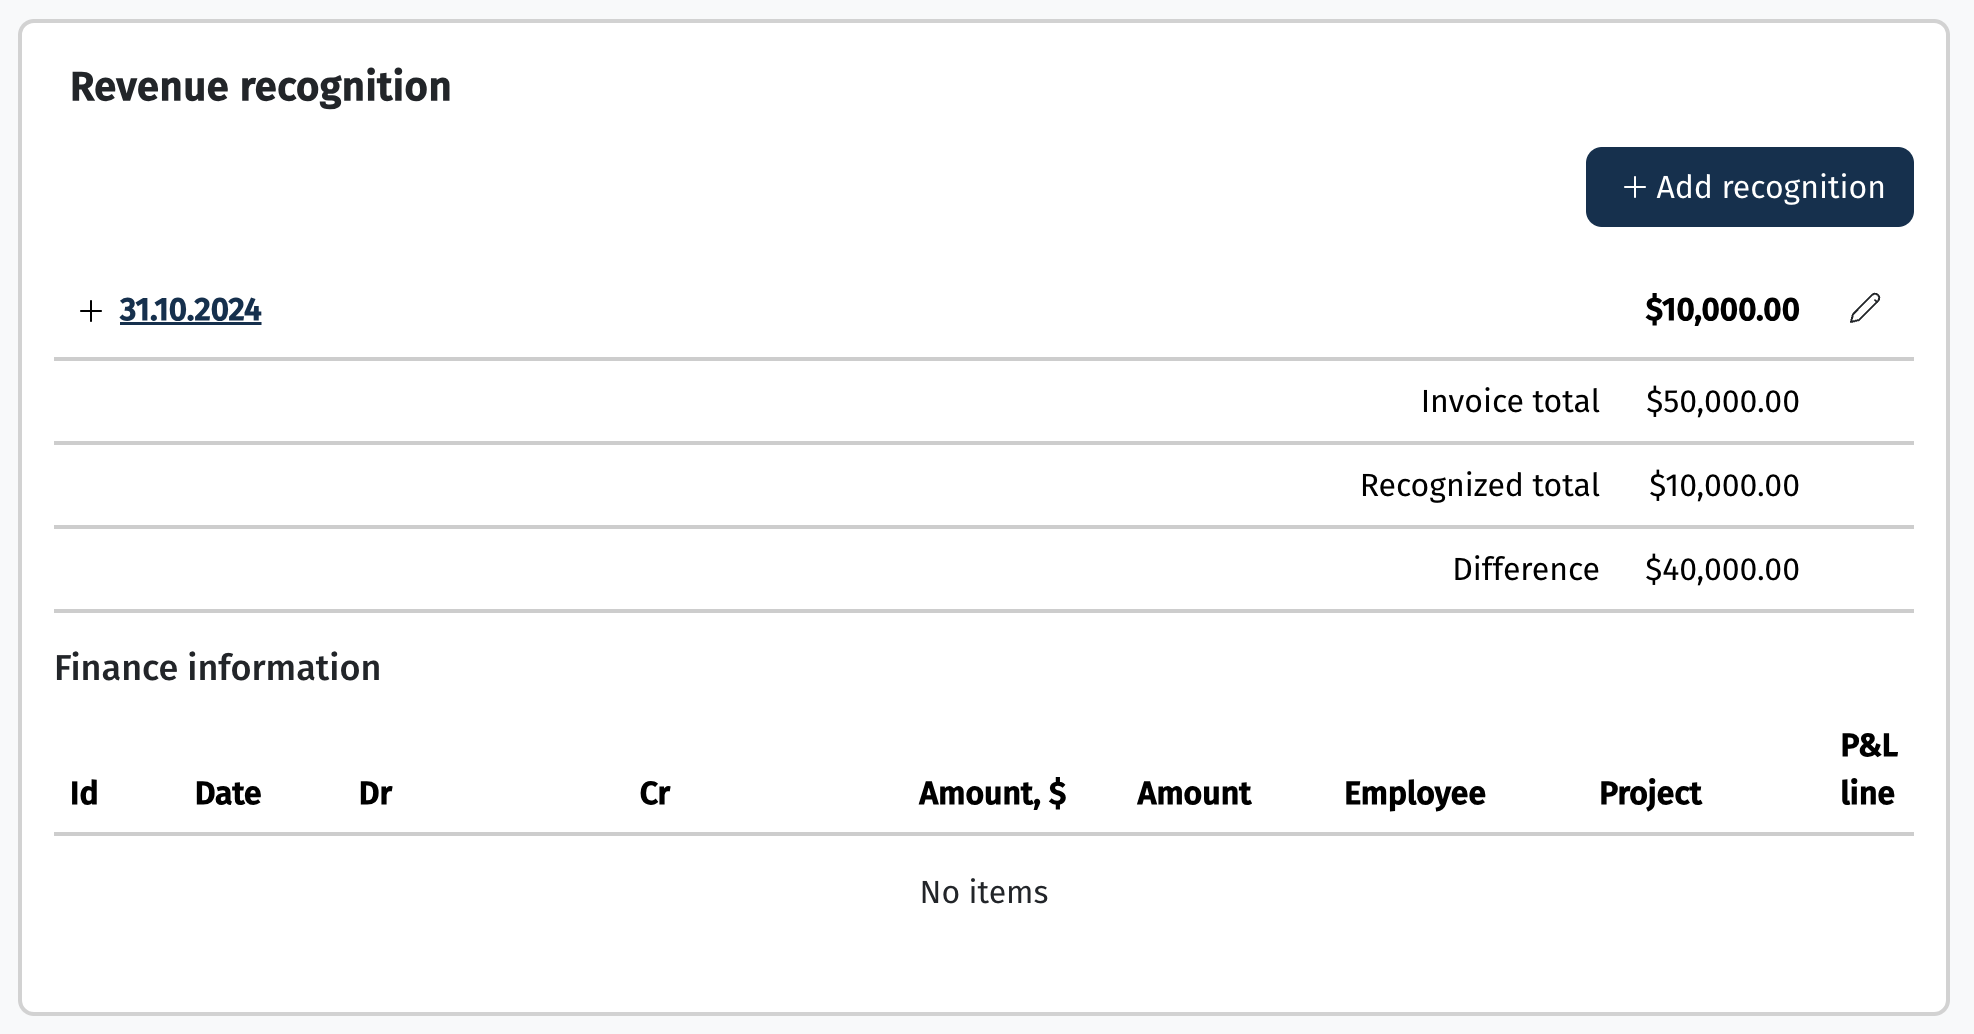
Thus, as of 10/31, we have recognized a portion of the prepaid invoice amount, and it will be reflected in the P&L report for October. We won’t see the generated financial entry at this step yet, as it will appear after generating the P&L report.
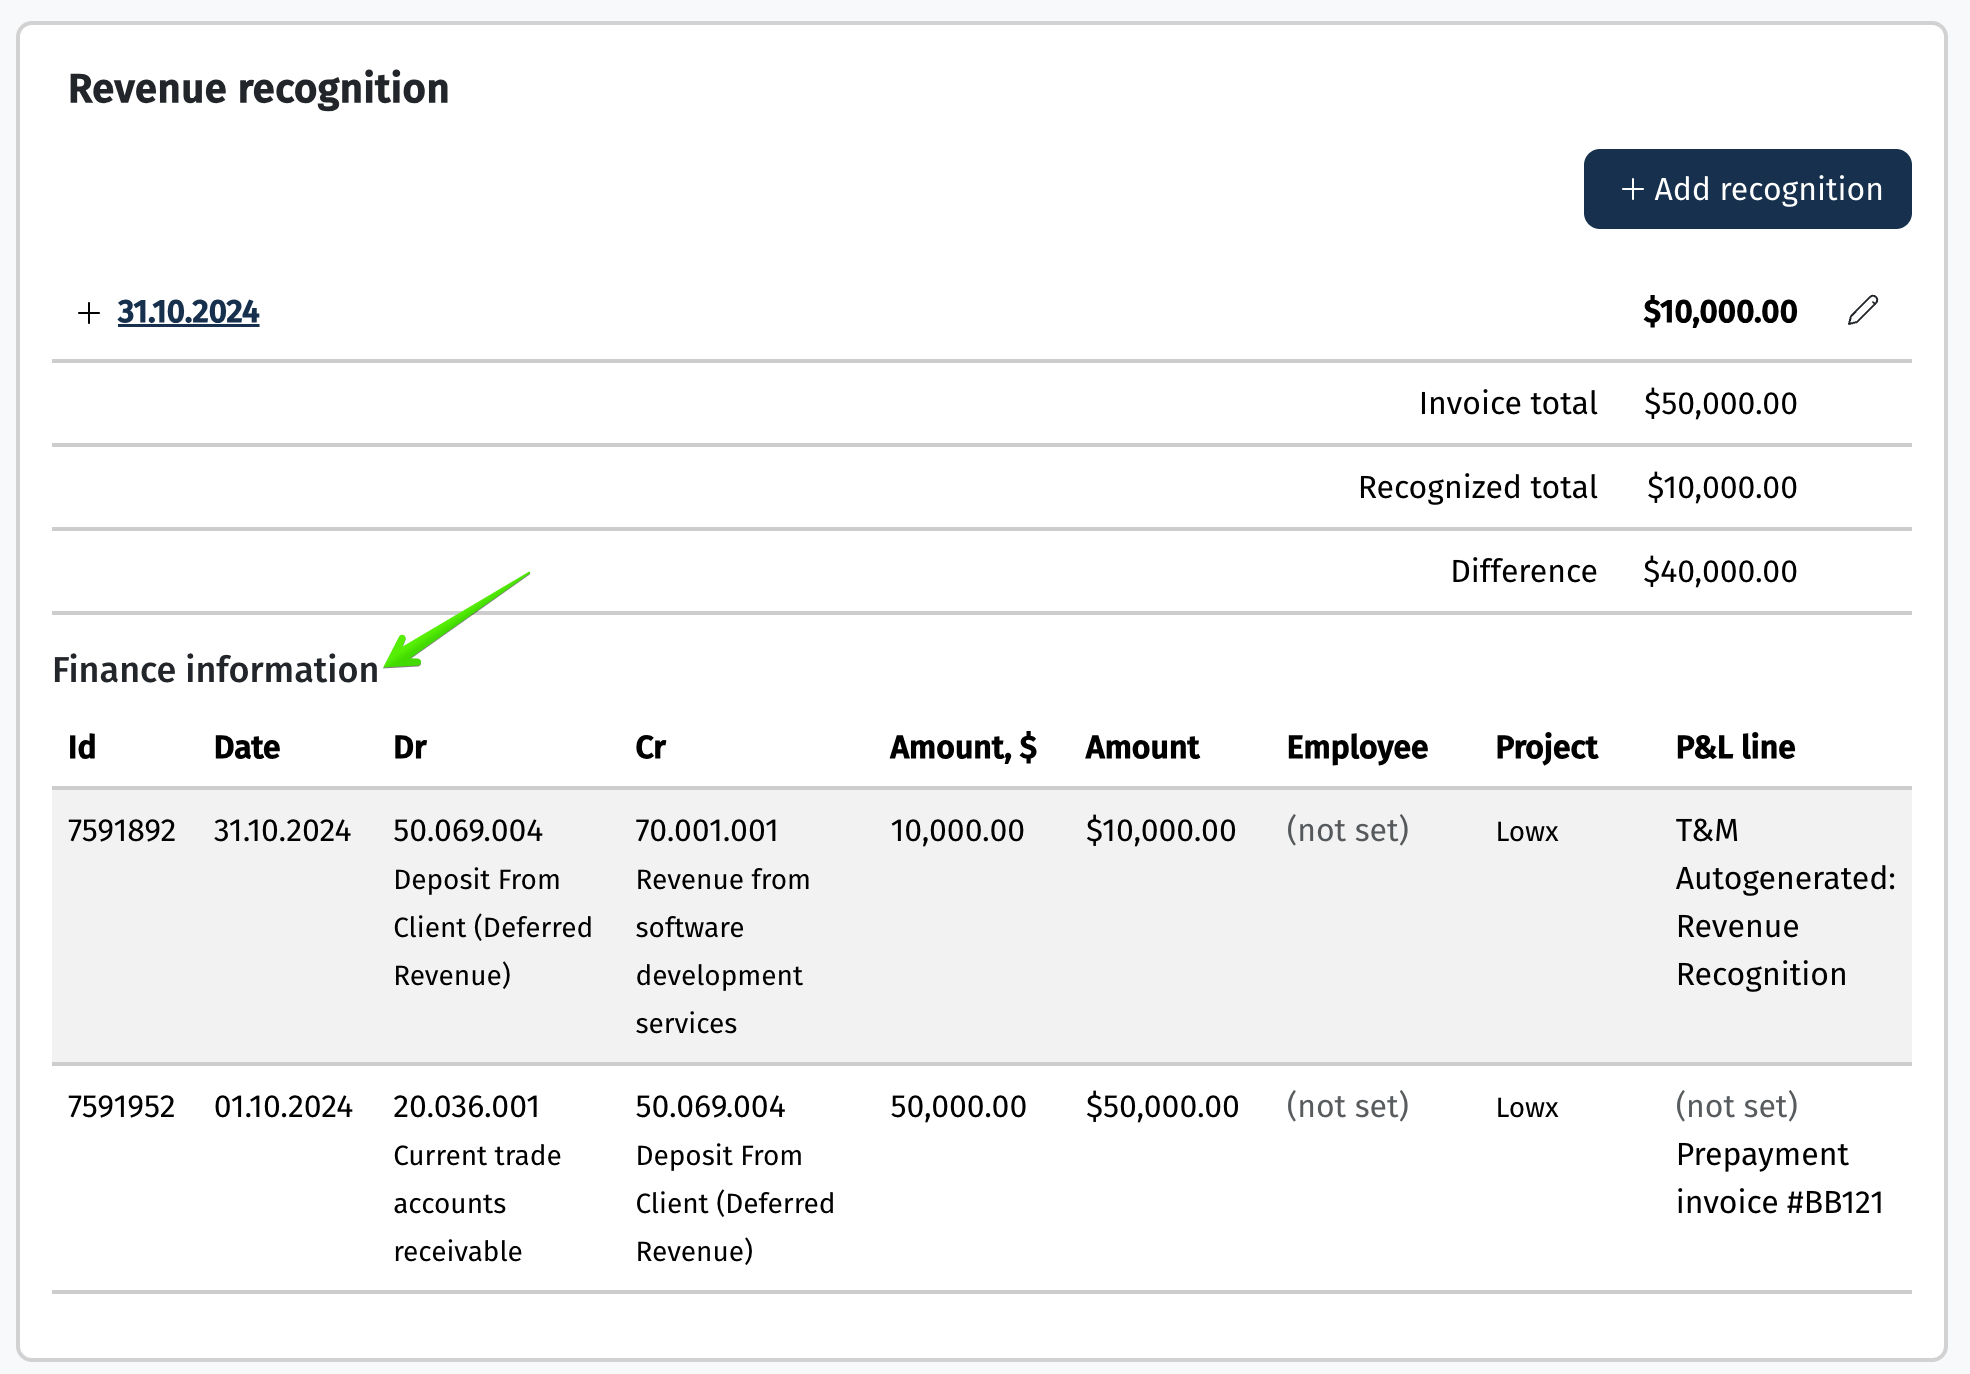
After generating the P&L report for October, the amount for this project will appear there. Additionally, in the invoice’s Financial information section, a transaction entry will be added, which was created upon report generation.
If after recognizing revenue you decide to transfer it to a different account (Chart of Accounts), the system allows you to make this adjustment. To do this, you need to click the edit button for the revenue recognition, select the checkbox Use Custom Account, and then choose another account from the list.
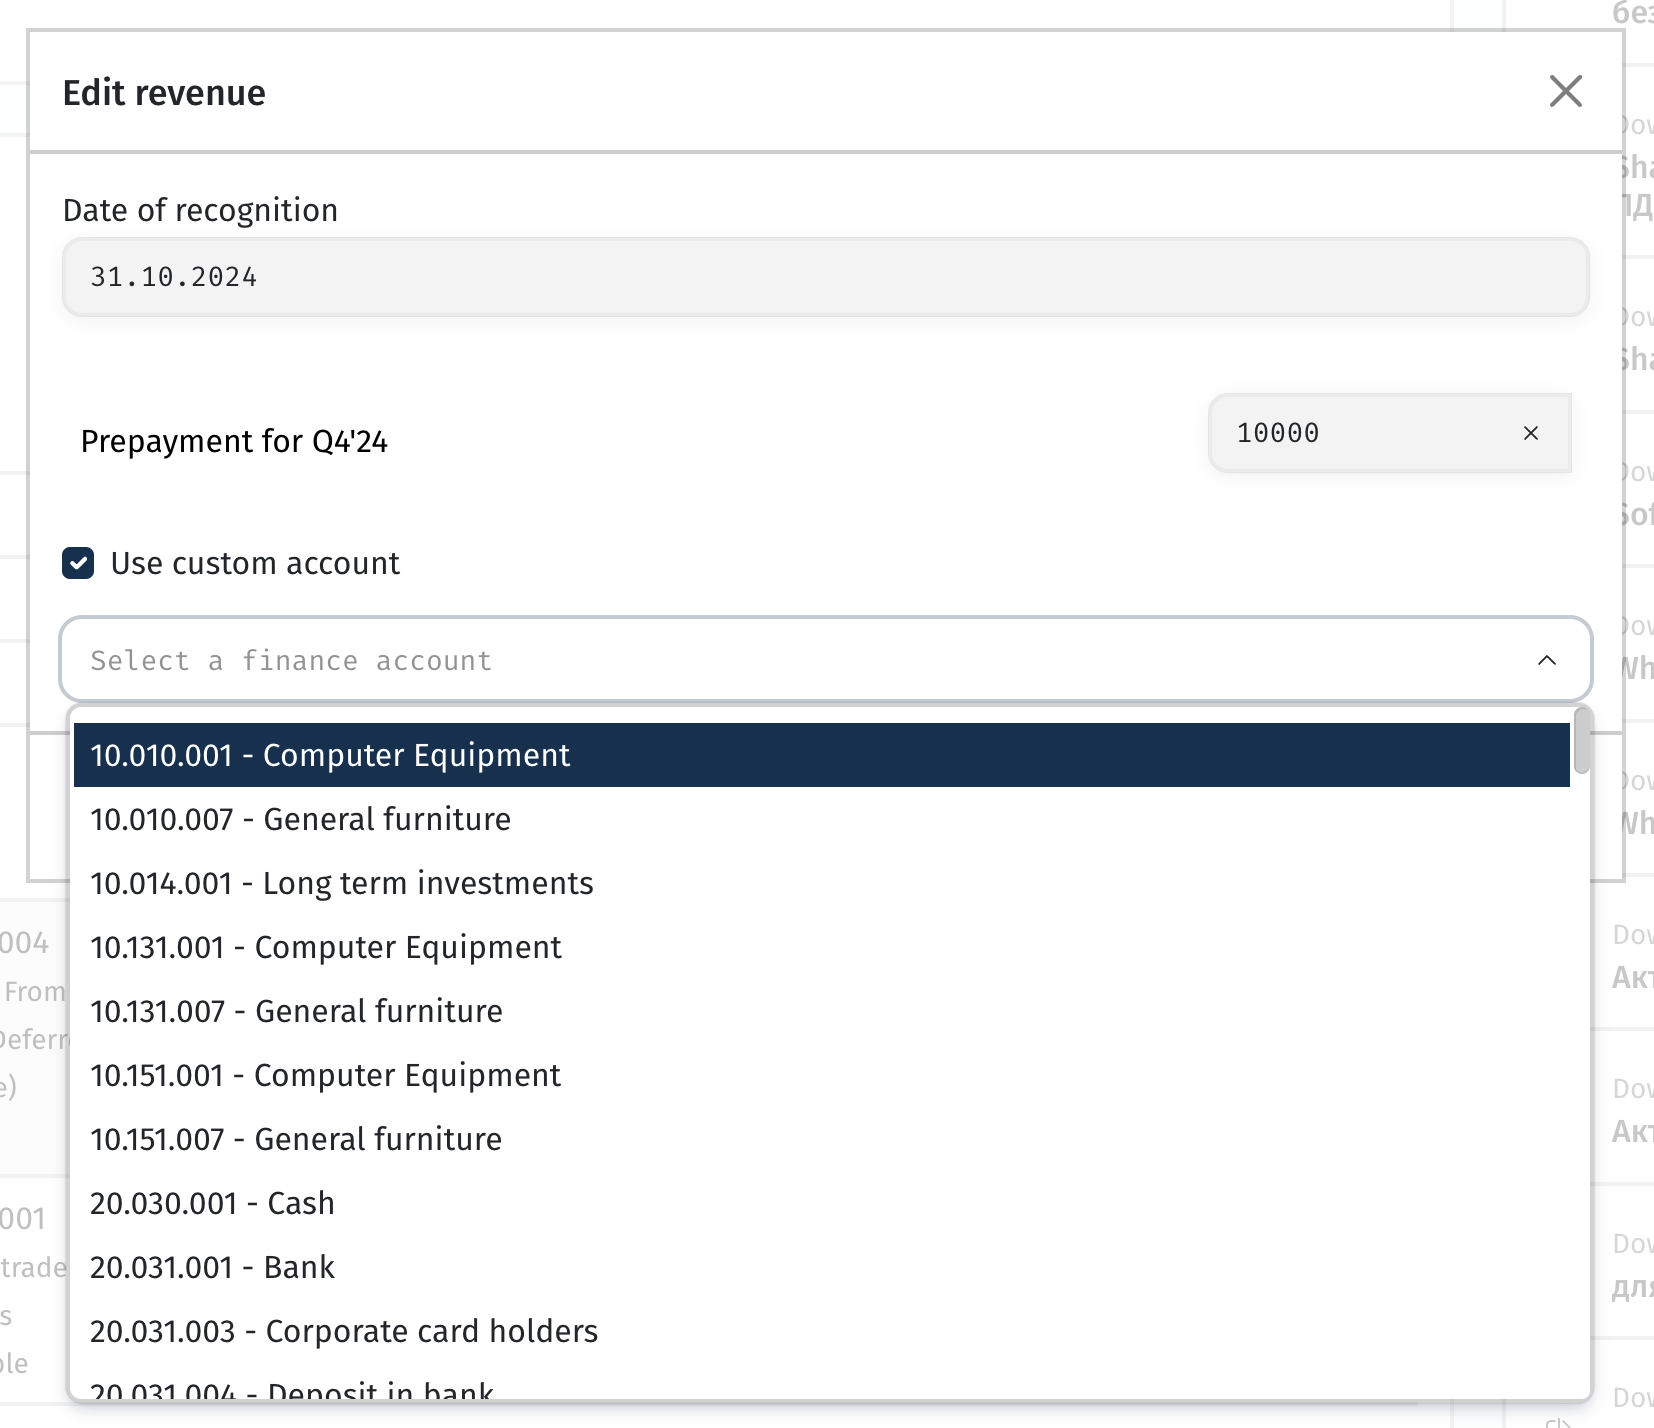
During the next generation of the P&L report, the system will remove the previous revenue recognition entry and create a new one with the updated account.
Autogeneration of invoices from Upwork
For companies working with clients through the Upwork platform and receiving payments into an Upwork account, we have introduced automatic invoice generation. This feature allows revenue recognition on an accrual basis not by the payment date but by the date of work completion (for Hourly contracts), ensuring the relevance of documents used to record revenue.
When creating an Upwork account, there is a checkbox for Create invoice automatically Create Invoice.
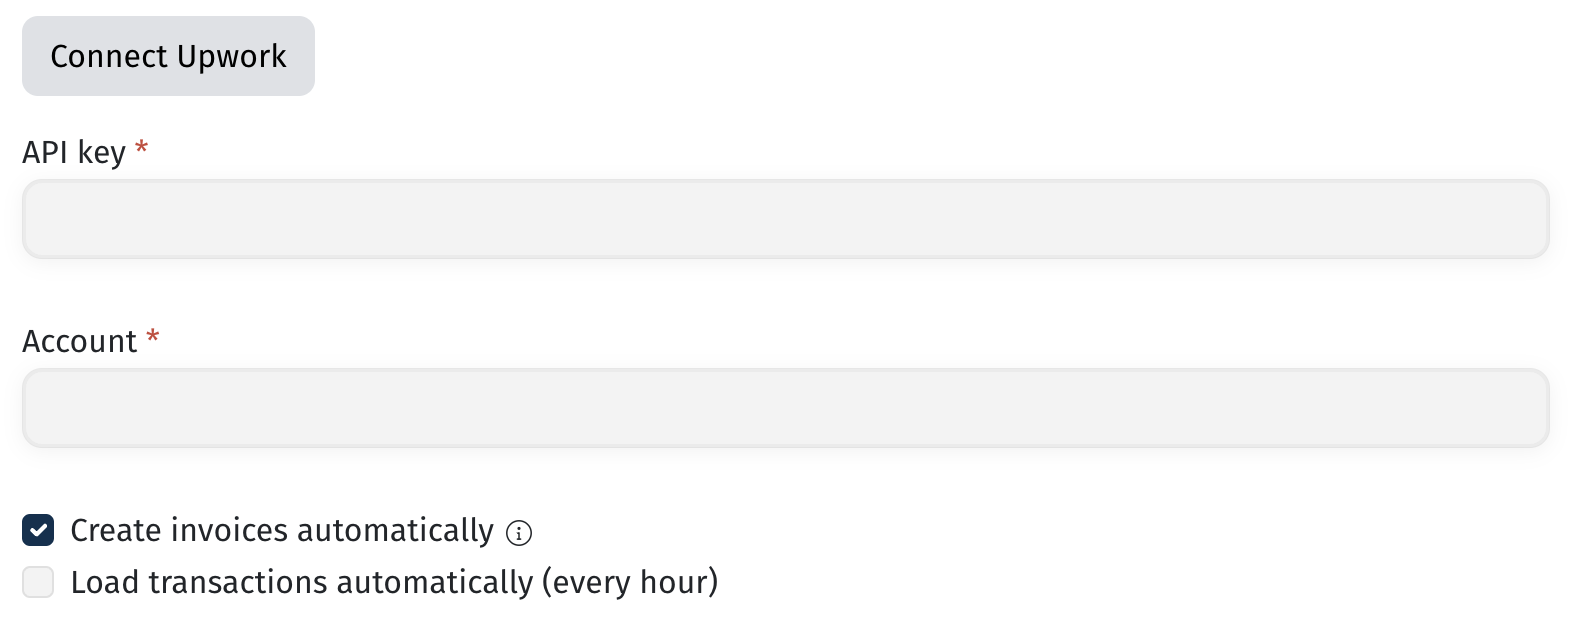
If you select this option:
1. After uploading a statement from Upwork (either manually or through integration), the system automatically identifies transactions where the Type field specifies Hourly or Fixed Price and generates corresponding invoices based on these transactions.
• The generated invoices are saved in the database but are not yet visible in the user interface, as the associated project cannot be determined until the payments are reconciled.
• For Hourly contracts, the invoice includes the number of hours, hourly rate, work description, and, if the name and surname of the freelancer listed in the payment match an employee’s data, the corresponding employee is automatically indicated in the document.

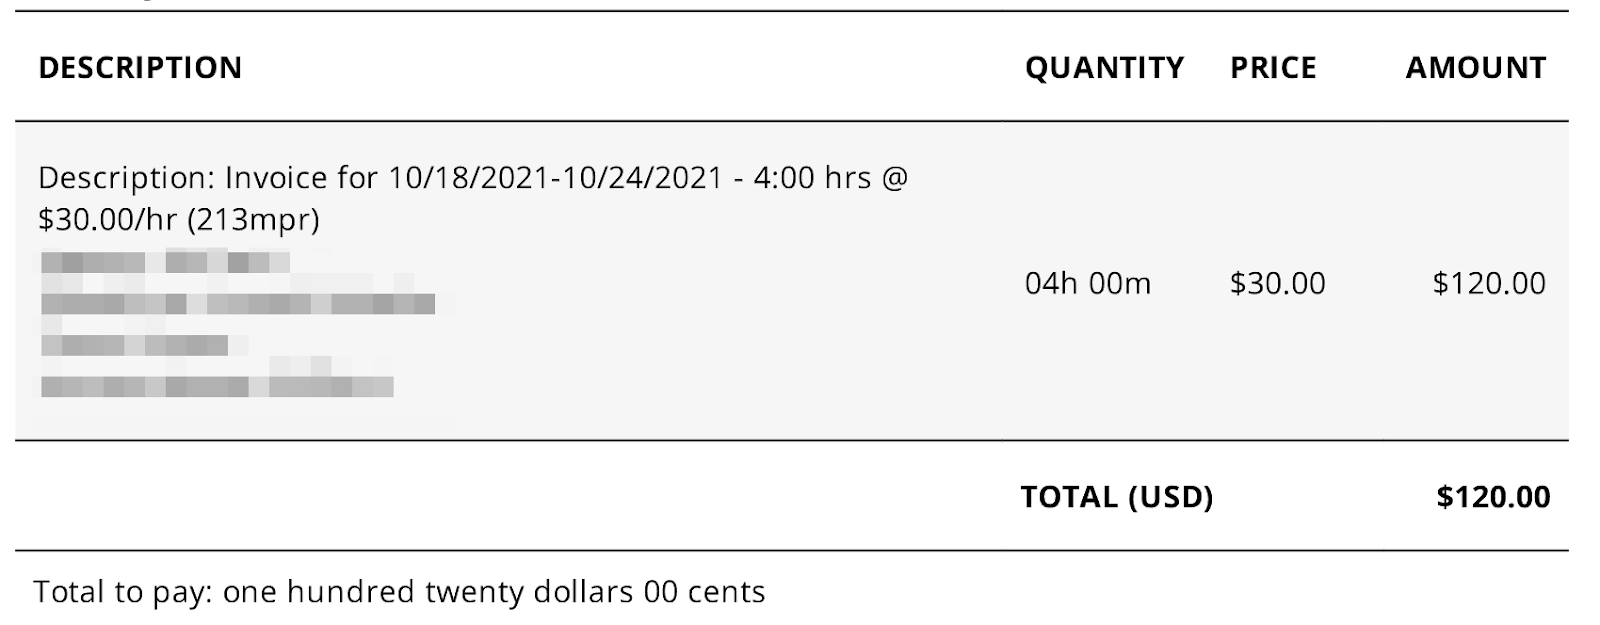

The system generates an invoice with a Fixed line item for transactions where the Type field specifies Fixed Price. The invoice amount matches the transaction amount, and the revenue recognition date is set to the payment date.


2. During payment reconciliation for transactions with Type = Hourly or Fixed Price, the user is notified that an invoice for this payment has already been created in the database. Therefore, there is no need to create or link it manually.
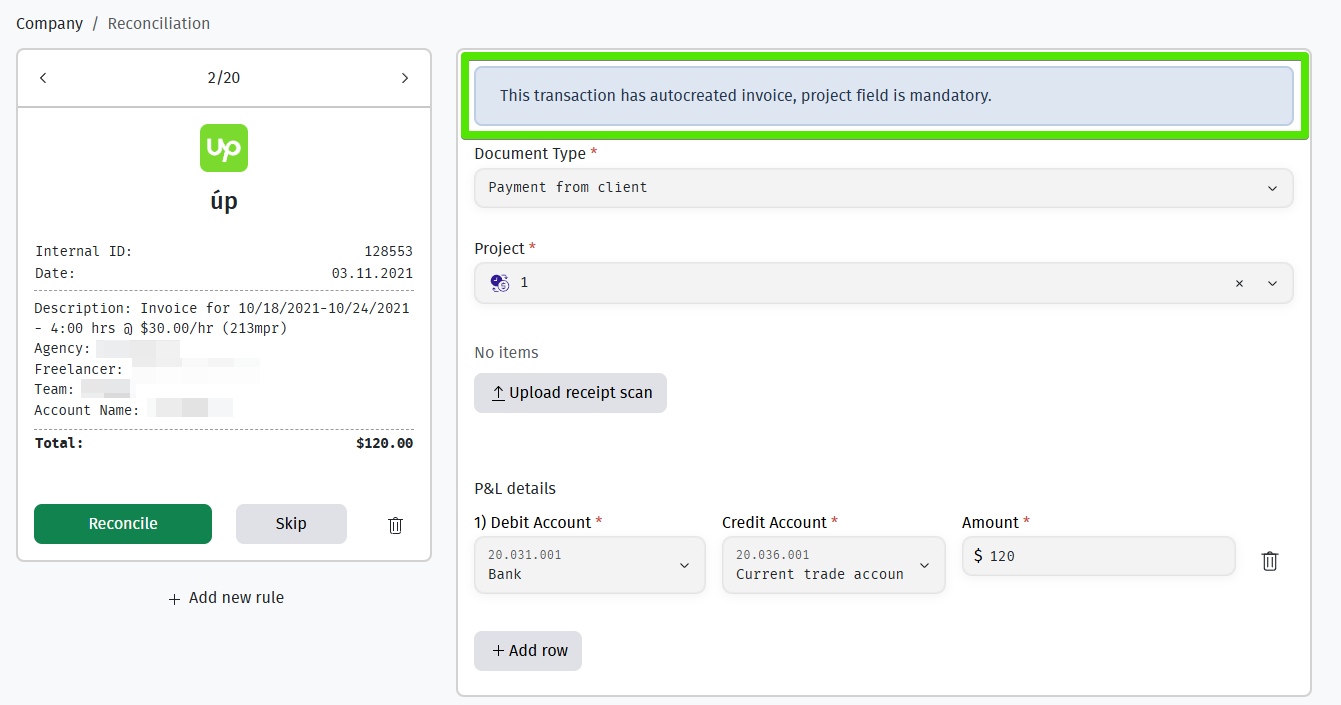
3. After the payment is reconciled, the system displays the invoices with the status Paid and the label autocreated. Subsequently, during the recalculation of the Profit & Loss (P&L) statement, the corresponding journal entries are created.


Invoice template
You can configure invoice templates and modify them to suit your needs in the section Company > Settings > Templates.
Editing is done using HTML markup, and there is also the option to add the company logo.
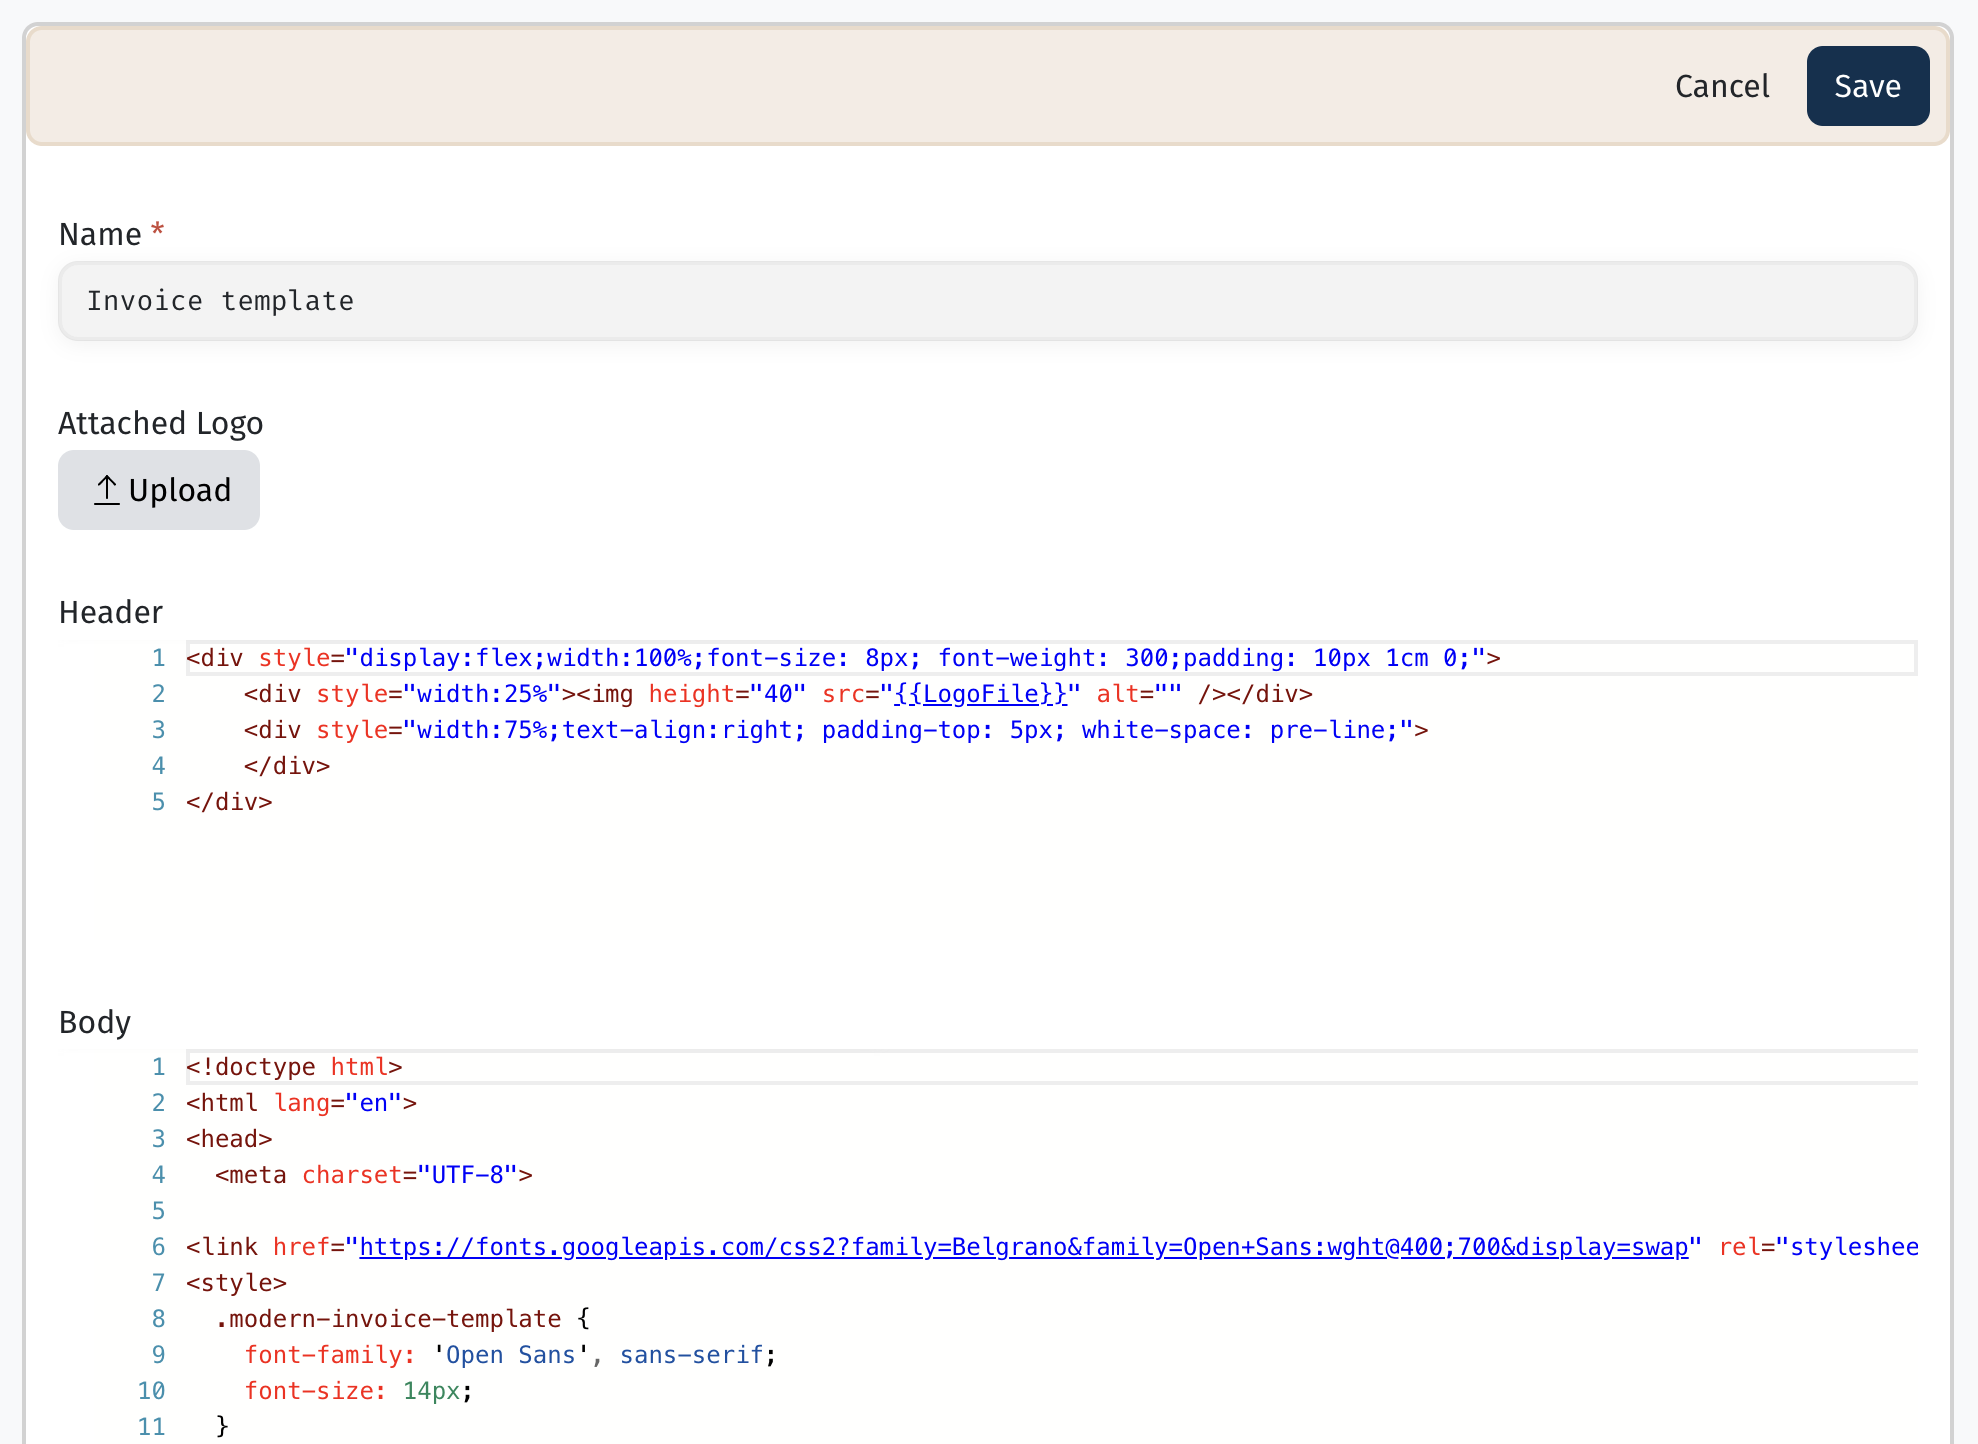
For each Business Unit, you can set separate invoice templates, and when adding Billing Information for a client, you should specify which unit will issue the invoice.
In the Business Unit settings, in the field Information for section "Payment method", you should indicate the details that will be used by default when creating an invoice from that unit.
If you need to set individual details for a client, you can specify them in the fields Information for section "For" and Information for the invoice section “Payment Method” in the Billing information settings for the desired client.